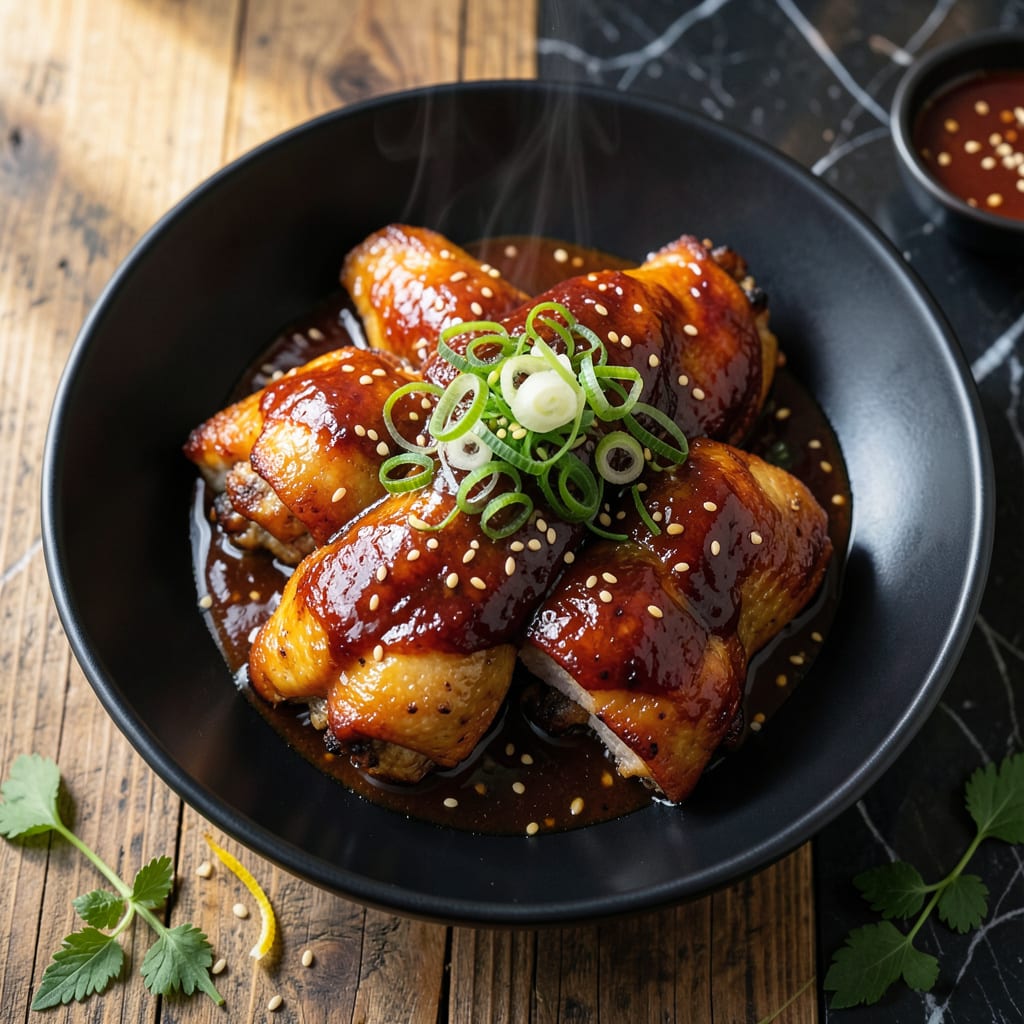
This oven-baked chicken delivers crispy skin and a sweet umami glaze that’s impossible to resist. The secret lies in a high-heat start to render the fat, followed by a brush of Bachan’s sauce for that signature sticky finish.
With just a few simple steps, you’ll achieve restaurant-quality results at home. The sauce caramelizes beautifully, creating a glossy coating that clings to every bite of tender, juicy chicken.
Ingredients for Bachan’s Japanese Bbq Sauce Chicken Recipe Oven
Simple ingredients, bold flavors. Everything you need for that sticky, crispy magic.
| Ingredient | Amount | Notes |
|---|---|---|
| Chicken Thighs 🍗 | 2 ½ lb | Bone-in, skin-on for crispiness |
| Bachan's Japanese BBQ Sauce 🥫 | 1 cup | Original variety preferred |
| Olive Oil 🫒 | 2 tbsp | Divided for brushing and drizzling |
| Salt 🧂 | 1 ½ tsp | Kosher or sea salt |
| Black Pepper 🌶️ | 1 tsp | Freshly ground preferred |
| Garlic Powder 🧄 | 1 tsp | For extra flavor depth |
| Onion Powder 🧅 | 1 tsp | Balances the sweetness |
| Soy Sauce 🥢 | 1 tbsp | Low-sodium if preferred |
| Honey 🍯 | 2 tbsp | For extra glaze sheen |
| Rice Vinegar 🍚 | 1 tbsp | Adds tangy brightness |
| Sesame Seeds 🌰 | 1 tbsp | Toasted for garnish |
| Green Onions 🧅 | 3 whole | Thinly sliced for garnish |
[recipe_ingredient_scaler]
The chicken is the star here—bone-in, skin-on thighs give you that crispy finish. Grab them from Whole Foods or your local butcher if you want the best quality, but the regular grocery store works too. Look for even sizing so everything cooks at the same rate. I always buy extra Bachan’s sauce (it’s addictive) and keep a bottle in the pantry for quick meals like this one.
No Bachan’s? Teriyaki plus a splash of rice vinegar gets you close, but it won’t be the same. Swap honey for maple syrup if you need it vegan. The soy sauce can be tamari for gluten-free. out of sesame seeds? Crushed peanuts add a similar crunch. Don’t skip the high-heat start—it’s what makes the skin crispy (worth the extra minute).
Leftovers keep 4-5 days in the fridge, but the skin softens. Reheat in the oven or air fryer to crisp it back up. Freezes well for 3 months—just thaw overnight before reheating. I like to slice the chicken and pack it with extra sauce for easy lunches.
Why You’ll Love This Recipe
- One Pan Magic: I toss the thighs with olive oil, salt, and pepper, then let Bachan’s sauce do the rest—no marinating, no fuss.
- Sticky Sweet Heat: That glossy, umami-packed glaze clings to every bite, balancing smoky, tangy, and just a little spice.
- Weeknight Hero: Honestly, it’s my Tuesday dinner MVP—ready before the rice cooker beeps.
- Budget Stretcher: Chicken thighs stay juicy and cheap, and the sauce makes even leftovers taste intentional.
Step-by-Step Instructions for Bachan’s Japanese BBQ Sauce Chicken Oven
This method guarantees crispy skin and a sticky-sweet glaze that’ll have everyone asking for seconds.
Step 1: Season and Prep the Chicken
Pat the 2.5 lb chicken thighs dry with paper towels—this is non-negotiable for crispy skin. I use bone-in, skin-on thighs because they stay juicier and the skin crisps up beautifully.
In a small bowl, mix 1.5 tsp salt, 1 tsp black pepper, 1 tsp garlic powder, and 1 tsp onion powder. Season both sides of the chicken generously with this mix. Let it sit at room temperature for 15 minutes while your oven preheats.
Step 2: Create the Glaze Mixture
In another bowl, whisk together 1 cup Bachan’s Japanese BBQ Sauce, 1 tbsp soy sauce, 2 tbsp honey, and 1 tbsp rice vinegar. The vinegar might seem odd, but it cuts through the sweetness and balances the umami perfectly.
I taste it at this point—if it needs more tang, I add a splash more vinegar. The glaze should be thick but pourable. Set this aside while you get the chicken started in the oven.
Step 3: Sear and Start the Chicken
Preheat oven to 400°F. Heat 1 tbsp olive oil in a large oven-safe skillet over medium-high heat. Place the chicken skin-side down in the hot pan. You’ll hear that beautiful sizzle—that’s how you know it’s working.
Let it sear undisturbed for 4-5 minutes until the skin turns deep golden brown. Flip the chicken and immediately brush the skin with some of the glaze mixture. Transfer the skillet to the preheated oven.
Step 4: Roast and Glaze to Perfection
Roast for 15 minutes, then brush the chicken with more glaze. Roast another 10-12 minutes until the chicken reaches 175°F internally and the skin is crispy and caramelized.
I check the thickest piece—when the juices run clear and the skin crackles when pressed, it’s done. Remove from oven and brush with remaining glaze. The chicken should be glossy with sticky edges.
Step 5: Rest and Garnish
Let the chicken rest in the skillet for 5 minutes. This lets the juices redistribute so every bite is moist. Sprinkle with 1 tbsp sesame seeds and 3 whole green onions, thinly sliced.
Drizzle with the remaining 1 tbsp olive oil for extra shine. The green onions will wilt slightly from the residual heat, adding a fresh contrast to the rich, sticky chicken. Serve immediately while the skin is still crispy.
Pro Tips For Making Bachan’S Japanese Bbq Sauce Chicken Recipe Oven
- Preheat the Oven: Crank it to 425°F before the chicken goes in—I learned this the hard way when my first batch came out pale and sad. The high heat gets that sauce caramelizing right away.
- Pat Thighs Dry: Sounds tedious, but it works: drying the chicken with paper towels guarantees a better sear when it hits the hot pan, even if you’re finishing it in the oven.
- Skip the Over-Saucing: Bachan’s is potent, so brush it on during the last 10 minutes only, or the sugars will burn before the chicken cooks through—I know, I’ve ruined a few trays.
- Use a Wire Rack: Elevate the thighs on a rack over a baking sheet so the heat circulates evenly and the skin gets crispy all around, not just on top.
Essential Equipment for This Recipe
Oven-Safe Skillet
An oven-safe skillet is non-negotiable here. I swear by my Lodge cast iron—it goes from stovetop to oven seamlessly and retains heat like a dream. A 12-inch skillet gives you enough room to sear all the chicken without crowding. 🔥
Instant-Read Thermometer
Don’t guess when your chicken is done. A ThermoWorks Instant Read gives you accurate temps in 2-3 seconds. You’re aiming for 175°F internally for juicy, tender meat. I check the thickest piece to be sure.
Silicon Basting Brush
A heat-resistant silicone brush makes glazing effortless. It won’t melt under high heat and spreads the sauce evenly. I keep one dedicated to savory dishes to avoid flavor cross-contamination. Look for 10-12 inch length for better reach.
Mixing Bowls
You’ll need 2 medium bowls—one for seasoning the chicken and another for mixing the glaze. I use stainless steel bowls from OXO; they’re lightweight and nest for easy storage. A 1-quart size works perfectly for this recipe.
Tongs
Long locking tongs are essential for flipping chicken safely. I prefer 12-inch tongs with a scalloped edge for a better grip. They keep your hands away from the heat while giving you precise control.
Cooling Rack
If you want extra crispy skin, transfer the chicken to a wire cooling rack set over a baking sheet after searing. This allows air to circulate all around, preventing soggy bottoms. A stainless steel rack is my go-to for durability.
Nutrition Facts

Trained in classic French technique but raised on slow-cooked ribs and spicy rubs, she blends culinary skill with smoke and soul.
- Recipe for Fried Prawns Batter: Ultra-Crispy Golden Shell - October 3, 2026
- Indian Lamb Curry Recipe Pressure Cooker: Fragrant Spices in a Fraction of the Time - October 3, 2026
- Recipe for Oven Roasted: Golden Crisp Perfection Without the Fryer - October 3, 2026