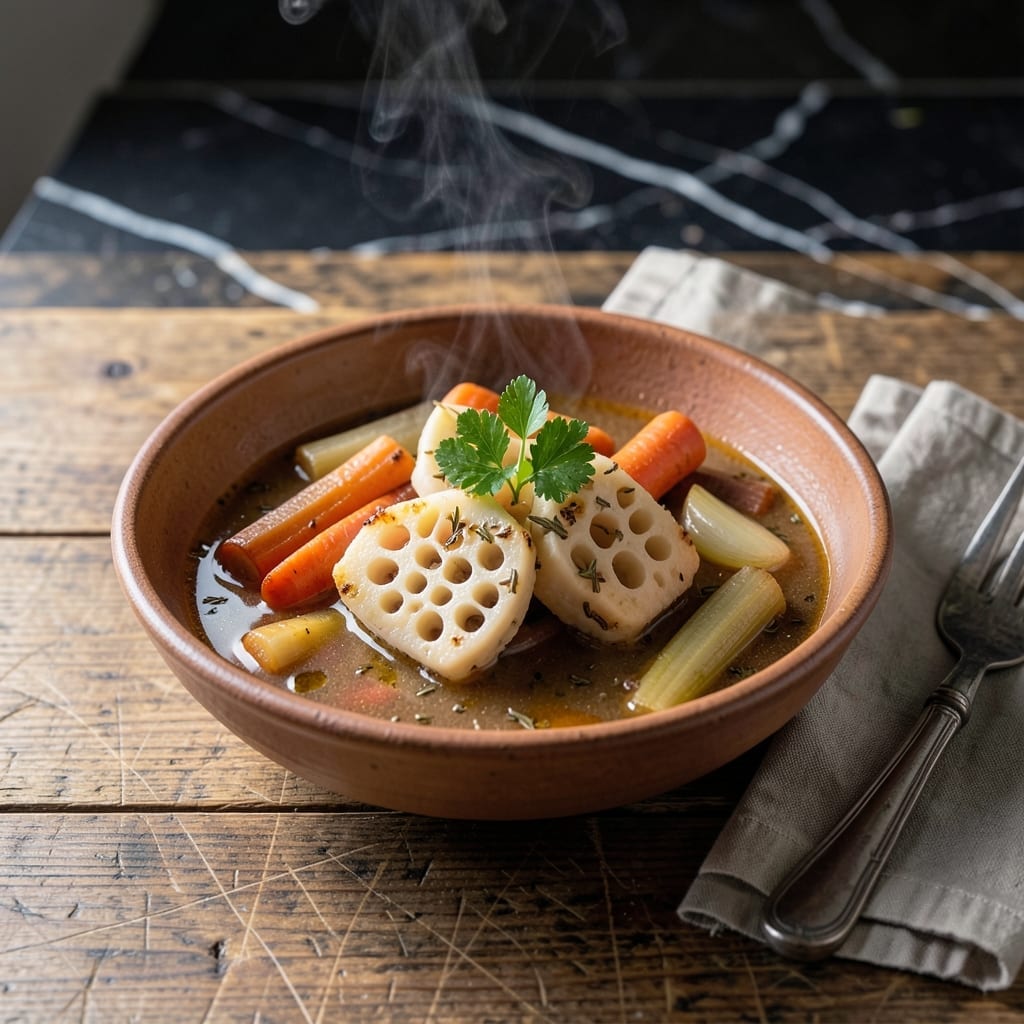
This recipe transforms tough beef tripe into tender, flavorful perfection through slow simmering. My French training taught me patience is the key to breaking down these fibrous cuts.
What emerges is a dish with deep, rich flavor and melt-in-your-mouth texture. The long cooking process coaxes out the meat’s natural sweetness while building complex layers in the broth.
Ingredients for Beef Tripe
Slow-simmered tripe needs bold aromatics and rich broth to break down beautifully.
| Ingredient | Amount | Notes |
|---|---|---|
| Beef Tripe 🥩 | 2 lb | Honeycomb, cleaned and trimmed |
| Beef Broth 🍲 | 8 cups | Low-sodium preferred for control |
| Yellow Onion 🧅 | 1 whole | Large, diced for base flavor |
| Carrots 🥕 | 2 whole | Medium, sliced into rounds |
| Celery Stalks 🌿 | 2 whole | Sliced for aromatic depth |
| Garlic Cloves 🧄 | 6 cloves | Smashed for robust infusion |
| Canned Diced Tomatoes 🍅 | 1 can | 28 oz, with juices for acidity |
| Tomato Paste 🍅 | 2 tbsp | For concentrated umami base |
| Dry White Wine 🍷 | ½ cup | Sauvignon Blanc or Pinot Grigio |
| Bay Leaves 🌿 | 2 whole | Fresh or dried for aroma |
| Fresh Thyme Sprigs 🌿 | 4 whole | Tied with twine for easy removal |
| Kosher Salt 🧂 | 1 ½ tsp | Diamond Crystal preferred for texture |
| Black Peppercorns 🌶️ | 1 tsp | Whole, for balanced heat |
| Olive Oil 🫒 | 2 tbsp | Extra-virgin for richness |
[recipe_ingredient_scaler]
The tripe is non-negotiable here—honeycomb cut has the best texture after long cooking. Look for pre-cleaned at Whole Foods or a Latin market (they often sell it pre-bleached). If buying frozen, thaw overnight in the fridge. The beef broth should be high quality—Better Than Bouillon or homemade if you have it. Don’t skip the wine; it brightens the whole pot.
No white wine? Dry vermouth works in a pinch, or extra broth with a splash of lemon juice for acidity. Fresh thyme can be swapped for dried at one-third the amount. If you’re out of tomato paste, a bit of ketchup (yes, really) adds similar depth. The carrots and celery are flexible—use what you have, but keep the onion for the flavor base.
This tastes even better the next day—3-4 days in the fridge, or freeze for 3 months. Tripe freezes beautifully (just thaw before reheating). Leftovers make killer tacos or ramen toppings (trust me on this one).
Why You’ll Love This Recipe
- I’ll be real: tripe is affordable, and paired with simple veggies, it’s a filling, cost-effective meal.
- One Pot Wonder: I toss everything—tripe, broth, onions, carrots, celery—into a single pot and let it simmer. One pot, minimal cleanup.
- Rich and Hearty: The beef broth soaks into the tripe, making it tender with a deep, savory flavor that’s hard to resist.
- Feeds a Crowd: Honestly, this recipe stretches easily for family dinners or meal prep—leftovers taste even better the next day.
Step-by-Step Instructions for Beef Tripe
Here’s my foolproof method to transform this humble cut into a melt-in-your-mouth masterpiece.
Step 1: Blanch the Tripe for Clean Flavor
Begin by rinsing the 2 lb Beef Tripe thoroughly under cold water to remove any residual impurities. I always give it a good scrub with my fingers to ensure it’s completely clean. This step is non-negotiable for the best flavor.
Bring a large pot of water to a boil and add the tripe. Blanch for 5-7 minutes, then drain and rinse again under cold water. You’ll notice the water turns cloudy—that’s all the impurities being removed. This pre-treatment ensures your final dish has a clean, pure beef flavor without any off-putting odors.
Step 2: Build the Aromatic Foundation
Heat the 2 tbsp Olive Oil in a large Dutch oven over medium-high heat. Add the 1 whole Yellow Onion (diced), 2 whole Carrots (sliced), and 2 whole Celery Stalks (sliced). Sauté for 8-10 minutes until the vegetables soften and the onion turns translucent.
Add the 6 cloves Garlic Cloves (smashed), 2 tbsp Tomato Paste, 1.5 tsp Kosher Salt, and 1 tsp Black Peppercorns. Cook for 2 minutes, stirring constantly, until the tomato paste darkens slightly. This builds a rich, complex base that will infuse the tripe with incredible depth.
Step 3: Deglaze and Add Liquids
Pour in the 0.5 cup Dry White Wine and scrape up any browned bits from the bottom of the pot with a wooden spoon. Let it simmer for 3-4 minutes until the liquid reduces by half. The wine adds a bright acidity that balances the richness of the dish.
Add the 1 can Canned Diced Tomatoes (with juices), 8 cups Beef Broth, 2 whole Bay Leaves, and 4 whole Fresh Thyme Sprigs. Stir to combine, then return the blanched tripe to the pot. The liquid should just cover the tripe—if not, add a bit more broth.
Step 4: Simmer to Tender Perfection
Bring the mixture to a boil, then reduce the heat to low. Cover and let it simmer gently for 2.5 to 3 hours. You want a lazy simmer, not a rolling boil—this slow cooking breaks down the tripe’s tough fibers without making it tough.
Check the tripe after 2 hours. It’s done when a knife slides in with no resistance and the texture is tender but still holds its shape. If it’s not quite there, give it more time. The key is patience—rushing this step will result in chewy tripe.
Step 5: Rest and Serve
Once the tripe is tender, remove the pot from heat. Discard the bay leaves and thyme sprigs. Let the tripe rest in its braising liquid for 15 minutes before serving. This resting period allows the flavors to meld and the tripe to absorb some of the delicious liquid.
Serve the tripe in shallow bowls with plenty of the aromatic broth. The tripe should be fork-tender, with a rich, deeply flavorful sauce that soaks into every bite. Ladle some of the vegetables and broth over the top for a complete, satisfying dish.
Pro Tips For Making Beef Tripe
- Pre-Boil the Tripe: I learned this the hard way—simmer the tripe in water for 10-15 minutes first, then drain and rinse. It removes the strong odor and makes the final dish much more pleasant.
- Low and Slow: Skip the high heat; tripe needs at least 2-3 hours in gently simmering beef broth to become tender. Rush it and you’ll be chewing for hours.
- Slice Against the Grain: After cleaning, cut the tripe into thin strips against the grain. This shortens the fibers and guarantees a more tender bite in every spoonful.
- Add Vinegar: Sounds weird, but it works: a splash of white vinegar in the broth helps break down the tripe faster and balances the richness—about 2 tablespoons does the trick.
Storing and Reheating This beef tripe
Fridge Storage
Once cooled, transfer this dish to airtight containers and refrigerate. It keeps beautifully for 3-4 days, and honestly, the flavor improves as the spices meld. I always use glass containers—they don’t absorb odors like plastic. ❄️
Freezing for Later
For longer storage, portion into freezer-safe bags or containers. It freezes well for up to 3 months without losing texture. Leave 1 inch headspace for expansion, and label with the date. Wild herb foraging taught me the value of preserving flavors for later.
Reheating on Stove
Gently reheat on the stove over medium-low heat for 10-15 minutes. Add a splash of beef broth or water to loosen the sauce. Stir occasionally to prevent sticking. The tripe will soak up the liquid and taste freshly made.
Microwave Method
For quick meals, microwave individual portions covered with a damp paper towel. Use 70% power in 2-minute intervals, stirring between each. This prevents the tripe from drying out. Check the temperature reaches 165°F.
I often use this method for leftovers when I’m in a rush after a long coastal ride. 💡
Nutrition Facts
Frequently Asked Questions
How do I know when it’s done?
It’s ready when a knife slides in with no resistance after 2.5-3 hours of simmering. The texture should be tender but still hold its shape. Patience is key!
Can I use a different cut?
Honeycomb tripe works best for this dish due to its texture. Plain tripe can be used, but it may require 30-45 minutes more cooking time to reach the same tenderness.
Why blanch first?
Blanching removes impurities and any lingering odors, ensuring a clean, pure flavor in your final dish. Skip this step, and you risk a less refined taste.
Can I make this in a slow cooker?
Yes! Sear the vegetables first, then transfer everything to a slow cooker. Cook on low for 6-8 hours for the same melt-in-your-mouth result.

Trained in classic French technique but raised on slow-cooked ribs and spicy rubs, she blends culinary skill with smoke and soul.
- Recipe for Cut Up Chicken: One-Pan Crispy Bites - October 3, 2026
- Recipe For Oven Baked Haddock: Buttery Crumbs With Zesty Lemon Topping - October 3, 2026
- Recipe For Fried Salmon Patties With Flour: Crispy Golden Crust With Flaky Centers - October 3, 2026