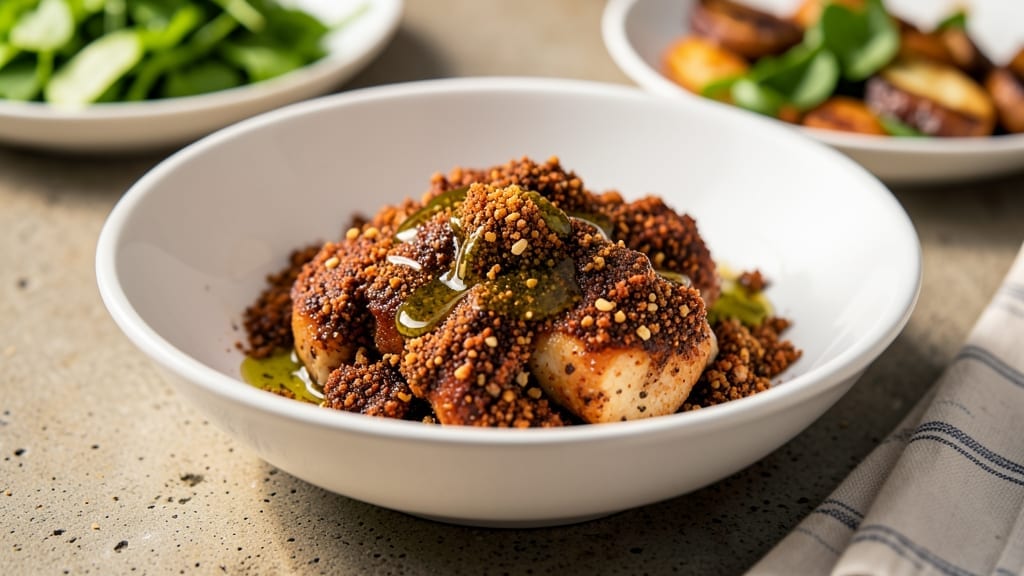
This beer butt chicken rub transforms ordinary wings into sticky, smoky-sweet masterpieces with just a few dry ingredients. The blend of malt powder, smoked paprika, and brown sugar creates a deep, caramelized crust that mimics the flavors of slow-cooked beer-can chicken—without the mess.
I developed this recipe after years of testing spice combinations, and it’s become my go-to for game day, wings night, or any occasion where bold flavor is the star.
The secret lies in balancing sweetness, heat, and smokiness—no wet ingredients needed. Just mix the spices, coat your chicken, and let the magic happen in the oven or on the grill.
The malt powder adds that unmistakable beer-like depth, while the garlic and black pepper ensure every bite is complex and satisfying. This rub works on wings, drumsticks, or even roasted chicken thighs for a restaurant-quality finish.
What makes this blend special is its versatility. Use it dry for a bold, concentrated flavor or mix it with a little oil for an easy marinade. The result?
Crispy, caramelized edges with a tender interior, all infused with that signature beer-butt taste. Once you try it, you’ll never go back to store-bought seasoning again.
Perfect for meal prep or last-minute entertaining, this rub keeps well in an airtight container for up to three months. Pair it with your favorite sticky glaze for next-level flavor. Let’s get started!
Ingredients for beer butt chicken rub
Just a handful of spices and a few pantry staples to create wings with that signature beer-butt flavor.
| Ingredient | Amount | Notes |
|---|---|---|
| Malt Powder 🍺 | ½ cup | Light malt powder for beer depth |
| Smoked Paprika 🌶️ | ¼ cup | High-quality smoked variety |
| Brown Sugar 🍚 | ¼ cup | Light or dark, packed tightly |
| Garlic Powder 🧄 | 2 tbsp | Freshly ground preferred |
| Onion Powder 🧅 | 1 tbsp | For sweet depth |
| Ground Black Pepper 🌶️ | 1 ½ tbsp | Freshly cracked for heat |
| Kosher Salt 🧂 | 1 tbsp | Diamond Crystal preferred |
| Cayenne Pepper 🔥 | ½ tbsp | Adjust for heat preference |
| Chicken Wings 🍗 | 2 lb | Dry or frozen, skin-on |
| Extra-Virgin Olive Oil 🫒 | 1 tbsp | For tossing wings |
| Fresh Lemon Juice 🍋 | 1 tbsp | Brightens the rub |
| Honey 🍯 | 1 tbsp | For extra caramelization |
[recipe_ingredient_scaler]
The malt powder is non-negotiable here—it’s what gives you that authentic beer-can smokiness. Bob’s Red Mill or Anthony’s Goods are my go-tos for quality malt powder, but the grocery store brand works in a pinch. Smoked paprika should be deep red, not dusty—Penzeys has a great selection if you’re willing to splurge. Brown sugar adds that caramelized sweetness, so don’t skimp. For the chicken, skin-on wings crisp up beautifully, but boneless thighs work too if you’re not feeling wings. The key is dry wings—the moisture will steam instead of crisp.
No malt powder? Substitute 1 tbsp of coffee grounds for a deeper, roasted note, but it won’t mimic beer exactly. Short on smoked paprika? Regular paprika plus a pinch of liquid smoke gets you close, though it’s not the same. The cayenne is optional—leave it out if you’re sensitive to heat, but trust me, it adds a nice kick. For tossing, olive oil or melted butter both work, but butter adds richness. If you’re prepping ahead, toss the wings with the dry rub and refrigerate overnight—they’ll develop even more flavor.
This rub keeps indefinitely in an airtight container, but the chicken should be used within 2 days if prepped ahead. For extra crispiness, broil the wings for the last 2-3 minutes. The leftovers? Toss them in the oven at 400°F for 10-15 minutes to revive the crisp. Store the dry rub in a small jar with a tight seal—it’ll last for months, but the wings are best fresh. Double the batch; you’ll want it on hand for game day.
Why You’ll Love This Recipe
- No-Fuss Rub Mix: I mix the rub in under five minutes—just whisk the dry ingredients, toss in the wet, and boom, you’re done. No chopping, no fuss, just pure flavor waiting to happen. The malt powder and smoked paprika do all the heavy lifting, so you’re basically adding magic dust to your wings.
- Crave-Worthy Beer Twist: That malt powder isn’t just for show—it gives these wings that beer buttery depth that makes them taste like they’ve been simmered in a pint. The brown sugar and honey caramelize into a sticky crust while the garlic and onion powders add a savory punch. Honestly, the first bite is the best.
- Leftovers? No Problem: These wings keep perfectly for two days, and honestly, they taste even better the next day. Toss them in a container, and you’ve got a meal for game night, a quick lunch, or that last-minute dinner when you’re starving. The rub stays crispy enough to hold its own, so no sad, soggy wings here.
- Budget-Friendly Bang: For under $10, you’re feeding a crowd with wings that taste like they cost twice as much. The dry rub ingredients are cheap staples, and the honey and lemon juice are pantry basics. It’s the kind of recipe that doesn’t break the bank but makes your taste buds do a happy dance.
Step-by-step instructions for smoky-sweet beer-butt chicken wings
Here’s how to create wings with a perfect balance of smoky depth and sweet caramelization.
Combine the Dry Rub Ingredients
In a large bowl, whisk together the ½ cup malt powder, ¼ cup smoked paprika, ¼ cup brown sugar, 2 tablespoons garlic powder, 1 tablespoon onion powder, 1½ tablespoons ground black pepper, 1 tablespoon kosher salt, and ½ tablespoon cayenne pepper. This blend should look like a fine, even powder with no visible clumps. The malt powder adds that signature malty depth reminiscent of beer, while the smoked paprika provides the backbone of smokiness.
I like to use a wire whisk for this step to ensure everything is fully incorporated and the spices are evenly distributed. The brown sugar will begin to slightly clump with the paprika, but don’t worry—this is normal and will break down when you add the wet ingredients later. The cayenne pepper might seem like a small amount, but it builds heat gradually rather than overwhelming the flavor profile.
Toss the Wings in Wet Ingredients
In a separate small bowl, mix together the 1 tablespoon extra-virgin olive oil, 1 tablespoon fresh lemon juice, and 1 tablespoon honey. This combination creates the perfect sticky base that will help the rub adhere to the wings and promote caramelization during cooking. The lemon juice brightens the smoky flavors, while the honey adds just enough sweetness to balance the heat.
Pour this wet mixture over the dry rub in the large bowl and stir vigorously with your hands—this is where the magic happens. The olive oil helps the spices cling to the wings, and the honey creates a glossy finish that caramelizes beautifully in the oven. You’ll notice the mixture becomes slightly wet but still crumbly. If it feels too dry, add an extra teaspoon of olive oil or honey to help it stick better to the wings.
Coat the Wings Thoroughly
Pat the 2 lb chicken wings dry with paper towels to remove any excess moisture. This step is crucial because wet wings won’t crisp up properly, and the rub won’t adhere evenly. Working in batches if needed, toss the wings in the spice mixture until they’re completely and evenly coated. Press the rub firmly into the skin and crevices—this ensures maximum flavor penetration and a consistent crust.
Transfer the coated wings to a baking sheet lined with parchment paper, leaving about ½ inch of space between each wing. This spacing allows hot air to circulate evenly, preventing steaming and promoting crispiness. Arrange them skin-side up so the rub gets maximum exposure to the heat. If you’re using frozen wings, let them sit at room temperature for 15-20 minutes before baking to ensure even cooking.
Bake for Sticky-Glazed Perfection
Preheat your oven to 425°F for 15 minutes to ensure it’s fully heated. Place the baking sheet on the middle rack and bake the wings for 45-50 minutes, flipping them once halfway through the cooking time. You’ll know they’re ready when the edges are deep golden brown and the rub has formed a sticky, caramelized crust. The internal temperature should reach 165°F when measured at the thickest part of the wing.
Here’s the thing—don’t be tempted to peek too early. Every time you open the oven, you lose heat and steam, which can prevent the rub from properly caramelizing. The honey in the mixture will create a glossy, slightly sticky glaze by the end, so resist the urge to check until the time is nearly up. If you notice the wings browning too quickly, tent them loosely with foil to prevent burning while still allowing air to circulate.
Pro Tips For Making Beer Butt Chicken Rub
- Preheat Like It Matters: That 15-minute preheat at 425°F isn’t just busywork—it’s the difference between a sticky glaze and sad, undercooked wings. I used to skip it and always ended up with uneven browning. Trust me, the oven needs time to wake up before the wings hit the rack.
- Whisk the Malt Powder: The malt powder is your beer flavor anchor, but it’s also the most likely to clump. Whisk it first with the smoked paprika and brown sugar before adding anything else—this breaks up the sugar’s grit and ensures the malt distributes evenly. Skimping here means uneven flavor in every bite.
- Press the Rub Hard: Don’t just toss the wings—press the rub into every crevice, especially the skin. I learned this after my first batch tasted like half the flavor was missing. The extra effort makes the difference between a dusting and a crust that caramelizes into something addictive.
- Resist the Peek: The honey in this rub turns into that glossy glaze only if you leave it alone. Every time you crack the oven door before 45 minutes, you’re sabotaging the caramelization. Set a timer and walk away—your future self will thank you for the crispy, sticky perfection.
Common mistakes when making perfect results
Skipping the Dry Rub Prep
One of my biggest mistakes early on was assuming I could skip mixing the dry rub thoroughly. I’d just dump the spices into a bowl and stir once—big error!
The malt powder and brown sugar need to fully incorporate with the smoked paprika to create that perfect balance of sweetness and smokiness. I learned the hard way that clumps mean uneven flavor distribution. Always whisk vigorously until everything looks like a fine, even powder. 🔥
Overlooking Wing Dryness
Wet chicken wings are the enemy of crispy, sticky perfection. I once rushed through patting the wings dry with paper towels, leaving them damp. The result? A sad, steamed mess instead of crispy, caramelized edges.
Always pat them thoroughly—no shortcuts! Dry wings ensure the rub clings properly and crisps beautifully in the oven.
Ignoring Resting Time
I used to toss the wings in the rub and immediately pop them into the oven. Big mistake! The rub needs time to adhere to the skin—at least 15 minutes (or overnight for maximum flavor).
I once baked wings right after coating, and the rub just slid off, leaving bland meat underneath. Give it time to stick!
Peeking Too Often
The first time I tried this recipe, I couldn’t resist opening the oven every 5 minutes to check on the wings. Each time, I lost precious heat and steam, ruining the caramelization process.
The honey in the mixture creates that glossy glaze, but it needs undisturbed heat to develop. Resist the urge to peek until the final minutes!
Skipping the Flip
Forgetting to flip the wings halfway through baking is a common oversight. I once baked them all skin-side up, and the bottoms turned out soggy while the tops got crispy.
Always flip them at the 25-minute mark to ensure even cooking. This simple step ensures both sides develop that perfect caramelized crust.
Nutrition facts
Frequently asked questions
Can I use this rub on other proteins besides chicken?
This beer butt-inspired spice blend works beautifully on pork chops, beef ribs, or even salmon fillets. The malt powder and smoked paprika add depth that pairs well with many proteins. For best results, adjust cooking times based on the meat’s thickness—think 350°F for 25-30 minutes for pork chops or 400°F for 15-20 minutes for salmon. The sticky-sweet caramelization will shine on any protein!
Why does the rub need to sit on the wings before baking?
The resting time—at least 15 minutes—lets the spices fully adhere to the skin and penetrate the meat. Without this step, the rub slides off during baking, leaving bland chicken underneath. Pro tip: For even better flavor, refrigerate the coated wings overnight. The cold helps the spices cling tighter, and the flavors meld beautifully by morning.
Can I make this rub ahead of time?
Yes! The dry rub keeps indefinitely in an airtight container, so you can prep it weeks in advance. Just store it in a cool, dark place. For the chicken, coat it with the rub up to 2 days ahead and refrigerate. If you’re prepping early, toss the wings in the spice mix, then store them uncovered on a wire rack in the fridge—this prevents sogginess. Reheat in the oven at 400°F for 10-15 minutes to revive the crisp.
What if I don’t have malt powder?
No malt powder? No problem! Substitute 1 tablespoon of finely ground coffee for a deeper, roasted flavor—though it won’t mimic beer exactly. For a closer approximation, mix ¼ cup regular paprika + ½ teaspoon liquid smoke. The heat from the coffee or smokiness from the liquid smoke will still give you that bold, complex profile. Adjust to taste!

Trained in classic French technique but raised on slow-cooked ribs and spicy rubs, she blends culinary skill with smoke and soul.
- Smoked Beef Ribs Recipe: Fall-Apart Tenderness with Smoky Depth - November 4, 2026
- Dry Rub Wings Recipe: Smoky-Spiced Crunch Without the Mess - November 4, 2026
- Corned Brisket Slow Cooker Recipe: Fall-Apart Tender With Smoky Depth - November 4, 2026