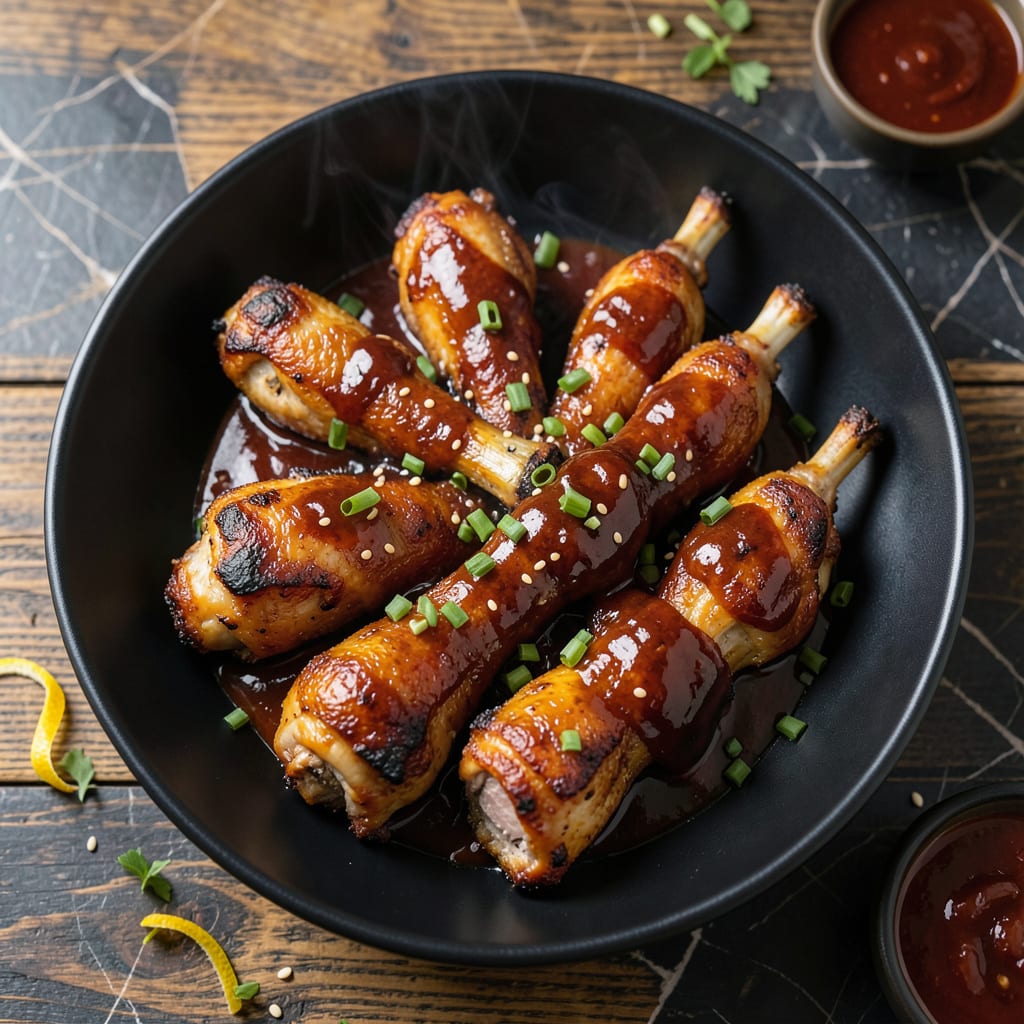
Achieving perfectly charred BBQ drumsticks with a smoky-sweet glaze requires precision and patience. This method delivers restaurant-quality results every time, with tender meat and caramelized edges.
I’ve refined this technique through years of pitmaster experience, balancing heat control and sauce application. The secret lies in the timing and temperature, ensuring each bite is packed with flavor.
Ingredients for Best Bbq Drumstick
Chicken drumsticks and a bold glaze come together for restaurant-quality results at home.
| Ingredient | Amount | Notes |
|---|---|---|
| Chicken Drumsticks 🍗 | 3 lb | Skin-on, bone-in preferred |
| Ketchup 🍅 | 1 ½ cups | High-quality for depth |
| Apple Cider Vinegar 🍏 | ¼ cup | Balances sweetness in glaze |
| Brown Sugar 🍚 | ½ cup | Light or dark variety |
| Molasses 🍯 | 2 tbsp | Adds rich depth to glaze |
| Worcestershire Sauce 💧 | 2 tbsp | Enhances umami flavor |
| Smoked Paprika 🌶️ | 1 tbsp | Key for smoky profile |
| Garlic Powder 🧄 | 1 tbsp | Uniform flavor distribution |
| Onion Powder 🧅 | 1 tbsp | Complements garlic base |
| Salt 🧂 | 1 tbsp | Kosher or sea salt preferred |
| Black Pepper 🌶️ | 1 tsp | Freshly ground for best results |
| Olive Oil 🫒 | 2 tbsp | For brushing drumsticks |
| Liquid Smoke 🔥 | 1 tsp | Optional for extra smokiness |
[recipeingredientscaler]
The drumsticks are the foundation—look for plump, evenly sized pieces with good marbling. Costco or Sam’s Club offer the best bulk pricing for large batches. For the glaze, Heinz ketchup provides consistent quality, while raw brown sugar adds a deeper molasses note. Smoked paprika from Penzeys delivers superior smoke intensity compared to generic brands.
No molasses? Honey or maple syrup can substitute, though the flavor profile shifts slightly sweeter. Dijon mustard at half the amount adds tang if you’re out of vinegar. For a spicier kick, cayenne or chipotle powder at ½ tsp enhances the glaze. Skip the liquid smoke if using a charcoal grill—natural smoke will suffice.
Glaze keeps in the fridge for 2 weeks in an airtight container. Drumsticks are best served immediately but reheat well—wrap in foil and warm at 350°F for 15 minutes. Leftovers freeze for up to 3 months without texture loss.
Why You’ll Love This Recipe
- Set It and Forget: I just mix the sauce, coat the drumsticks, and let the oven do the work—no flipping, no fuss.
- Sweet-Tangy Magic: The brown sugar and molasses caramelize while the apple cider vinegar cuts through for that perfect balance.
- Crowd-Pleasing Staple: I’ve served these at backyard parties and weeknight dinners alike, and they disappear every single time.
- Budget-Friendly Feast: A big batch of drumsticks costs pennies per serving, and leftovers (if there are any) taste even better the next day.
Step-by-Step Instructions for Smoky BBQ Drumsticks
This professional method delivers competition-worthy drumsticks with a glossy, caramelized glaze and fall-off-the-bone tenderness.
Step 1: Season and Prepare the Drumsticks
Pat the 3 lb Chicken Drumsticks completely dry with paper towels. In a small bowl, combine the 1 tbsp Smoked Paprika, 1 tbsp Garlic Powder, 1 tbsp Onion Powder, 1 tbsp Salt, and 1 tsp Black Pepper. Rub this mixture evenly over all surfaces of the drumsticks, pressing it into the skin for maximum adhesion.
Let the seasoned drumsticks sit at room temperature for 15-20 minutes while you prepare the glaze. This allows the salt to begin penetrating the meat and ensures more even cooking. Arrange them on a wire rack set over a baking sheet for optimal air circulation.
Step 2: Create the Smoky-Sweet Glaze
In a medium saucepan, combine the 1.5 cups Ketchup, 0.25 cup Apple Cider Vinegar, 0.5 cup Brown Sugar, 2 tbsp Molasses, 2 tbsp Worcestershire Sauce, and 1 tsp Liquid Smoke. Bring to a gentle simmer over medium heat, stirring occasionally.
Reduce heat to medium-low and let the mixture simmer for 8-10 minutes, stirring frequently, until it thickens to the consistency of maple syrup and coats the back of a spoon. The color will deepen to a rich mahogany. Remove from heat and set aside to cool slightly.
Step 3: Bake and Glaze for Maximum Flavor
Preheat your oven to 400°F. Brush the 2 tbsp Olive Oil lightly over the seasoned drumsticks. Place them in the preheated oven and bake for 25 minutes, then flip each piece and bake for another 15 minutes.
After 40 minutes total baking time, remove the drumsticks from the oven and brush generously with the prepared glaze. Return to the oven and bake for an additional 10-15 minutes, basting with more glaze halfway through, until the internal temperature reaches 185°F and the edges are charred and sticky.
Step 4: Rest and Serve for Optimal Tenderness
Transfer the glazed drumsticks to a serving platter and let them rest for 5-10 minutes. This crucial step allows the juices to redistribute throughout the meat, ensuring each bite is moist and flavorful rather than dry at the edges.
Reserve any remaining glaze to serve on the side for dipping. The drumsticks should have a deep, glossy coating with slightly blackened edges where the sugars have caramelized. Serve immediately while still warm for the best texture and flavor impact.
Pro Tips For Making Best Bbq Drumstick
- Start Hot, Finish Low: Sear the drumsticks at 425°F for 20 minutes first to lock in juices, then drop to 350°F to let the molasses and brown sugar caramelize without burning—I learned this the hard way after charring three batches.
- Score the Skin: Make shallow cuts in the drumstick skin before saucing so the ketchup and vinegar mixture penetrates deeper, giving you more flavor in every bite.
- Skip the Boiling Sauce: Resist the urge to simmer your ketchup, vinegar, and sugar sauce first—it thickens too much and loses that tangy brightness that makes these drumsticks stand out.
- Rest Before Serving: Let the drumsticks sit under foil for 5-10 minutes after baking so the juices redistribute, or you’ll lose half the moisture to the cutting board—my grandmother swore by this, and she was right.
Storing and Reheating This best bbq drumstick
Refrigerator Storage
Let the drumsticks cool completely, then place them in an airtight container with any remaining glaze. They’ll keep in the fridge for up to 4 days. I always use glass containers—they retain heat better when reheating.
Freezer Storage
For longer storage, wrap cooled drumsticks individually in plastic wrap, then place them in a freezer-safe bag for up to 3 months. Squeeze out excess air to prevent freezer burn. This method keeps the meat tender and flavorful.
Oven Reheating
Preheat your oven to 350°F and place the drumsticks on a baking sheet. Cover with aluminum foil and heat for 15-20 minutes, then uncover and broil for 2-3 minutes to restore the sticky glaze. 🔥
Microwave Reheating
Place drumsticks on a microwave-safe plate, cover with a damp paper towel, and heat on 70% power for 2-3 minutes. Check and rotate halfway through. The damp towel prevents the glaze from drying out.
Slow Cooker Revival
For a hands-off approach, add drumsticks and a splash of chicken broth to your slow cooker. Heat on low for 2 hours to gently revive the meat. This works great for meal prep days.
Pro Tip
Always reheat with a little extra glaze or broth to maintain moisture. I learned this trick at a local BBQ competition—it makes all the difference! 💡
Nutrition Facts

Trained in classic French technique but raised on slow-cooked ribs and spicy rubs, she blends culinary skill with smoke and soul.
- Indian Lamb Curry Recipe Pressure Cooker: Fragrant Spices in a Fraction of the Time - October 3, 2026
- Recipe for Oven Roasted: Golden Crisp Perfection Without the Fryer - October 3, 2026
- Recipe for Fried Pork Chops With Flour: Crispy Crust and Juicy Centers - October 3, 2026