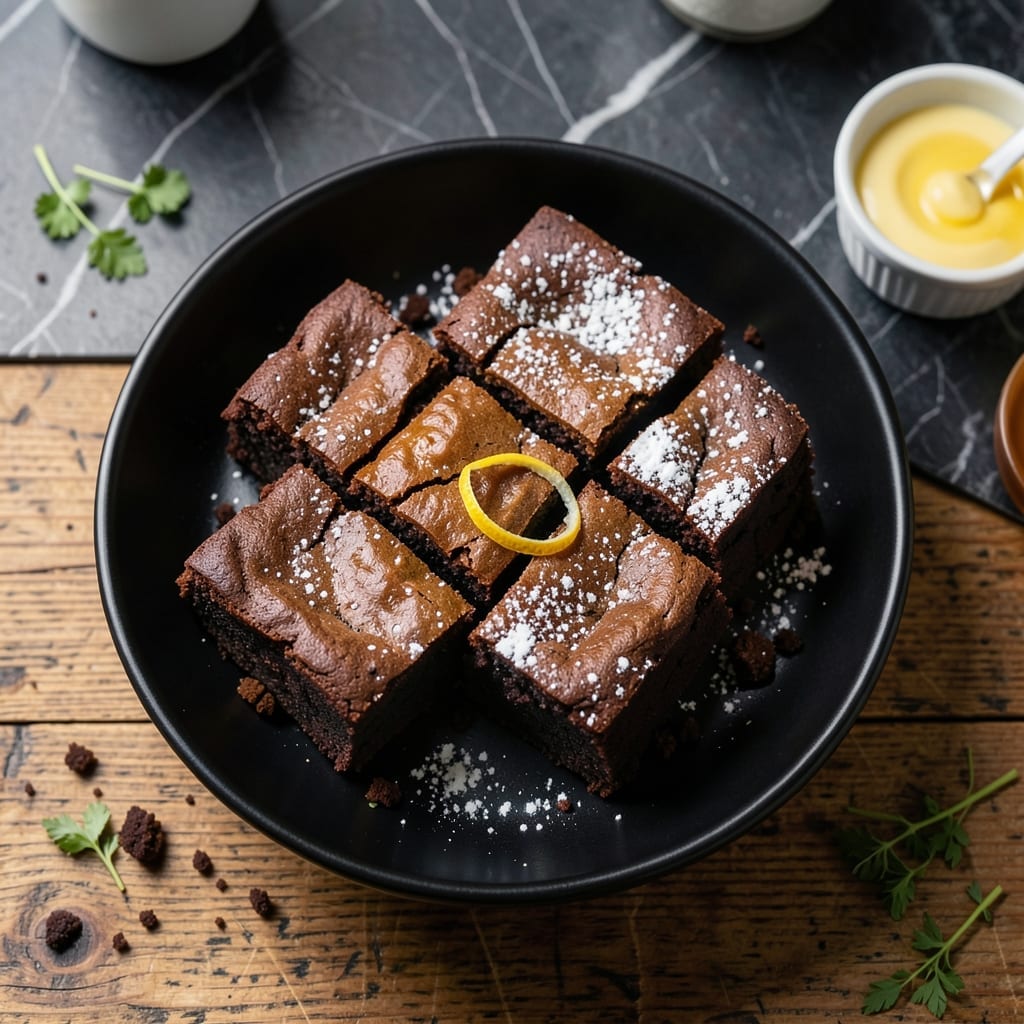
There’s nothing quite like a homemade brownie with a cracked top and dense, fudgy center. This from-scratch recipe delivers rich chocolate flavor and perfect texture every time.
With a few simple ingredients and precise mixing, you’ll achieve restaurant-quality results. The secret lies in the balance of butter, sugar, and cocoa for that signature blissful bite.
Ingredients for Brownie Recipe from Scratch
Rich cocoa, perfect sugar balance, and high-quality chocolate create that signature dense, fudgy texture.
| Ingredient | Amount | Notes |
|---|---|---|
| Unsalted Butter 🧈 | 1 cup | Melted and slightly cooled |
| Granulated Sugar 🍚 | 2 cups | Fine white sugar preferred |
| Large Eggs 🥚 | 4 whole | Room temperature for even mixing |
| Vanilla Extract 💧 | 2 tsp | Pure vanilla for best flavor |
| All-Purpose Flour 🌾 | ¾ cup | Spoon and level method |
| Unsweetened Cocoa Powder 🍫 | ¾ cup | Dutch-process for richer taste |
| Salt 🧂 | ½ tsp | Fine sea salt or table salt |
| Baking Powder 🧂 | ¼ tsp | Ensures slight lift for crackly top |
| Semi-Sweet Chocolate Chips 🍫 | 1 cup | High-quality for melty pockets |
| Chopped Walnuts 🌰 | ¾ cup | Toasted, optional for crunch |
[recipe_ingredient_scaler]
The cocoa is the soul of this recipe. Dutch-process cocoa delivers that deep, dark flavor and smooth texture that defines a premium brownie. Ghirardelli or Hershey’s Special Dark are reliable brands at most supermarkets. For the chocolate chips, Guittard or Ghirardelli semi-sweet chips melt beautifully without that waxy aftertaste of lesser brands.
No Dutch-process cocoa? Natural cocoa at the same amount works but may yield a slightly less rich flavor. Swap semi-sweet chips for bittersweet if you prefer a darker chocolate punch. The walnuts can be omitted entirely or replaced with pecans for a buttery crunch. If using salted butter, reduce the added salt by half.
Store brownies in an airtight container at room temperature for up to 5 days. They actually improve overnight as flavors meld. Freeze portions wrapped in plastic and foil for up to 3 months—thaw overnight before serving.
Why You’ll Love This Recipe
- One Bowl Wonder: I just melt the butter, mix in the sugar and eggs, and fold in the flour—no fancy equipment needed.
- Rich Chocolate Fix: That deep cocoa flavor from the butter and sugar combo hits the spot every time.
- Crowd Pleaser: I bring these to potlucks and they disappear first—kids and adults alike.
- Budget Friendly: A batch costs pennies compared to store-bought, and leftovers stay fresh for days.
Step-by-Step Instructions for Brownie Recipe From Scratch
Master the technique for dense, fudgy brownies with that coveted crackly top every time.
Step 1: Melt and Combine Butter with Sugar
In a heatproof bowl, melt the 1 cup unsalted butter completely. I prefer using the microwave in 30-second bursts to avoid overheating. Once melted, let it cool slightly for 2-3 minutes—it should be warm but not hot to the touch.
Whisk the melted butter with the 2 cups granulated sugar until fully combined and slightly thickened. This mixture should look like wet sand with no visible butter separation. The warmth helps dissolve the sugar, creating the foundation for that signature crackly top.
Step 2: Incorporate Eggs and Vanilla
Add the 4 whole large eggs one at a time, whisking vigorously after each addition for 30-45 seconds. This aerates the mixture, contributing to the brownies’ structure. The batter will lighten in color and become glossy and thick, resembling a rich chocolate pudding.
Stir in the 2 tsp vanilla extract until evenly distributed. At this stage, the mixture should be smooth and velvety. I always use pure vanilla extract here—its depth of flavor makes a noticeable difference in the final result.
Step 3: Fold in Dry Ingredients
In a separate bowl, sift together the 0.75 cup all-purpose flour, 0.75 cup unsweetened cocoa powder, 0.5 tsp salt, and 0.25 tsp baking powder. The baking powder is subtle but crucial for achieving that coveted crackly top.
Gradually add the dry mixture to the wet ingredients, folding gently with a spatula until just combined. Overmixing develops gluten, which leads to cakey brownies. The batter will be thick and glossy. Now fold in the 1 cup semi-sweet chocolate chips and 0.75 cup chopped walnuts (if using), distributing them evenly throughout.
Step 4: Bake to Fudgy Perfection
Pour the batter into a 9×13-inch baking pan lined with parchment paper, spreading it evenly with a spatula. Bake in a preheated 350°F oven for 25-30 minutes. The key visual cue: a toothpick inserted in the center should come out with a few moist crumbs, not wet batter.
The top should appear set with a glossy, crackly surface, while the edges pull slightly away from the pan. If you start to smell chocolate strongly, that’s your signal to check for doneness. Underbaking slightly is better than overbaking—these continue to set as they cool.
Step 5: Cool and Slice
Remove the pan from the oven and let the brownies cool completely in the pan on a wire rack for at least 1 hour. This waiting period is difficult but essential—the brownies will firm up as they cool, making them easier to slice cleanly.
Once fully cooled, lift the brownies out of the pan using the parchment paper and transfer to a cutting board. Use a sharp knife to cut into squares, wiping the blade clean between cuts for neat edges. The result should be dense, fudgy brownies with a glossy, crackly top and melty chocolate pockets throughout.
Pro Tips For Making Brownie Recipe From Scratch
- Melt Butter Slowly: Use low heat to melt the butter—high heat can cause it to separate or burn, and you want it smooth for even mixing with the sugar.
- Room Temp Eggs: Pull your eggs out 30 minutes before baking; they whip better into the sugar and butter, giving you a glossier, more even texture.
- Don’t Overmix Flour: Stir in the flour just until it disappears—overmixing develops gluten, which turns brownies cakey instead of fudgy.
- Underbake Slightly: Pull them out when a toothpick comes out with a few moist crumbs; they’ll firm up as they cool, staying rich and gooey inside.
Serving Suggestions for This brownie recipe from scratch
Classic Presentation
For a timeless look, cut into 2-inch squares and arrange on a white platter. The contrast between the dark brownies and the plate makes them pop. I dust with a light sprinkle of powdered sugar for an elegant finish. 💫
Ice Cream Pairing
Serve warm brownies with a scoop of vanilla bean ice cream on top. The cold cream against the warm chocolate creates magic. Drizzle with hot fudge sauce for an extra-decadent touch.
Dessert Board
Create a brownie charcuterie board with fresh berries, whipped cream, and caramel sauce for dipping. I add sea salt flakes to enhance the chocolate flavors.
À La Mode
For a restaurant-style dessert, place a brownie in a shallow bowl with 2 scoops of ice cream. I prefer coffee or mint chip to complement the chocolate. Top with chopped walnuts for crunch.
Gift-Worthy Packaging
Stack cooled brownies in a clear cellophane bag tied with ribbon. They make perfect gifts and stay fresh for 3 days at room temperature. Add a handwritten tag for a personal touch.
Beverage Pairing
Serve with a glass of cold milk or a bold red wine like Cabernet Sauvignon. The tannins in the wine cut through the richness beautifully. I also love a cappuccino for an afternoon treat.
Nutrition Facts
Frequently Asked Questions
Why use Dutch-process cocoa instead of natural?
Dutch-process cocoa has been treated to neutralize its acidity, resulting in a smoother, richer chocolate flavor. It also creates a darker color and helps achieve that signature fudgy texture.
How do I get a crackly top?
Whisk the eggs and sugar vigorously for 30-45 seconds after each addition. This creates a thin, paper-like crust. Also, don’t overmix the batter after adding flour.
Can I make these gluten-free?
Yes! Substitute the all-purpose flour with a 1:1 gluten-free baking flour. Ensure all other ingredients, like baking powder, are certified gluten-free.
How do I prevent cakey brownies?
Avoid overmixing the batter once flour is added. Fold just until combined to minimize gluten development. Also, don’t overbake—remove them when a toothpick has moist crumbs.

Trained in classic French technique but raised on slow-cooked ribs and spicy rubs, she blends culinary skill with smoke and soul.
- Indian Lamb Curry Recipe Pressure Cooker: Fragrant Spices in a Fraction of the Time - October 3, 2026
- Recipe for Oven Roasted: Golden Crisp Perfection Without the Fryer - October 3, 2026
- Recipe for Fried Pork Chops With Flour: Crispy Crust and Juicy Centers - October 3, 2026