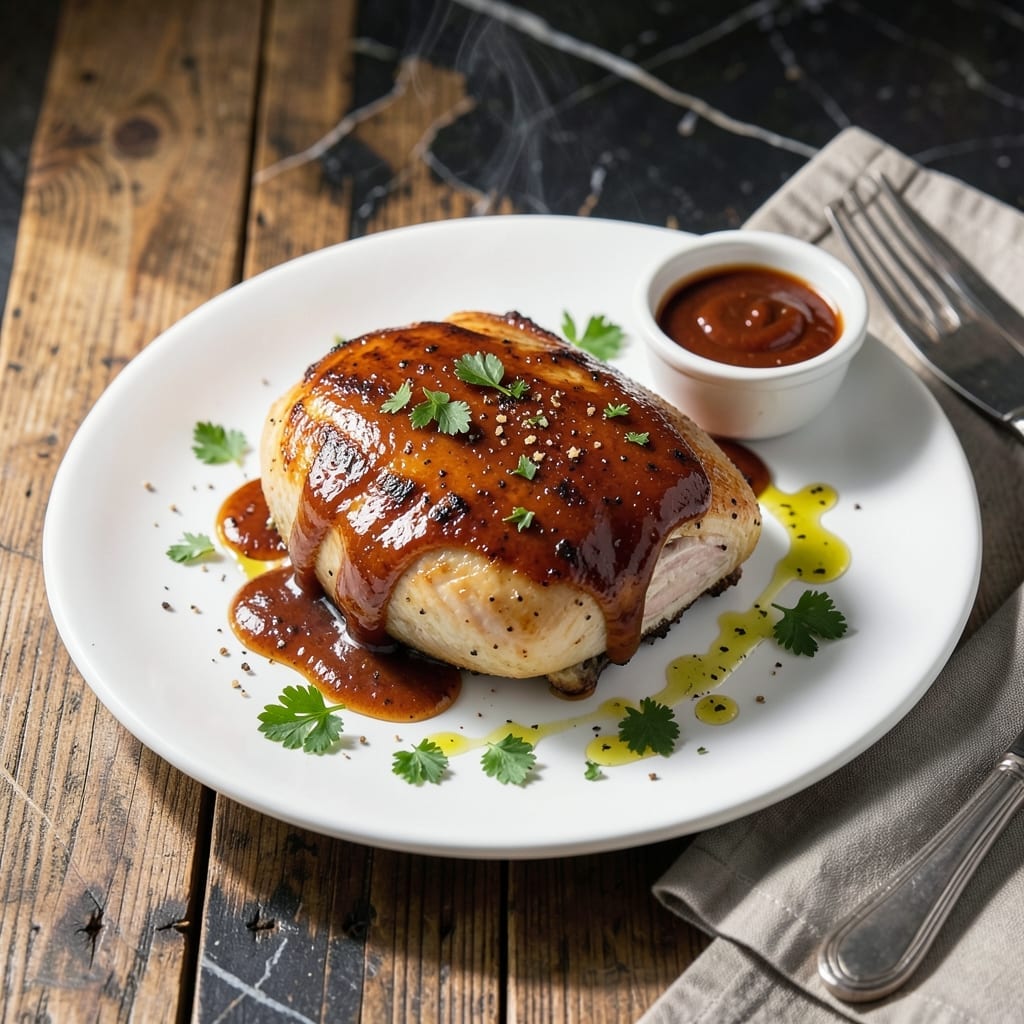
Professional culinary technique meets backyard BBQ tradition in this oven-baked chicken breast with smoky barbecue finish.
This method delivers juicy meat with caramelized sauce, using a simple process that guarantees consistent results every time.
Ingredients for Chicken Breast with Barbecue Sauce
Professional-grade ingredients deliver that signature smoky-sweet barbecue finish with juicy results.
| Ingredient | Amount | Notes |
|---|---|---|
| Boneless, Skinless Chicken Breast 🍗 | 1 ½ lb | Pounded to even thickness |
| Barbecue Sauce 🍯 | 1 ½ cups | High-quality smoky variety |
| Olive Oil 🫒 | 2 tbsp | Divided for cooking and brushing |
| Kosher Salt 🧂 | 1 tsp | Diamond Crystal preferred |
| Freshly Ground Black Pepper 🌶️ | ½ tsp | Coarse grind recommended |
| Garlic Powder 🧄 | 1 tsp | Not garlic salt |
| Onion Powder 🧅 | 1 tsp | Fine grind for even distribution |
| Smoked Paprika 🌶️ | ½ tsp | Enhances smoky depth |
| Brown Sugar 🍚 | 2 tbsp | Light or dark variety |
| Apple Cider Vinegar 🍏 | 1 tbsp | Balances sweetness |
| Worcestershire Sauce 🍶 | 1 tsp | Adds umami complexity |
| Unsalted Butter 🧈 | 1 tbsp | For finishing the sauce |
[recipe_ingredient_scaler]
The chicken quality is paramount. Boneless, skinless breasts from a trusted butcher or Whole Foods ensure tender meat. Pounding to uniform thickness prevents dry spots while baking. For the barbecue sauce, Stubb’s Original or Sweet Baby Ray’s provide consistent flavor without artificial additives. Opt for Diamond Crystal kosher salt—its texture adheres better to the meat.
Need to adapt? Chicken thighs can substitute for breasts (adjust cooking time). For a homemade touch, blend ketchup with molasses and liquid smoke at one-third the amount. No smoked paprika? Regular paprika plus a pinch of chipotle powder works. The vinegar can be white if that’s what’s available, though cider adds more depth.
Store raw chicken in the fridge for up to 2 days or freeze for 9 months. Once cooked, leftovers keep for 4-5 days refrigerated. The sauce can be made ahead and stored separately for up to 1 week.
Why You’ll Love This Recipe
- 20-Minute Meal: I can get this from fridge to table faster than the kids can argue over who sits where. Just sear, sauce, and serve.
- Smoky Sweetness: That combo of caramelized barbecue sauce with juicy chicken? I’ll admit I’ve licked the plate when no one was looking.
- Weeknight Hero: It’s my go-to for busy Tuesdays, lazy Sundays, or when I need to feed both picky eaters and foodies at the same table.
- Leftovers for Days: Honestly, it tastes even better the next day—toss it in a wrap or on a salad, and lunch solves itself.
Step-by-Step Instructions for Chicken Breast With Barbecue Sauce
This oven-baked method delivers tender chicken with a rich, smoky barbecue glaze every time.
Step 1: Season and Prepare the Chicken
Preheat your oven to 400°F. Pat the 1.5 lb boneless, skinless chicken breast dry with paper towels to ensure proper browning. Pound the chicken to an even 1-inch thickness using a meat mallet—this guarantees uniform cooking.
Rub the chicken with 1 tbsp olive oil, then season both sides evenly with 1 tsp kosher salt, 0.5 tsp freshly ground black pepper, 1 tsp garlic powder, 1 tsp onion powder, and 0.5 tsp smoked paprika. This spice blend enhances the smoky depth of the dish.
Step 2: Create the Barbecue Glaze
In a small saucepan, combine 1.5 cups barbecue sauce, 2 tbsp brown sugar, 1 tbsp apple cider vinegar, and 1 tsp Worcestershire sauce. Warm over low heat for 3-4 minutes, stirring occasionally, until the sugar dissolves and the mixture thickens slightly.
Taste and adjust the balance if needed—the vinegar should cut through the sweetness, while the Worcestershire adds umami complexity. Remove from heat and stir in 1 tbsp unsalted butter until melted and fully incorporated.
Step 3: Sear and Glaze the Chicken
Heat 1 tbsp olive oil in a large oven-safe skillet over medium-high heat. Add the seasoned chicken and sear for 2-3 minutes per side until the surface turns golden brown. This initial sear builds a flavorful crust.
Brush the chicken generously with half of the barbecue glaze, ensuring full coverage. Transfer the skillet to the preheated oven.
Step 4: Bake to Perfection
Bake the chicken for 15-18 minutes, or until the internal temperature reaches 165°F on an instant-read thermometer. Halfway through baking, brush the chicken with the remaining glaze to build layers of flavor.
Watch for the sauce to caramelize slightly at the edges—this indicates it’s developing a sticky, glossy finish. The chicken should feel firm to the touch but still juicy.
Step 5: Rest and Serve
Remove the skillet from the oven and transfer the chicken to a cutting board. Let it rest for 5-7 minutes to allow the juices to redistribute. This step ensures each bite remains moist and tender.
Slice the chicken against the grain and serve immediately with any remaining barbecue glaze spooned over the top. The sauce should cling to the chicken with a rich, smoky-sweet finish.
Pro Tips For Making Chicken Breast With Barbecue Sauce
- Pound the Breast: Chicken breasts cook unevenly if left thick—pound them to an even ¾-inch so they finish at the same time. I learned this the hard way after too many dry, rubbery edges.
- Start Hot, Finish Low: Sear the chicken over medium-high heat for 2-3 minutes per side, then drop to medium-low to cook through without burning the sauce. Sounds obvious, but I ruined a few batches by rushing it.
- Dry the Surface: Pat the chicken completely dry with paper towels before seasoning—it guarantees a better sear and helps the sauce cling. Skip this and you’ll be steaming the meat instead.
- Sauce Last: Brush on the barbecue sauce only in the last 2-3 minutes of cooking to prevent it from burning. After burning one too many saucy coatings, I now keep a close eye and flip often.
Pro Cooking Tips for This Dish
Perfect the Pound
Always pound your 1.5 lb chicken breast to an even 1-inch thickness—this prevents dry spots and ensures even cooking. I use a heavy meat mallet from my local butcher shop for consistent results. Uneven pieces cook at different rates, leading to dry edges.
Thermometer Precision
Invest in an instant-read thermometer—I swear by Thermoworks models. Pull the chicken at 160°F and let it rest to 165°F. Overcooking is the fastest way to ruin juicy chicken, and I learned this the hard way at my first BBQ competition. 🌡️
Glaze Timing
Apply the first coat of barbecue glaze after searing, then add another layer halfway through baking. This builds a sticky, caramelized finish without burning the sugars. I brush generously for that restaurant-quality shine.
Resting Matters
Let the chicken rest for 5-7 minutes after baking. This lets the juices redistribute, so every bite stays moist. Skipping this step means all that flavor ends up on your cutting board instead of in your meal.
Sauce Balance
Taste your glaze before applying—it should balance sweet, tangy, and smoky. I often add a splash of apple cider vinegar to brighten the flavors. The vinegar cuts through the richness, just like my grandma taught me.
Skillet Choice
Use a heavy oven-safe skillet, like Lodge cast iron, for even heat distribution. This ensures a perfect sear and prevents hot spots that can burn the sauce. I’ve had mine for years and it still delivers. 🔥
Nutrition Facts
Frequently Asked Questions
What’s the best way to keep the chicken moist?
Pound to 1-inch thickness and pull from the oven at 160°F. Let it rest to 165°F. This prevents overcooking and dryness.
Can I use a different type of vinegar?
Yes, white vinegar works in a pinch, but apple cider vinegar adds depth. It balances the sweetness better for that classic barbecue tang.
Why does the sauce burn sometimes?
High heat can caramelize sugars too quickly. Apply glaze after searing, and bake at 400°F for even cooking without burning.
How long can I store leftovers?
Cooked chicken keeps for 4-5 days refrigerated. Store separately from the sauce to maintain texture and flavor.

Trained in classic French technique but raised on slow-cooked ribs and spicy rubs, she blends culinary skill with smoke and soul.
- Recipe for Dumplings in Crock Pot: Fluffy Pillows with Minimal Effort - October 3, 2026
- Recipe For Diced Pork In Slow Cooker: Melt-In-Your-Mouth Tenderness All Day - October 3, 2026
- Recipe for Crock Pot Lasagna Using Ravioli: No-Boil Cheese Layers - October 3, 2026