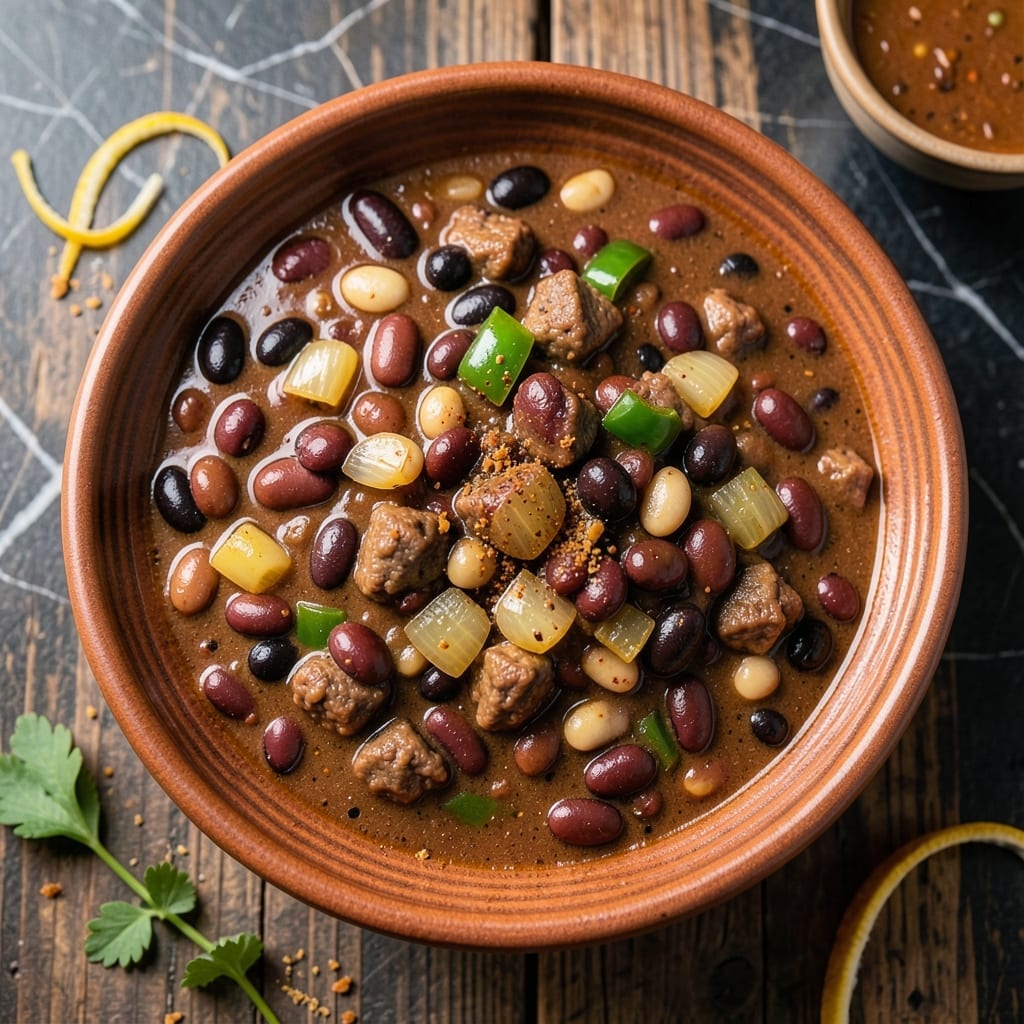
This one-pot chili delivers hearty satisfaction with minimal cleanup. Beans take center stage, creating a protein-rich dish that’s both filling and flavorful.
Perfect for feeding a crowd, it simmers slowly to blend spices and textures. The result is a thick, robust chili that’s ready to serve straight from the pot.
Ingredients for Chili Recipe with Beans
These pantry staples and fresh vegetables create a hearty, protein-packed one-pot meal for any gathering.
| Ingredient | Amount | Notes |
|---|---|---|
| Dried Black Beans 🌱 | 2 cups | Soaked overnight or quick-soaked |
| Dried Kidney Beans 🌱 | 2 cups | Soaked overnight or quick-soaked |
| Olive Oil 🫒 | 2 tbsp | Extra-virgin preferred |
| Yellow Onion 🧅 | 1 whole | Medium, finely diced |
| Green Bell Pepper 🌶️ | 1 whole | Seeds removed, diced |
| Garlic Cloves 🧄 | 4 cloves | Minced for depth of flavor |
| Canned Diced Tomatoes 🍅 | 2 cans | 28 oz cans, undrained |
| Tomato Paste 🍅 | 6 tbsp | For concentrated tomato flavor |
| Vegetable Broth 🥣 | 4 cups | Low-sodium preferred |
| Chili Powder 🌶️ | 2 tbsp | Mild or hot variety |
| Ground Cumin 🌿 | 1 tbsp | Toasted for deeper flavor |
| Smoked Paprika 🌶️ | 1 tbsp | For smoky depth |
| Dried Oregano 🍃 | 1 tsp | Mediterranean variety |
| Salt 🧂 | 1 tbsp | Kosher or sea salt |
| Black Pepper 🌶️ | 1 tsp | Freshly ground preferred |
[recipe_ingredient_scaler]
The beans are the foundation here. Black and kidney beans give the best texture and hold up well to long simmering. Dried beans are ideal (cheaper, better flavor), but canned work in a pinch—just drain and rinse first. For the broth, Better Than Bouillon or Imagine Foods make solid vegetable bases. The olive oil should be something you’d actually cook with—no need for the fancy stuff.
No chili powder? Combine paprika, cumin, and cayenne at a 2:1:0.25 ratio. Want more heat? Add cayenne or chipotle powder to taste. Fresh out of kidney beans? Pinto beans or red beans work just as well. The bell pepper can be any color, but green gives that classic chili flavor. Canned tomatoes can be fire-roasted for extra smokiness.
This chili actually improves overnight. Keeps 5 days in the fridge, freezes for 3 months. Store in airtight containers, and reheat gently to avoid breaking the beans. Perfect for meal prep—portion it out for easy lunches all week.
Why You’ll Love This Recipe
- I’ll be real: this makes enough for a week of lunches or a cozy dinner with friends.
- One Pot Wonder: I soak the dried black and kidney beans overnight, then everything simmers together—no extra pans, no fuss.
- Rich and Hearty: The onion and bell pepper base gives it a deep, savory flavor that’s even better the next day.
- Feeds a Crowd: I’ll be real: this makes enough for a week of lunches or a cozy dinner with friends.
Step-by-Step Instructions for Chili With Beans
This one-pot method delivers hearty, flavorful results with minimal cleanup required.
Step 1: Sauté the Aromatic Base
Heat the 2 tbsp olive oil in a large Dutch oven or heavy pot over medium heat. Add the finely diced yellow onion and diced green bell pepper, cooking for 5-7 minutes until the onion becomes translucent and the bell pepper softens.
Stir in the 4 cloves garlic cloves and cook for an additional 30 seconds until fragrant. This aromatic base builds the foundation of flavor for your chili, so take your time to develop these layers properly.
Step 2: Toast the Spices and Add Tomatoes
Add the 2 tbsp chili powder, 1 tbsp ground cumin, 1 tbsp smoked paprika, and 1 tsp dried oregano to the pot. Stir constantly for 1 minute to toast the spices, which deepens their flavors and prevents a raw taste.
Immediately add the 6 tbsp tomato paste and cook for another 2 minutes, stirring frequently. This step caramelizes the tomato paste slightly, enhancing its natural sweetness. Then add the 2 cans canned diced tomatoes with their juices.
Step 3: Combine with Beans and Broth
Pour in the 4 cups vegetable broth and stir well to combine all the ingredients. Add the soaked 2 cups dried black beans and 2 cups dried kidney beans, then season with the 1 tbsp salt and 1 tsp black pepper.
Bring the mixture to a boil, then reduce the heat to low. Cover and let it simmer gently for 1 to 1.5 hours, stirring occasionally, until the beans are tender and the chili has thickened slightly.
Step 4: Adjust Seasoning and Serve
Once the beans are fully cooked, taste the chili and adjust the seasoning if needed. The flavors should be well-balanced, with a rich, smoky depth from the spices and a hearty texture from the beans.
Ladle the chili into bowls and serve hot. For the best results, let it sit for 10-15 minutes off the heat before serving—this allows the flavors to meld together even further. This dish serves 6 generously.
Pro Tips For Making Chili Recipe With Beans
- Soak Overnight: I learned this the hard way—dried kidney and black beans need at least 8 hours in water, or they’ll stay tough no matter how long you simmer them.
- Bloom Your Spices: After sautéing the onion and bell pepper in olive oil, add your chili spices and cook for 1-2 minutes until fragrant—it deepens the flavor in a way raw spices just can’t.
- Skip the Salt Early: Resist the urge to season the beans while they’re soaking or in the first hour of cooking; it can make them stay firm instead of creamy.
- Use the Bean Liquid: Sounds weird, but it works: stir in ½ cup of the bean soaking liquid when building your chili—it adds body and a subtle richness you’d otherwise miss.
Storing and Reheating This Dish
Refrigerator Storage
Let your chili cool for no more than 2 hours before transferring to airtight containers. I use glass Pyrex with snap-on lids. Store at 40°F or below for up to 5 days. The flavors actually improve overnight as the spices meld together. ❄️
Freezer Storage
This chili freezes well for up to 3 months without quality loss. I recommend flat freezer bags (quart or gallon size) because they stack efficiently. Leave 1 inch of headspace for expansion and squeeze out excess air.
Stovetop Reheating
Pour chili into a heavy-bottomed pot, add ¼ cup water or vegetable broth to prevent sticking, and heat over medium-low heat for 10-15 minutes. Taste and adjust seasonings—chili often needs a pinch of salt after reheating.
Microwave Reheating
For quick lunches, microwave individual portions covered with a damp paper towel. Heat on 70% power for 2-3 minutes, stir, then continue in 1-minute intervals until reaching 165°F. Add a splash of water if it looks dry.
Portioning for Meals
Divide into single-serving containers before freezing for easy grab-and-go meals. I use 16-ounce mason jars—they’re perfect for lunch portions and go straight from freezer to microwave. 💡
Nutrition Facts
Frequently Asked Questions
Can I use canned beans instead of dried?
Yes! Use 4 cans (drained and rinsed) to replace the 4 cups dried. Reduce broth by 1 cup and simmer for just 20-30 minutes since canned beans are pre-cooked.
How do I make it spicier?
Add ½ tsp cayenne or 1 chopped jalapeño with the onions. For smoky heat, stir in 1 tsp chipotle powder with the spices. Adjust to taste before serving.
Why soak the beans overnight?
Soaking reduces cooking time by 50% and helps prevent gas. For a quick method, boil beans for 2 minutes, then let sit off heat for 1 hour.
Can I make this in a slow cooker?
Sauté aromatics first, then transfer everything to the slow cooker. Cook on low for 6-8 hours or high for 3-4 hours.

Trained in classic French technique but raised on slow-cooked ribs and spicy rubs, she blends culinary skill with smoke and soul.
- Recipe for Dumplings in Crock Pot: Fluffy Pillows with Minimal Effort - October 3, 2026
- Recipe For Diced Pork In Slow Cooker: Melt-In-Your-Mouth Tenderness All Day - October 3, 2026
- Recipe for Crock Pot Lasagna Using Ravioli: No-Boil Cheese Layers - October 3, 2026