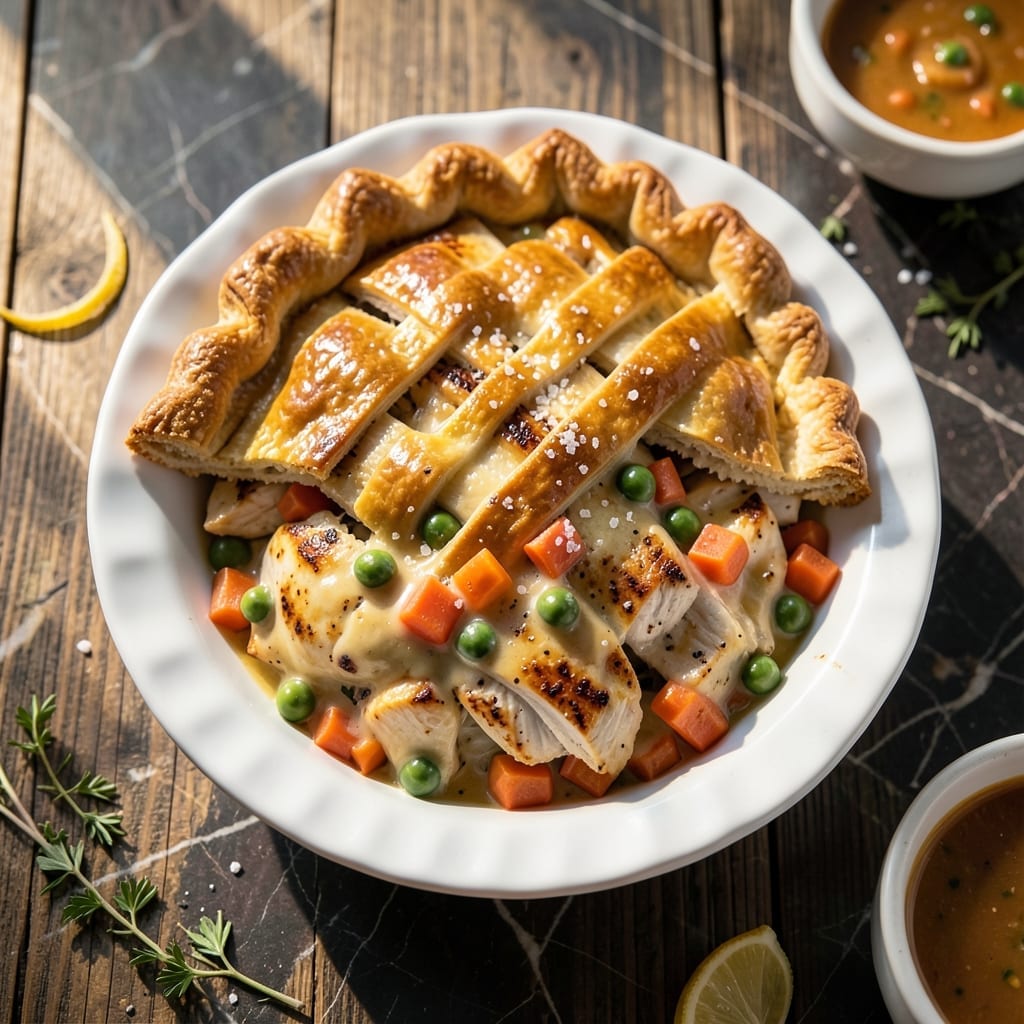
This recipe transforms grilled chicken into a comforting classic with a flaky crust that encases a rich, savory filling.
I developed this method to capture smoky grill flavors in a dish that feels like home, perfecting the balance between tender chicken and creamy vegetables.
Ingredients for Daily Grill Chicken Pot Pie
Transform grilled chicken and garden vegetables into a homey masterpiece with these essentials.
| Ingredient | Amount | Notes |
|---|---|---|
| Grilled Chicken Breast 🍗 | 2 lb | Cooked, diced, with grill marks |
| All-Purpose Flour 🌾 | 2 cups | Plus extra for dusting surface |
| Unsalted Butter 🧈 | 1 cup | Cold, cubed for crust |
| Ice Water 💧 | ½ cup | For pie dough moisture |
| Heavy Cream 🥛 | 1 cup | For creamy filling base |
| Chicken Broth 🍲 | 1 ½ cups | Low-sodium preferred for control |
| Carrots 🥕 | 2 whole | Peeled, diced into small cubes |
| Frozen Peas 🌱 | 1 cup | No need to thaw before using |
| Yellow Onion 🧅 | 1 whole | Finely diced for even cooking |
| Celery Stalks 🌿 | 2 whole | Diced, including some leaves |
| Garlic Cloves 🧄 | 3 cloves | Minced for aromatic depth |
| Fresh Thyme Leaves 🍃 | 1 tbsp | Stripped from stems, chopped |
| Salt 🧂 | 1 ½ tsp | Diamond Crystal preferred for even seasoning |
| Black Pepper 🌶️ | 1 tsp | Freshly ground for best flavor |
[recipe_ingredient_scaler]
The crust demands precision. King Arthur Flour produces consistent all-purpose results, while Plugrá or European-style butter ensures flakiness. For the chicken, use leftovers or grill specifically for this—bone-in, skin-on breasts retain moisture better than boneless. The vegetables should be uniform in size for even cooking, and organic carrots and celery often have superior flavor.
No grilled chicken on hand? Rotisserie chicken at one-and-a-half times the amount works well, though you’ll miss the smoky depth. Fresh thyme can be replaced with one-third the amount of dried. For a richer filling, substitute half the broth with whole milk. The peas are forgiving—green beans or corn make fine alternatives if that’s what’s available.
Assembled pie keeps 1 day in the fridge before baking. Baked pot pie stores 3-4 days refrigerated or 3 months frozen. Reheat individual portions in a toaster oven to maintain crust crispness. Always cool completely before freezing to prevent sogginess.
Why You’ll Love This Recipe
- One Pan Magic: The buttery crust comes together with just flour, butter, and ice water—no fancy tools, no mess.
- That Grilled Flavor: Using pre-grilled chicken breast adds a smoky depth that makes every bite taste like it came from a backyard BBQ.
- Feeds the Week: I make a double batch on Sunday and portion it out for easy lunches—honestly saves me from the takeout trap.
- Stretch Your Dollar: Chicken breast and pantry staples keep this dish budget-friendly, and it feels way more indulgent than the cost.
Step-by-Step Instructions for Chicken Pot Pie
Master this method and you’ll achieve a golden crust with a rich, velvety filling.
Step 1: Prepare the Flaky Pie Crust
In a large bowl, cut the 1 cup unsalted butter (cold and cubed) into the 2 cups all-purpose flour using a pastry cutter or your fingers. Work quickly to keep the butter cold—this is crucial for achieving flaky layers in your crust.
When the mixture resembles coarse crumbs with pea-sized butter pieces, gradually add the 0.5 cup ice water, one tablespoon at a time, mixing just until the dough comes together. Overworking the dough will develop gluten, resulting in a tough crust instead of a flaky one.
Divide the dough into two equal portions, shape into discs, wrap in plastic, and refrigerate for at least 1 hour. This chilling step relaxes the gluten and solidifies the butter, ensuring maximum flakiness when baked.
Step 2: Make the Savory Filling
In a large skillet over medium heat, melt 2 tablespoons of the reserved butter. Add the yellow onion (finely diced), carrots (peeled and diced), and celery stalks (diced). Cook for 5-7 minutes until the vegetables soften and the onion becomes translucent.
Stir in the 3 cloves garlic cloves (minced) and 1 tbsp fresh thyme leaves, cooking for an additional 30 seconds until fragrant. Sprinkle the 2 tablespoons all-purpose flour over the mixture and stir for 1-2 minutes to cook off the raw flour taste, creating a roux that will thicken your filling.
Gradually whisk in the 1.5 cups chicken broth and 1 cup heavy cream, then add the 2 lb grilled chicken breast (diced), 1 cup frozen peas, 1.5 tsp salt, and 1 tsp black pepper. Simmer for 5-7 minutes until the sauce thickens enough to coat the back of a spoon. Remove from heat and let cool slightly.
Step 3: Assemble and Bake the Pot Pie
On a lightly floured surface, roll out one disc of dough to fit a 9-inch pie dish. Transfer the dough to the dish, pressing it gently into the bottom and sides. Trim the edges, leaving a slight overhang. Pour the cooled filling into the crust-lined dish.
Roll out the second disc of dough slightly larger than the pie dish. Place it over the filling, pressing the edges to seal. Trim the excess dough and crimp the edges with your fingers or a fork. Cut several small slits in the top crust to allow steam to escape during baking.
Preheat your oven to 375°F. Bake the pot pie on a parchment-lined baking sheet for 40-45 minutes, or until the crust is golden brown and the filling is bubbling. If the edges brown too quickly, cover them with foil or a pie shield.
Step 4: Rest and Serve
Remove the pot pie from the oven and let it rest for 10-15 minutes before slicing. This resting period allows the filling to set, making it easier to serve neat portions without the filling running out.
The crust should be deep golden and flaky, with visible layers. The filling should be thick and creamy, studded with tender chunks of grilled chicken and vegetables. Serve warm, as the filling will continue to thicken slightly as it cools.
Pro Tips For Making Daily Grill Chicken Pot Pie
- Chill the Dough: Let your pie dough rest in the fridge for at least 30 minutes before rolling—I learned this the hard way after my first few crusts shrank like a cheap sweater in the wash.
- Shred While Warm: Tear the grilled chicken into pieces as soon as it’s cool enough to handle; it absorbs the filling’s creaminess better than when it’s stone cold.
- Skip the Overmix: When cutting the butter into the flour for the crust, stop once the mixture looks like coarse crumbs with pea-sized butter bits—overworking it means a tough, flat crust.
- Brush with Cream: Right before baking, brush the top crust with a thin layer of heavy cream for a golden, flaky finish that looks like it came from a bakery.
Pro Cooking Tips for Perfect Results
Butter Temperature Control
Keep your 1 cup unsalted butter ice-cold until the moment you cut it into the flour. I like to cube it, then freeze for 15 minutes before starting. Cold butter creates those beautiful flaky layers we all love in a pot pie crust. 💡
Dough Resting Time
Don’t rush the 1-hour chilling step for your pie dough. This rest period lets the gluten relax and the butter firm up. I often prep my dough first, then move on to making the filling while it rests in the fridge.
Roux Perfection
When making the roux for your filling, cook the 2 tablespoons flour and butter mixture for the full 1-2 minutes. This removes the raw flour taste and builds a solid base for your creamy sauce. The aroma will change from buttery to nutty when it’s ready.
Filling Consistency
Your filling should coat the back of a spoon before going into the crust. If it’s too thin, simmer for another 2-3 minutes. Too thick? Add a splash more chicken broth. This step ensures your pie won’t be soupy after baking. 🔥
Venting the Crust
Cut those steam vents generously—I use a small cookie cutter to make decorative openings. Without proper venting, your top crust might puff up or the filling could burst through. 4-5 small slits usually does the trick.
Baking Surface
Always bake on a parchment-lined sheet to catch any bubbles. I learned this the hard way after cleaning my oven one too many times. The parchment also makes it easier to transfer your finished pie to a serving plate.
Nutrition Facts
Frequently Asked Questions
Can I use pre-cooked chicken?
Yes, rotisserie chicken works in a pinch. Use 3 lb to match the flavor intensity. For best results, shred it coarsely to mimic grilled texture.
Why rest the dough for 1 hour?
This chilling step relaxes the gluten and firms the butter. Skipping it risks a tough crust instead of flaky layers. The wait is worth it!
How do I prevent a soggy bottom crust?
Pre-bake the bottom crust for 10 minutes before adding filling. Also, ensure your filling is slightly cooled to avoid melting the butter prematurely.
Can I make this ahead?
Assemble the pie and refrigerate for 1 day before baking. Or bake completely, cool, and freeze for up to 3 months.

Trained in classic French technique but raised on slow-cooked ribs and spicy rubs, she blends culinary skill with smoke and soul.
- Recipe for Crock Pot Swiss Steak: Slow-Cooked Beef With Mushroom Gravy - October 3, 2026
- Recipe for Kabsa Rice: Spiced Middle Eastern Feast in One Pot - October 3, 2026
- Hamburger Stir Fry Recipe Healthy: Lean Protein and Veggie-Packed Dinner - October 3, 2026