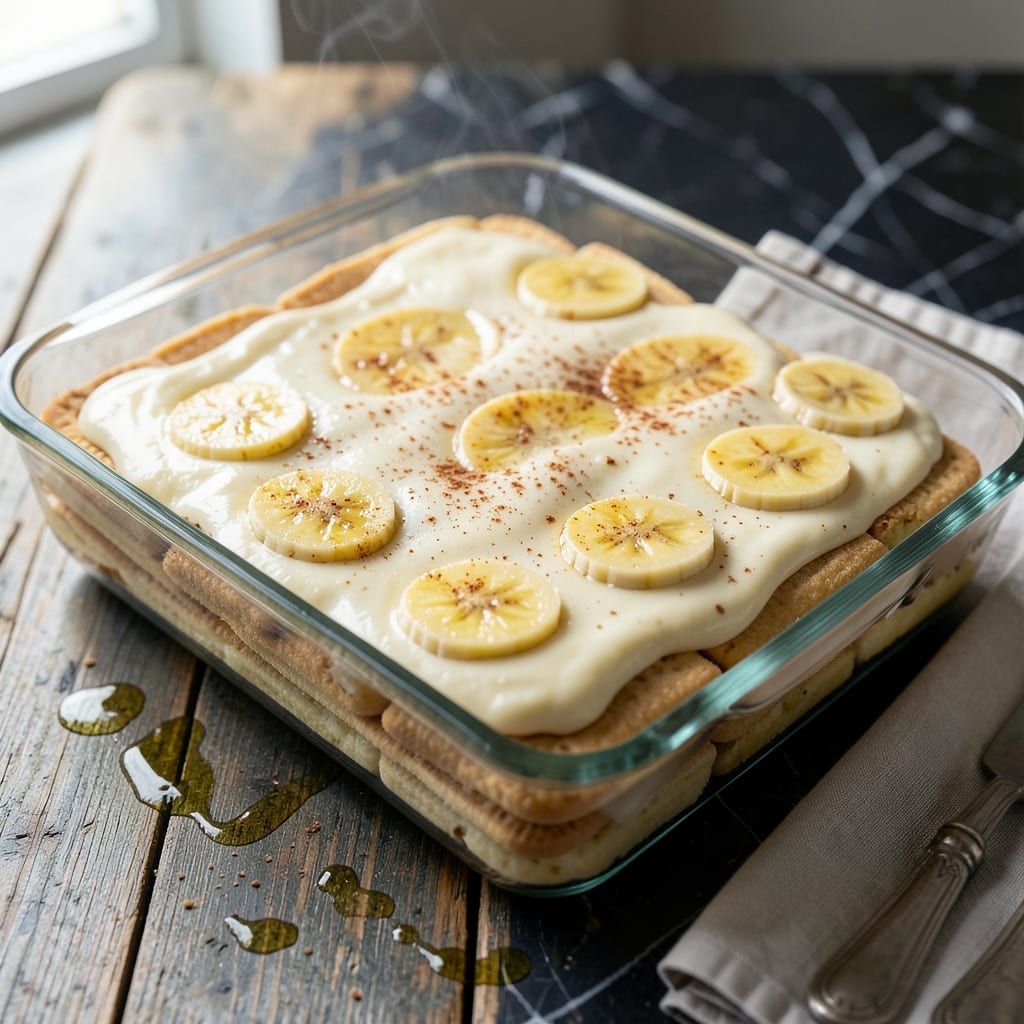
This classic Southern dessert brings layers of vanilla wafers, fresh bananas, and creamy custard together in perfect harmony. The secret lies in the balance of textures and flavors that create an unforgettable taste experience.
I’ve refined this recipe through years of BBQ gatherings, ensuring each bite delivers that nostalgic comfort we all crave. The custard sets to a velvety consistency that clings beautifully to the wafers and fruit.
Ingredients for Dreamland Bbq Banana Pudding
Vanilla wafers, fresh bananas, and creamy custard make this Southern classic irresistible.
| Ingredient | Amount | Notes |
|---|---|---|
| Vanilla Wafers 🍪 | 12 oz | Nilla brand preferred |
| Ripe Bananas 🍌 | 6 whole | Sliced just before layering |
| Whole Milk 🥛 | 2 cups | Full-fat for creaminess |
| Granulated Sugar 🧂 | 1 ½ cups | Divided for custard and meringue |
| All-Purpose Flour 🌾 | ¼ cup | For thickening custard |
| Large Eggs 🥚 | 4 whole | Separated, yolks for custard |
| Unsalted Butter 🧈 | 2 tbsp | Melted for custard |
| Vanilla Extract 🌿 | 2 tsp | Pure extract preferred |
| Salt 🧂 | ¼ tsp | Balances sweetness |
| Heavy Cream 🥛 | ½ cup | Whipped for topping |
| Cream Cheese 🧀 | 4 oz | Softened, for creaminess |
| Sweetened Condensed Milk 🥛 | 1 can | 14 oz can, standard size |
[recipe_ingredient_scaler]
The vanilla wafers are non-negotiable—Nilla is the gold standard here (grab them at any grocery store). Bananas should be ripe but firm, with just a few brown speckles. For the custard, whole milk and heavy cream give that velvety texture mentioned in the intro. I grab mine from Publix—their dairy section is always well-stocked. The cream cheese adds richness, so don’t skip it (Philadelphia brand is my go-to).
No Nilla wafers? Generic vanilla wafers work in a pinch, but the flavor won’t be the same. Out of fresh bananas? Frozen (thawed and drained) can substitute, though texture suffers slightly. Need a shortcut? Store-bought custard cuts prep time, but homemade is worth it. For a lighter version, half-and-half instead of heavy cream (just know it won’t cling as well to the layers).
Assemble this the day you plan to serve—bananas brown fast. Leftovers keep 2-3 days in the fridge, but the wafers soften. Doesn’t freeze well. Best eaten fresh, straight from the dish (that’s the Dreamland BBQ way).
Why You’ll Love This Recipe
- No Fuss Layers: I just alternate wafers, bananas, and pudding—no baking, no fancy steps.
- Creamy Dreamland Magic: The warm vanilla pudding soaks into those ripe bananas and crispy wafers like a hug in a bowl.
- Potluck MVP: Honestly, it’s my go-to for summer picnics and Sunday suppers alike.
- Budget-Friendly Batch: A box of wafers, a few bananas, and pantry staples feed a crowd without breaking the bank.
Step-by-Step Instructions for Dreamland BBQ Banana Pudding
Here’s how to build those famous layers with perfect texture every time.
Step 1: Prepare the Vanilla Wafer Base
Line a 9×13-inch baking dish with a single layer of 12 oz Vanilla Wafers. I press them gently into the bottom to create a solid base. Don’t overlap them too much—you want each wafer to have room to absorb the custard later.
If you’re using Nilla brand, you’ll notice they fit perfectly in this dish size. This first layer sets the foundation for all those delicious flavors above. Save the remaining wafers for the middle and top layers.
Step 2: Make the Creamy Custard Filling
In a saucepan, whisk together 1.5 cups Granulated Sugar, 0.25 cup All-Purpose Flour, and 0.25 tsp Salt. Gradually whisk in 2 cups Whole Milk until smooth. Cook over medium heat until the mixture thickens to pudding consistency.
Temper the 4 whole Large Eggs by slowly whisking in some of the hot mixture, then return everything to the pan. Add 2 tbsp Unsalted Butter and 2 tsp Vanilla Extract. Stir in 1 can Sweetened Condensed Milk and 4 oz Cream Cheese until melted and smooth.
Step 3: Layer Bananas and Wafers
Slice the 6 whole Ripe Bananas just before layering to prevent browning. Arrange half the slices over the wafer base. Pour half the custard over the bananas, spreading evenly. Add another layer of Vanilla Wafers, then the remaining banana slices.
This layering technique ensures every bite has the perfect ratio of wafer to banana to custard. The bananas should be ripe but firm enough to hold their shape when sliced.
Step 4: Finish and Chill
Pour the remaining custard over the top layer. Cover with plastic wrap, pressing it directly against the surface to prevent a skin from forming. Refrigerate for at least 4 hours, but overnight is best for full flavor development.
The pudding needs this time for the wafers to soften perfectly and the flavors to meld. When ready to serve, whip 0.5 cup Heavy Cream to soft peaks and spoon dollops over the top for that classic Dreamland finish.
Pro Tips For Making Dreamland Bbq Banana Pudding
- Layer While Warm: Assemble the pudding while the vanilla wafers are still slightly warm from the oven—it helps them soften just enough to meld with the custard without turning mushy.
- Use Spotty Bananas: Pick bananas with plenty of brown spots; they’re sweeter and break down better in the pudding. I learned this the hard way after using underripe ones and getting a starchy texture.
- Whisk Constantly: When cooking the custard, whisk continuously over medium heat to prevent the flour from clumping. After burning two batches, I finally figured out that steady motion is non-negotiable.
- Chill Overnight: Skip the urge to dig in right away—letting it chill for at least 4 hours (or overnight) lets the flavors deepen and the wafers absorb the custard properly.
Essential Equipment for This Recipe
Mixing Bowls
Start with a set of sturdy mixing bowls in varying sizes—I rely on my Pyrex glass set for custard prep. The 1.5-quart bowl is perfect for whisking the sugar, flour, and milk mixture without spills. Glass lets me monitor the custard’s thickening progress.
Heavy Saucepan
Use a heavy-bottomed saucepan (I swear by my All-Clad 3-quart) for the custard. The even heat distribution prevents scorching, and the weight keeps the pan steady while whisking. A light-colored interior helps you spot when the mixture starts to thicken properly.
Whisk and Spatula
Invest in a balloon whisk for the custard—it covers more surface area than a flat whisk. I pair it with a silicone spatula to scrape every bit of custard from the pan. The OXO brand makes both, and they’ve lasted me years through countless desserts.
Baking Dish
A 9×13-inch baking dish is essential for proper layering. I prefer stoneware—it retains cold well in the fridge and looks beautiful on the table. The Le Creuset Heritage Collection in white is my go-to for serving at BBQ gatherings.
Electric Mixer
For the whipped cream topping, a hand mixer works, but a stand mixer with a whisk attachment is ideal. I use my KitchenAid to whip the heavy cream to perfect soft peaks in under 2 minutes. Look for one with at least 250 watts of power. 💛
Plastic Wrap
Don’t underestimate the importance of quality plastic wrap—it needs to cling tightly to the pudding’s surface. I use Glad Press’n Seal because it creates an airtight seal that prevents a skin from forming on the custard as it chills.
Nutrition Facts

Trained in classic French technique but raised on slow-cooked ribs and spicy rubs, she blends culinary skill with smoke and soul.
- Recipe For Fried Salmon Patties With Flour: Crispy Golden Crust With Flaky Centers - October 3, 2026
- Meat and Potato Recipe Ideas: Savory Pairings for Hearty Meals - October 3, 2026
- Recipe for Fried Prawns Batter: Ultra-Crispy Golden Shell - October 3, 2026