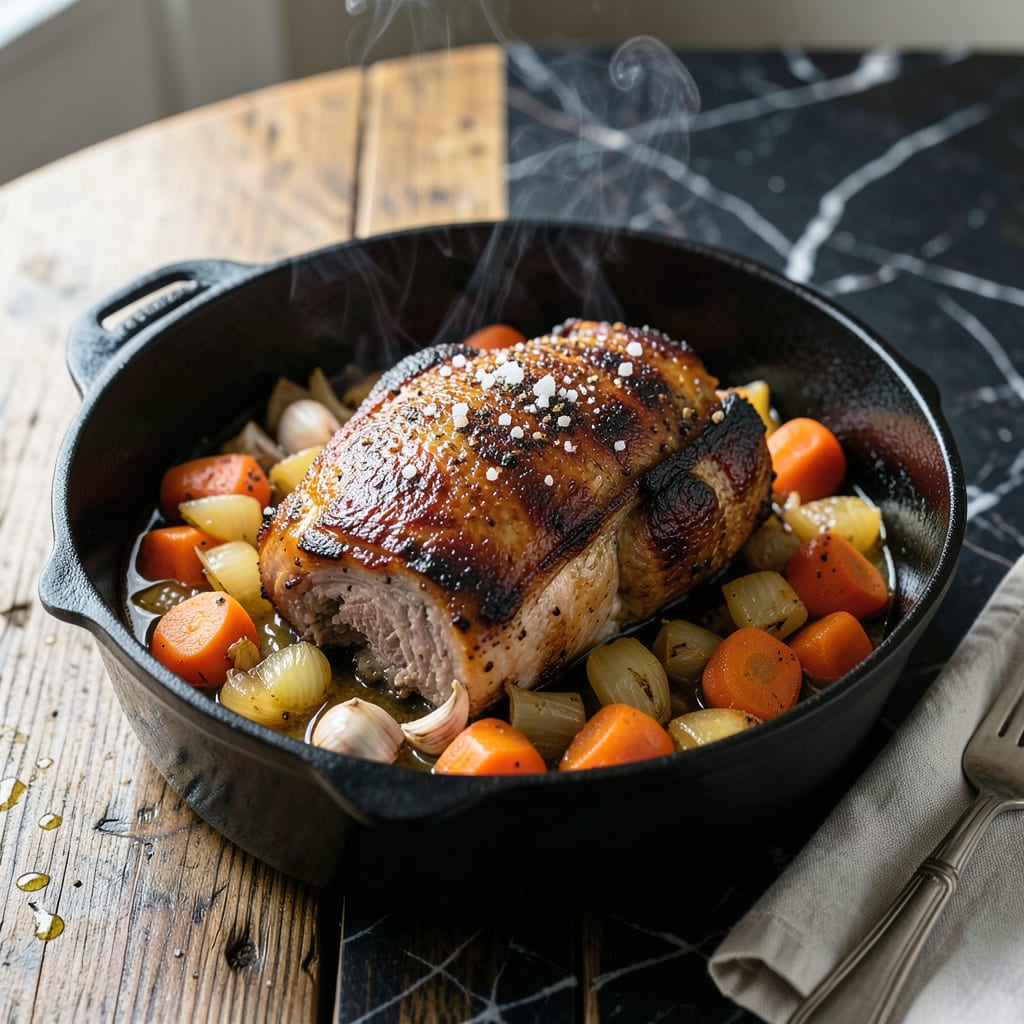
This Dutch oven method transforms pork shoulder into fall-off-the-bone perfection with minimal effort. The slow, even heat works magic on tough cuts, rendering fat and creating tender meat.
I developed this technique blending my pitmaster roots with French braising principles. The result is restaurant-quality pork that melts at the touch of a fork, ready to serve with your favorite sides.
Ingredients for Dutch Oven Pork Shoulder
Transform pork shoulder into tender perfection with these bold, simple ingredients.
| Ingredient | Amount | Notes |
|---|---|---|
| Pork Shoulder 🥩 | 3 lb | Bone-in, skin-on preferred |
| Kosher Salt 🧂 | 1 ½ tbsp | Diamond Crystal preferred |
| Black Pepper 🌶️ | 1 tsp | Freshly ground |
| Garlic Cloves 🧄 | 6 cloves | Smashed, peeled |
| Yellow Onion 🧅 | 1 whole | Large, roughly chopped |
| Carrots 🥕 | 2 whole | Peeled, cut into chunks |
| Celery Stalks 🌿 | 2 whole | Cut into large pieces |
| Chicken Stock 🥣 | 2 cups | Low-sodium preferred |
| Apple Cider Vinegar 🍏 | 2 tbsp | For brightness |
| Brown Sugar 🍚 | 2 tbsp | Light or dark |
| Dried Thyme 🍃 | 1 tsp | Crushed between fingers |
| Bay Leaves 🌿 | 2 whole | Dried, for depth |
| Olive Oil 🫒 | 2 tbsp | For searing pork |
| Fresh Rosemary Sprigs 🌿 | 2 pieces | Optional for garnish |
[recipe_ingredient_scaler]
The pork shoulder is everything here. Bone-in, skin-on gives the best texture and flavor—ask the butcher to cut it into 3-4 large chunks if buying a whole shoulder. I get mine from Costco (great price, consistent quality) or Whole Foods for organic. Look for good marbling (those white streaks of fat)—that’s what renders down to keep the meat moist. Don’t trim it yourself; the fat is flavor.
No pork shoulder? Pork butt (same cut, different name) works identically. Short on time? Country-style ribs cook faster but need less liquid. Out of chicken stock? Water plus a bouillon cube in a pinch. The vinegar matters—apple cider has the right tang. Swap thyme for sage or oregano if you’re feeling adventurous. Skip the bay leaves if you must, but they add a subtle depth worth the effort.
Leftovers keep beautifully. Shred and store in the cooking liquid for up to 5 days in the fridge, or freeze for 3 months. Reheat gently on the stove with a splash of stock to revive. The fat will solidify when cold—just skim it off if you prefer. Perfect for tacos, sandwiches, or straight from the pot.
Why You’ll Love This Recipe
- Set It and Forget: I toss the pork shoulder in the Dutch oven with garlic and onion, then let the oven do all the work for hours.
- Fallback Flavor: The garlic cloves and onion melt into the meat, creating a rich, savory taste that’s hard to resist.
- Feeds the Crew: This recipe makes enough to serve a big family dinner or meal prep for the week ahead.
- Leftovers for Days: Honestly, the pork tastes even better the next day in tacos, sandwiches, or straight from the fridge.
Step-by-Step Instructions for Dutch Oven Pork Shoulder
This method delivers tender, fall-apart meat with rich, caramelized flavors every time.
Step 1: Season and Sear the Pork Shoulder
Pat the 3 lb Pork Shoulder dry with paper towels. Rub it all over with the 1.5 tbsp Kosher Salt and 1 tsp Black Pepper, pressing the seasoning into the meat so it adheres well. This ensures every bite is flavorful.
Heat the 2 tbsp Olive Oil in a Dutch oven over medium-high heat. When it shimmers, add the pork and sear for 4-5 minutes per side until deeply browned on all sides. Searing creates a flavorful crust and locks in juices.
Transfer the pork to a plate and set aside. This step is crucial for building the foundation of flavor in your dish.
Step 2: Build the Aromatic Base
In the same Dutch oven, add the roughly chopped 1 whole Yellow Onion, 2 whole Carrots, and 2 whole Celery Stalks. Cook for 5-6 minutes, stirring occasionally, until the vegetables begin to soften and brown.
Add the 6 cloves Garlic Cloves, 1 tsp Dried Thyme, and 2 whole Bay Leaves. Stir for 1 minute until the garlic is fragrant. Be careful not to let it burn—burnt garlic turns bitter.
Pour in the 2 tbsp Apple Cider Vinegar and 2 tbsp Brown Sugar, stirring to deglaze the pan and dissolve the browned bits. This adds brightness and depth to the braising liquid.
Step 3: Braise to Perfection
Return the pork to the Dutch oven, along with any accumulated juices. Pour in the 2 cups Chicken Stock, ensuring the liquid comes about halfway up the pork. The pork should not be fully submerged. Add the 2 pieces Fresh Rosemary Sprigs if using.
Bring the liquid to a gentle simmer, then cover the Dutch oven and transfer it to a preheated 325°F oven. Braise for 3 to 3.5 hours, turning the pork once halfway through.
You’ll know it’s done when the meat pulls apart easily with a fork. The internal temperature should reach 195-200°F for that perfect fall-off-the-bone texture.
Step 4: Rest and Serve
Carefully remove the pork from the Dutch oven and transfer it to a cutting board. Let it rest for 15-20 minutes before shredding or slicing. This allows the juices to redistribute, ensuring moist, tender meat.
Skimming excess fat from the braising liquid gives you a rich, flavorful sauce. Serve the pork with the vegetables and sauce spooned over the top.
The meat should be so tender it nearly melts in your mouth, with a deep, savory flavor from the aromatic braising liquid.
Pro Tips For Making Dutch Oven Pork Shoulder
- Sear It Hard: Get your Dutch oven screaming hot before adding the pork shoulder—about 3-4 minutes on medium-high. A deep brown crust forms the flavor base for the whole dish.
- Score the Fat: Cut 1/2-inch crosshatches into the fatty side of the pork so the salt, pepper, and garlic penetrate deeper. I learned this the hard way after my first few roasts tasted bland underneath.
- Don’t Rush the Braise: Keep the heat at a gentle simmer, not a boil, or the meat will toughen up. After burning three batches, I finally figured out that low and slow actually changes the outcome.
- Use the Onion Layer: Line the bottom of the Dutch oven with thick onion slices to lift the pork and prevent sticking. Sounds weird, but it works and saves you from scrubbing burnt bits later.
Common Mistakes When Making dutch oven pork shoulder
Skipping the Sear
I see home cooks rush this step, but searing the 3 lb Pork Shoulder for 4-5 minutes per side builds the Maillard reaction flavors that define this dish. Skipping it results in pale, bland meat. 🔥
Insufficient Liquid
Your braising liquid should come halfway up the pork, not fully submerge it. Using less than 2 cups Chicken Stock risks dry meat. Too much liquid dilutes the flavors and prevents proper caramelization.
Wrong Oven Temp
Braising at 325°F is ideal for breaking down collagen slowly. Higher temps toughen the meat, while lower temps extend cooking beyond 3.5 hours without better results. I learned this the hard way at my first BBQ competition.
Peeking Too Often
Every time you open that Dutch oven, you lose 50-100°F of heat and add 30 minutes to cooking time. Resist the urge—trust the process. The aroma after 3 hours will tell you it’s working.
Not Resting Enough
Cutting into pork fresh from the oven sends all those beautiful juices onto your cutting board. Always rest for 15-20 minutes—this lets the muscle fibers reabsorb moisture, guaranteeing tender bites.
Overcrowding the Pot
If using a 5-6 quart Dutch oven, don’t exceed 3-4 lbs of pork. Overcrowding prevents even cooking and proper browning. I use my Le Creuset for anything larger.
Nutrition Facts

Trained in classic French technique but raised on slow-cooked ribs and spicy rubs, she blends culinary skill with smoke and soul.
- Recipe for Curried Tofu: Aromatic Spices With Crispy Edges - October 3, 2026
- Recipe for Dumplings in Crock Pot: Fluffy Pillows with Minimal Effort - October 3, 2026
- Recipe For Diced Pork In Slow Cooker: Melt-In-Your-Mouth Tenderness All Day - October 3, 2026