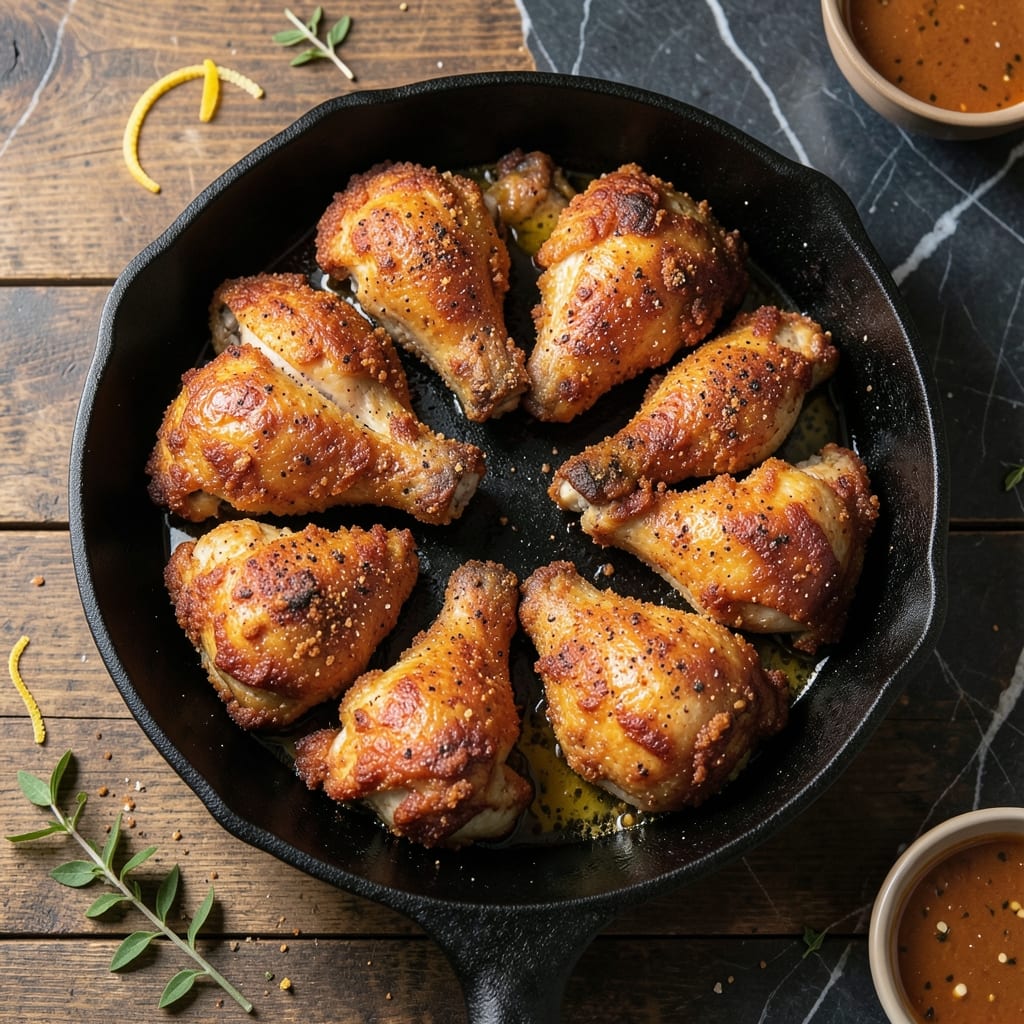
Buttermilk isn’t the only path to crispy fried chicken. This egg wash method delivers the same golden, shatteringly crispy coating without a drop of buttermilk in sight.
I developed this technique in my Charleston kitchen during a particularly busy week when I ran out of buttermilk. The egg wash creates a superior bond between the chicken and the flour coating, ensuring maximum crunch in every bite.
The result is perfectly cooked chicken with a coating that stays crispy long after frying. The egg proteins form a barrier that locks in moisture while creating that coveted crunch.
Serve with classic sides like mashed potatoes or coleslaw for a complete meal that proves buttermilk isn’t always necessary for perfection.
Ingredients for Fried Chicken Recipe No Buttermilk
No buttermilk needed for this crispy, golden fried chicken with an egg wash trick.
| Ingredient | Amount | Notes |
|---|---|---|
| Chicken Thighs 🍗 | 2 lb | Boneless, skin-on preferred |
| Large Eggs 🥚 | 2 whole | For egg wash bonding |
| All-Purpose Flour 🌾 | 2 cups | Plus extra for dredging |
| Cornstarch 🌽 | ¼ cup | For extra crispiness |
| Baking Powder ⚗️ | 1 tsp | Makes coating lighter |
| Paprika 🌶️ | 1 tbsp | Sweet or smoked variety |
| Garlic Powder 🧄 | 1 tsp | Not garlic salt |
| Onion Powder 🧅 | 1 tsp | Fresh ground preferred |
| Salt 🧂 | 1 ½ tsp | Diamond Crystal preferred |
| Black Pepper 🌶️ | 1 tsp | Freshly ground preferred |
| Cayenne Pepper 🔥 | ½ tsp | Adjust to spice preference |
| Vegetable Oil 🫒 | 4 cups | For deep frying |
| Butter 🧈 | 2 tbsp | Melted, for egg wash |
[recipe_ingredient_scaler]
The chicken thighs are non-negotiable here—bone-in, skin-on gives you the juiciest meat and crispest coating. I grab mine from Whole Foods or Publix (whatever’s closest in Charleston). Look for pieces that are similar in size so they cook evenly. The egg wash trick came from a busy week when I was out of buttermilk, and honestly? I haven’t gone back since.
No cornstarch? Swap in more flour—the coating won’t be quite as shatteringly crispy, but it’ll still work. Short on spices? Use a pre-made Cajun seasoning (about 2 tbsp) instead of the individual ones. The baking powder is the secret to that extra crunch—don’t skip it. If you’re frying for a crowd, peanut oil has a higher smoke point than vegetable oil.
Fry in batches and keep finished pieces warm in a 200°F oven on a wire rack. Leftovers (if there are any) stay crispy for 2-3 days in the fridge. Reheat in the oven or air fryer—never the microwave (trust me on this one).
Why You’ll Love This Recipe
- No Buttermilk Needed: I love that I can skip the buttermilk entirely—just eggs, flour, and cornstarch do the trick.
- Crispy Perfection: The baking powder makes the coating light and airy, while the cornstarch gives it that addictive crunch.
- Weeknight Hero: Honestly, it’s my go-to for busy evenings when I need something quick but still satisfying.
- Budget Friendly: Chicken thighs stay juicy and cost less than breasts, so I can make this for a crowd without breaking the bank.
Step-by-Step Instructions for Fried Chicken Without Buttermilk
Here’s the method that delivers that signature crunch without a drop of buttermilk.
Step 1: Prepare the Seasoned Flour Coating
In a large bowl, whisk together the 2 cups all-purpose flour, 0.25 cup cornstarch, 1 tsp baking powder, 1 tbsp paprika, 1 tsp garlic powder, 1 tsp onion powder, 1.5 tsp salt, 1 tsp black pepper, and 0.5 tsp cayenne pepper.
The cornstarch is your secret weapon for that extra crispy texture, while the baking powder makes the coating lighter and airier. This blend should look uniformly speckled with spices—no clumps allowed.
Step 2: Create the Egg Wash Bonding Agent
Melt the 2 tbsp butter and let it cool slightly. In a separate bowl, beat the 2 whole large eggs until well combined, then whisk in the melted butter. This rich egg wash will help the flour coating adhere to the chicken and create that golden-brown finish.
Real talk: don’t skip melting the butter—it adds fat to the egg wash, which translates to better browning and extra flavor in every bite. The mixture should be smooth and slightly frothy.
Step 3: Coat the Chicken Thighs Thoroughly
Pat the 2 lb chicken thighs completely dry with paper towels—this is crucial for crispiness. Season them lightly with a pinch of salt and pepper (though the flour blend will add plenty of flavor).
Dip each piece into the egg wash, letting any excess drip off, then dredge in the seasoned flour. Press firmly to ensure the coating adheres completely. For maximum crunch, repeat the egg wash and flour dredge a second time. Let the coated pieces rest on a wire rack for 10 minutes while you heat the oil.
Step 4: Fry to Golden Perfection
In a deep, heavy pot or Dutch oven, heat the 4 cups vegetable oil to 350°F. Use a deep-fry thermometer to monitor the temperature—this is non-negotiable for consistent results. The oil should shimmer but not smoke.
Carefully lower 2-3 pieces of chicken into the hot oil at a time, being careful not to overcrowd the pot. Fry for 12-15 minutes, turning occasionally, until the coating is deep golden brown and the internal temperature reaches 165°F. The coating should be crisp enough to audibly crackle when you remove the chicken.
Step 5: Drain and Serve Immediately
Transfer the fried chicken to a wire rack set over a baking sheet or paper towel-lined plate. This allows air to circulate around the chicken, preventing the coating from becoming soggy. Let it drain for 5 minutes before serving.
Here’s the thing—fried chicken is best eaten fresh and hot. The contrast between the crispy exterior and juicy interior is at its peak right out of the fryer. Serve with your favorite dipping sauces or alongside classic sides like mashed potatoes and coleslaw.
Pro Tips For Making Fried Chicken Recipe No Buttermilk
- Double-Dredge the Thighs: Dip each piece in the egg wash, then the flour-cornstarch mix, then back in the egg and flour again—this builds a shatteringly crisp crust that clings better than a single coat.
- Heat the Oil First: Get your oil to 350°F before adding chicken; I learned this the hard way after two batches soaked up oil and turned greasy instead of golden.
- Skip the Overcrowding: Fry in batches with space between pieces—steer clear of the urge to cram it all in, or the temperature drops and you’ll end up with soggy, unevenly cooked chicken.
- Add a Teaspoon of Baking Powder: Mix 1 tsp baking powder into your flour for extra crispiness—sounds weird, but it works by creating tiny air pockets in the crust.
Serving Suggestions for Leftovers
Classic Southern Sides
Nothing beats serving this chicken with creamy mashed potatoes and homemade gravy. I use Yukon Gold potatoes for their buttery texture. Add ½ cup buttermilk to your potatoes for extra tang.
Fresh and Crunchy
A cool, crisp coleslaw balances the richness perfectly. My go-to uses green cabbage, carrots, and a tangy vinegar-based dressing. The acidity cuts through the fried coating beautifully.
Dipping Sauces
Offer honey mustard and ranch dressing for dipping. I make mine with Dijon mustard and local Georgia honey. These pair particularly well with the spicy kick from the cayenne pepper in the coating. 💛
Biscuits and Bread
Warm buttermilk biscuits are ideal for soaking up any extra oil or flavors. I prefer flaky layers with a hint of butter. Serve with peach jam for a sweet contrast.
Pickled Vegetables
Add bread and butter pickles or pickled jalapeños for a vinegary crunch. I keep jars from Charleston markets on hand. Their bright acidity refreshes your palate between bites. 💫
Light Salad Option
A simple green salad with tomatoes and cucumbers adds freshness. Toss with a light vinaigrette to avoid overpowering the chicken’s crispy texture.
Nutrition Facts
Frequently Asked Questions
Why use eggs instead of buttermilk?
Eggs create a richer bond between flour and chicken, producing an even crispier coating. The proteins in eggs form a barrier that locks in moisture while browning beautifully. This method works just as well as traditional buttermilk marinades.
Can I use this method for chicken breasts?
Yes, but reduce cooking time to 8-10 minutes at 350°F to prevent dryness. Breasts cook faster than thighs. For best results, pound them to even thickness before coating.
How do I keep the coating from falling off?
Press firmly when dredging and let coated pieces rest for 10 minutes before frying. The double-dip method in the recipe creates a stronger bond. Avoid moving chicken too much while frying.
What oil works best for frying?
Vegetable or peanut oil are ideal for their high smoke points. Maintain 350°F throughout. For healthier options, avocado oil works but is more expensive.

Trained in classic French technique but raised on slow-cooked ribs and spicy rubs, she blends culinary skill with smoke and soul.
- Hamburgers in Sauce Recipe Crock Pot: Slow-Cooked Savory Delight - October 3, 2026
- Sanjeev Kapoor Egg Biryani Recipe: Fragrant Spiced Rice With Boiled Eggs - October 3, 2026
- Recipe for French Pork Spread Gorton: Savory Gallic Flavors in a Spreadable Delight - October 3, 2026