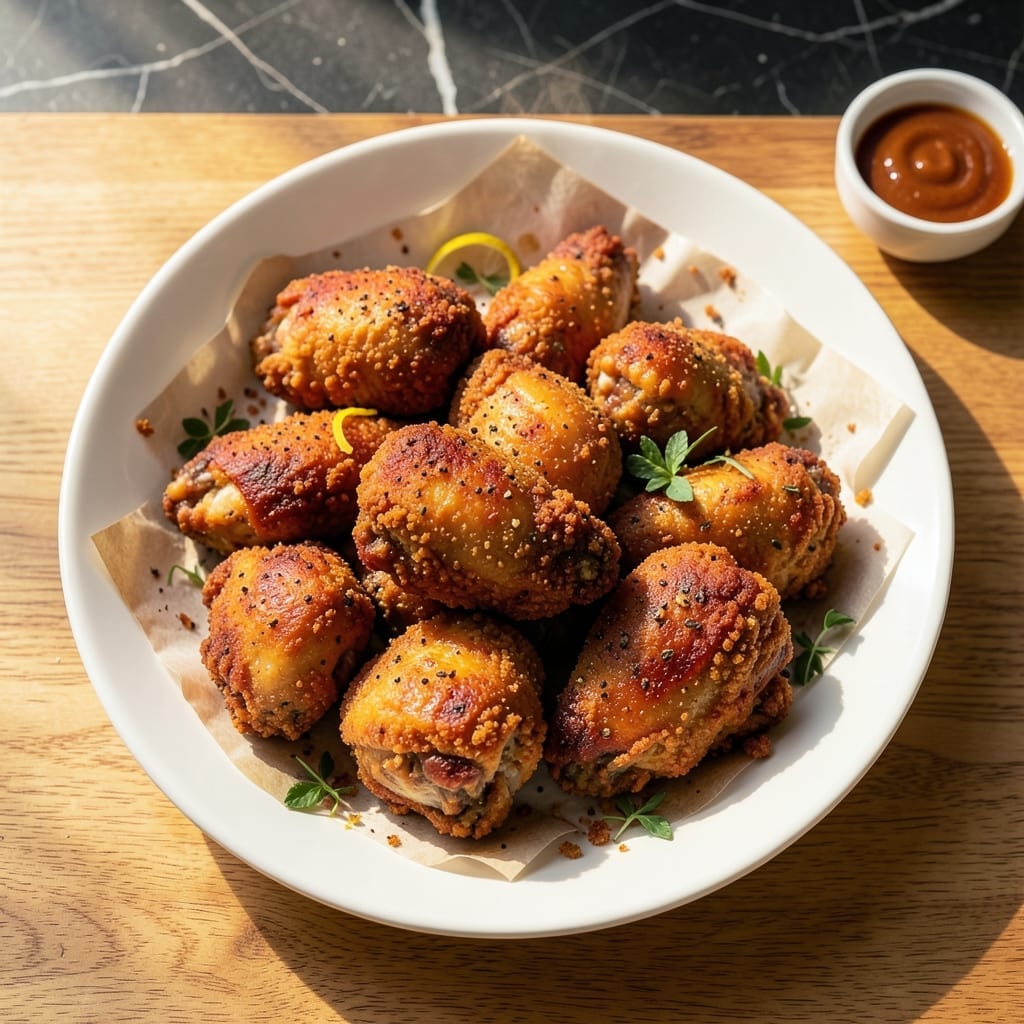
I developed this method after years of testing in my tiny Boston kitchen, where space and tools are limited. The self-rising flour creates a crispy, golden coating without the need for buttermilk, making it both simpler and more reliable.
This approach uses a foolproof technique that ensures even browning and a shatteringly crunchy exterior every time. The flour’s built-in leavening agents help the coating puff slightly, adding texture without extra steps.
You’ll achieve restaurant-quality fried chicken with minimal ingredients and effort. The result is juicy, tender meat encased in a coating that stays crisp long after frying.
Perfect for weeknight dinners or feeding a crowd, this recipe delivers consistent, delicious results with basic pantry staples.
Ingredients for Fried Chicken Recipe with Self Rising Flour
Basic pantry ingredients create that iconic crispy, golden fried chicken coating effortlessly.
| Ingredient | Amount | Notes |
|---|---|---|
| Chicken Thighs 🍗 | 2 ½ lb | Boneless, skin-on preferred |
| Self-Rising Flour 🌾 | 2 cups | For crispy, puffed coating |
| Kosher Salt 🧂 | 1 ½ tbsp | Diamond Crystal preferred |
| Freshly Ground Black Pepper 🌶️ | 1 tsp | Coarse grind for texture |
| Garlic Powder 🧄 | 1 tsp | Not garlic salt |
| Onion Powder 🧅 | 1 tsp | Enhances savory depth |
| Paprika 🌶️ | 1 tbsp | Sweet or smoked variety |
| Cayenne Pepper 🔥 | ¼ tsp | Adjust for heat preference |
| Large Eggs 🥚 | 2 whole | For egg wash adhesion |
| Whole Milk 🥛 | ½ cup | For egg wash consistency |
| Vegetable Oil 🫒 | 4 cups | For frying, high smoke point |
| Butter 🧈 | 2 tbsp | Melted, for extra flavor |
[recipe_ingredient_scaler]
The chicken thighs are non-negotiable for juiciness—bone-in, skin-on yields the best texture, but boneless works if that’s what you have. Self-rising flour is the star here; King Arthur or White Lily brands are reliable. For the oil, use peanut or vegetable oil with a smoke point above 400°F to avoid burning. Freshly ground black pepper adds a subtle crunch that pre-ground can’t match.
No self-rising flour? All-purpose flour plus 1.5 tsp baking powder and 0.5 tsp salt per cup mimics it perfectly. Swap chicken thighs for breasts if you prefer, but they’re prone to drying out—brine them first. For a spicier kick, add 1 tsp of hot sauce to the egg wash. The paprika can be smoked for depth, but sweet keeps it classic.
Fry in batches to avoid crowding—keeps the oil temp steady. Leftovers stay crisp for 24 hours at room temperature, or 3 days refrigerated. Reheat in a 375°F oven for 10-15 minutes to revive the crunch. Never microwave—it’ll turn soggy.
Why You’ll Love This Recipe
- No Fuss Coating: I just toss the thighs in self-rising flour with salt, pepper, and garlic powder—no measuring baking powder or buttermilk dip needed.
- Crispy, Peppery Bite: The garlic powder blooms in the hot oil, and the self-rising flour gives that shatter-crust with zero extra leaveners.
- Feeds a Crowd Fast: I’ve served this to picky kids and late-night guests alike, and the pan never comes back with leftovers.
- Budget Stretch: Chicken thighs stay juicy and cheap, and the flour does double duty as seasoning and crunch maker.
Step-by-Step Instructions for Fried Chicken With Self Rising Flour
This method delivers perfectly crispy, golden-brown chicken with minimal effort and maximum flavor.
Step 1: Season and Prepare the Chicken Thighs
Pat the 2.5 lb Chicken Thighs dry with paper towels to ensure the coating adheres properly. In a small bowl, combine the 1.5 tbsp Kosher Salt, 1 tsp Freshly Ground Black Pepper, 1 tsp Garlic Powder, 1 tsp Onion Powder, 1 tbsp Paprika, and 0.25 tsp Cayenne Pepper. Sprinkle this seasoning blend evenly over both sides of the thighs, pressing gently to ensure it sticks.
Seasoning the meat directly enhances flavor and ensures every bite is well-seasoned. Let the chicken sit for 10 minutes to allow the salt to penetrate the surface, which helps retain moisture during frying.
Step 2: Create the Egg Wash and Coat the Chicken
In a shallow dish, whisk together the 2 whole Large Eggs and 0.5 cup Whole Milk until fully combined. Place the 2 cups Self-Rising Flour in a separate shallow dish. Dip each seasoned thigh into the egg wash, allowing excess to drip off, then dredge thoroughly in the flour, pressing gently to ensure full coverage.
The self-rising flour creates a light, airy crust that puffs up beautifully during frying. For extra crunch, dip the chicken back into the egg wash and flour a second time, then place it on a wire rack to rest for 5 minutes while the oil heats.
Step 3: Heat the Oil and Fry to Golden Perfection
In a large, heavy-bottomed pot or Dutch oven, heat the 4 cups Vegetable Oil over medium-high heat until it reaches 350°F on a deep-fry thermometer. Add the 2 tbsp Butter to the oil just before frying to enrich the flavor. Carefully place 2-3 thighs into the hot oil, ensuring they are not crowded—this prevents the oil temperature from dropping too much.
Fry the chicken for 12-15 minutes, turning occasionally, until the coating is deep golden brown and the internal temperature reaches 165°F. Use tongs to transfer the cooked thighs to a wire rack set over a baking sheet to drain excess oil. The self-rising flour will create a crisp, puffed exterior that stays crunchy even after draining.
Step 4: Rest and Serve
Allow the fried chicken to rest for 5-10 minutes before serving. This brief rest lets the juices redistribute, ensuring the meat stays moist and tender. The crust will also set slightly, making it easier to handle without losing its crispiness.
Serve immediately while hot, with the coating at its peak crunch. The combination of the well-seasoned meat and the airy, golden crust delivers a satisfying texture and flavor in every bite.
Pro Tips For Making Fried Chicken Recipe With Self Rising Flour
- Heat the Oil Right: Use a thermometer and keep the oil at 350°F—any lower and the flour soaks up grease, any higher and the outside burns before the thighs cook through. I learned this the hard way after pulling out sad, greasy pieces more than once.
- Dry the Thighs: Pat the chicken thighs completely dry with paper towels before dredging. Even a little moisture makes the self-rising flour clump and slide off, and you’ll end up with bald spots instead of a crisp crust.
- Skip the Overcrowding: Fry in batches with plenty of space between pieces, or the temperature drops fast and you get steamed, soggy chicken. Sounds obvious, but I still catch myself trying to rush it.
- Season the Flour: Mix the kosher salt, black pepper, and garlic powder right into the self-rising flour before coating. It sticks better than sprinkling on after, and every bite actually tastes seasoned—not just the surface.
Pro Cooking Tips for Great fried chicken recipe with self rising flour
Oil Temperature Control
Use a deep-fry thermometer to maintain 350°F oil temperature—this is non-negotiable for that perfect crunch. I tested this in my tiny Boston kitchen with a Taylor Classic thermometer. If the oil drops below 325°F, the coating absorbs grease instead of crisping. 🌡️
Double-Dredge Secret
For extra crispiness, double-dredge your chicken: dip in egg wash, coat in flour, repeat. Let it rest 5 minutes between dredges. The self-rising flour’s leavening creates tiny air pockets that make the crust shatteringly crisp.
Batch Frying Strategy
Fry in batches of 2-3 pieces to avoid overcrowding. Too much chicken at once lowers oil temp, leading to soggy results. I learned this the hard way during my first attempt in that cramped apartment kitchen.
Butter Boost
Add 2 tbsp melted butter to your hot oil just before frying. This adds richness and depth to the flavor. The butter browns slightly, creating those delicious golden bits that cling to the coating.
Resting for Crispiness
Always rest your chicken on a wire rack (not paper towels) for 5-10 minutes after frying. This allows air circulation, keeping the crust crisp while the juices redistribute. My Nonna would approve of this Italian-inspired technique. 💪
Thermometer Check
Use an instant-read thermometer to confirm the internal temp hits 165°F. The self-rising flour coating can brown before the meat is fully cooked, so don’t rely on color alone. I trust my ThermoWorks Thermapen for accuracy.
Nutrition Facts
Frequently Asked Questions
Can I use all-purpose flour instead?
Yes! Mix 2 cups all-purpose flour with 3 tsp baking powder and 1 tsp salt to mimic self-rising. The leavening creates that signature puffed crust.
How do I keep the coating crispy longer?
Drain on a wire rack, not paper towels, to prevent steam. For leftovers, reheat in a 375°F oven for 10-15 minutes. Never microwave!
Why did my coating fall off during frying?
This usually means the oil wasn’t hot enough (350°F) or the chicken wasn’t dry before dredging. Pat pieces thoroughly and check oil temp with a thermometer.
Can I bake instead of fry?
Yes, but texture differs. Bake at 400°F for 25-30 minutes on a rack for air circulation. The crust won’t be as crispy, but it’s a healthier option.

Trained in classic French technique but raised on slow-cooked ribs and spicy rubs, she blends culinary skill with smoke and soul.
- Recipe for French Pork Spread Gorton: Savory Gallic Flavors in a Spreadable Delight - October 3, 2026
- Recipe for Pan Fried: Golden Crust with Savory Depth - October 3, 2026
- Recipe For Fried Chicken In A Pressure Cooker: Crispy Golden Bites in Half the Time - October 3, 2026