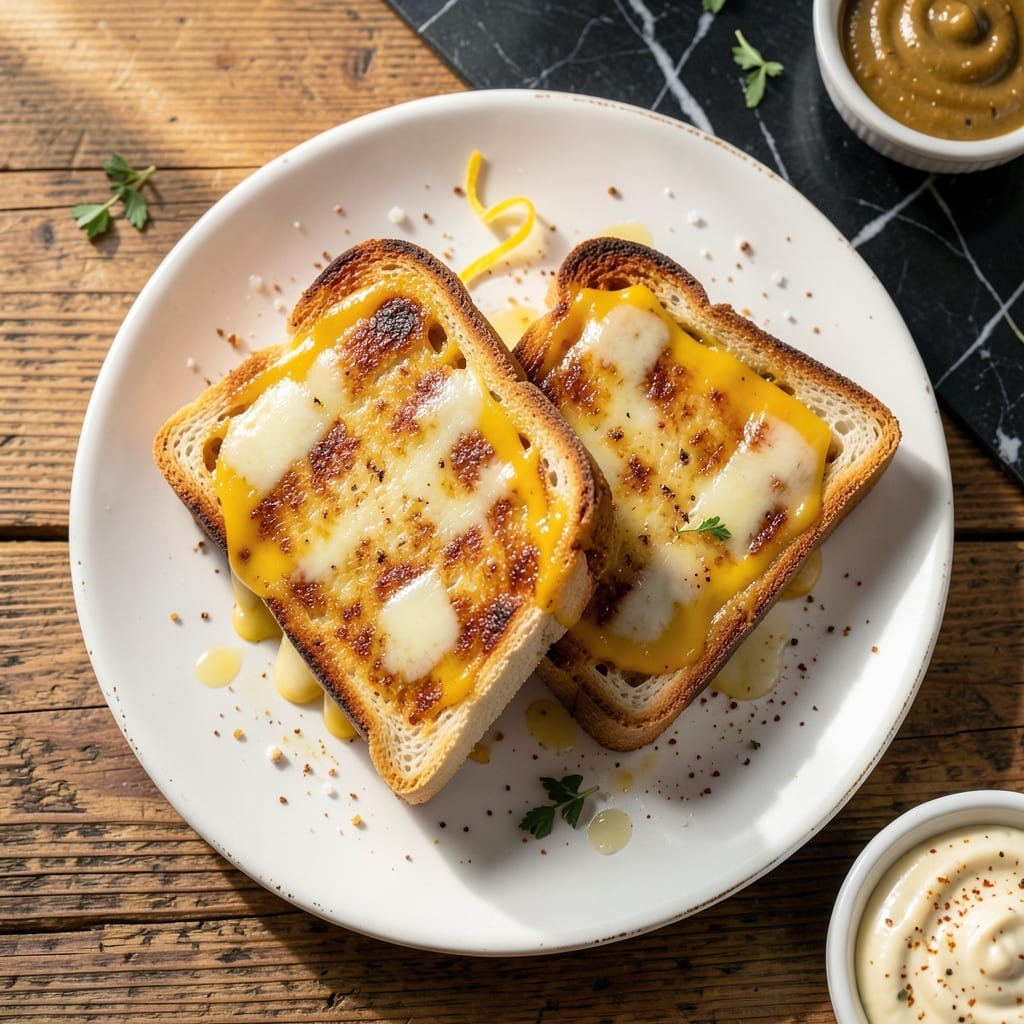
This method transforms a classic sandwich into something extraordinary with a perfectly crisp exterior and melted gold inside. No fancy techniques required—just precise timing and attention to detail.
I developed this approach after years of testing different breads, cheeses, and cooking methods. The key is using medium heat to achieve even browning without burning the butter, while ensuring the cheese melts completely through.
You’ll get a sandwich with shatteringly crispy bread and gooey, stretchy cheese in every bite. The contrast between textures makes this version stand out from ordinary grilled cheese.
Serve immediately for the best experience. The technique works with any bread or cheese combination you prefer.
Ingredients for Fried Grilled Cheese
Buttery bread, melty cheese, and a few secret touches make this next-level sandwich.
| Ingredient | Amount | Notes |
|---|---|---|
| White Bread 🍞 | 8 slices | Thick-cut sourdough or brioche preferred |
| Unsalted Butter 🧈 | ½ cup | Softened to room temperature |
| Sharp Cheddar Cheese 🧀 | 8 oz | Sliced thin for even melting |
| Gruyère Cheese 🧀 | 4 oz | Shredded for gooey texture |
| Mayonnaise 🥫 | 2 tbsp | Full-fat for crispier crust |
| Dijon Mustard 🟡 | 1 tbsp | Optional for depth of flavor |
| Garlic Powder 🧄 | ¼ tsp | For a subtle savory kick |
| Smoked Paprika 🌶️ | ¼ tsp | Adds a hint of warmth |
| Salt 🧂 | ¼ tsp | Diamond Crystal kosher salt |
| Black Pepper 🌶️ | 0.125 tsp | Freshly ground preferred |
[recipe_ingredient_scaler]
The bread makes the difference here. Sourdough or brioche gives you that shatteringly crisp exterior. Whole Foods has great thick-cut loaves, but any bakery section will do—just avoid the pre-sliced sandwich bread (too thin). The butter needs to be unsalted so you can control the seasoning. I always buy Plugrá for the rich flavor. Softened is key; cold butter won’t spread right.
No Gruyère? Fontina or Monterey Jack melt just as beautifully. Skip the pre-shredded cheese (it’s coated in anti-caking stuff that messes with the melt). The mayonnaise trick is non-negotiable—it browns better than butter alone. Duke’s or Hellmann’s are my go-tos (skip the light versions). Want more kick? Add a pinch of cayenne to the butter mix. Dijon is optional but worth it.
These sandwiches are best eaten hot off the pan, but leftovers keep 2 days in the fridge. Reheat in a skillet or air fryer to revive the crisp. Cheese freezes well for 3 months—just shred it before freezing so it melts evenly.
Why You’ll Love This Recipe
- 5-Minute Lunch: I can go from fridge to plate faster than the toaster pops up. Just butter, cheese, and a pan—no fuss.
- Crispy, Melty Magic: That sharp cheddar and gruyère combo with the mayo trick? Creates a golden crust and a gooey center that’s ridiculous.
- Kid-Approved Flexibility: I’ve served this for picky toddlers, late-night snacks, and even a fancy-ish brunch with tomato soup.
Step-by-Step Instructions for Fried Grilled Cheese
Here’s the method I’ve perfected for achieving that ideal crispy exterior with perfectly melted cheese inside.
Step 1: Prepare the Cheese Blend and Seasoning
In a small bowl, combine the 8 oz Sharp Cheddar Cheese slices with the 4 oz Gruyère Cheese. I like to layer these together for each sandwich to create that perfect melt. In a separate tiny dish, mix the 0.25 tsp Garlic Powder, 0.25 tsp Smoked Paprika, 0.25 tsp Salt, and 0.125 tsp Black Pepper.
This seasoning blend will add depth to both the exterior and interior. The smoked paprika gives a subtle warmth that complements the cheeses beautifully. Set both mixtures aside while you prepare the bread.
Step 2: Create the Buttery Mayonnaise Spread
In another small bowl, mix the 0.5 cup Unsalted Butter (softened) with the 2 tbsp Mayonnaise and 1 tbsp Dijon Mustard. The mayonnaise might seem unusual, but it creates an incredibly crisp crust that’s superior to butter alone.
This combination also prevents burning that can happen with just butter. Whisk until smooth and fully combined. The Dijon mustard adds a subtle tang that cuts through the richness of the cheeses. You’ll use about 1 tablespoon of this mixture per sandwich.
Step 3: Assemble the Sandwiches
Lay out all 8 slices White Bread on your work surface. Spread the butter-mayonnaise mixture thinly on one side of each slice—this will be the exterior. On the unbuttered side of four slices, sprinkle a pinch of your seasoning blend.
Arrange about 2 oz of the Sharp Cheddar Cheese and 1 oz of the Gruyère Cheese on top of the seasoned slices. The key here is even distribution so every bite has that perfect cheese pull. Top with the remaining bread slices, buttered side out.
Step 4: Cook to Golden Perfection
Heat a large skillet over medium heat. When hot, add the sandwiches and cook for 3-4 minutes per side. Press down gently with a spatula during the first minute to ensure good contact with the pan.
Watch for the bread to turn a deep golden brown and the cheese to start melting around the edges. Don’t rush this—you want that crisp exterior and fully melted interior. If cooking multiple batches, keep the finished sandwiches warm in a 200°F oven.
Remove from heat when both sides are crispy and the cheese is fully melted. Let rest for 1 minute before serving—the cheese needs this time to set slightly so it doesn’t all ooze out when you cut it.
Pro Tips For Making Fried Grilled Cheese
- Use Mayo Outside: Spread a thin layer of mayonnaise on the outer sides of the bread instead of butter—it browns better and creates a crispier crust without burning. I learned this the hard way after my butter kept scorching.
- Mix Cheeses Evenly: Grate the sharp cheddar and Gruyère together and distribute them all the way to the edges of the bread. Sounds obvious, but it prevents those sad, cheese-less bites.
- Low and Slow: Cook on medium-low heat and resist the urge to rush it—high heat will burn the bread before the cheese melts. After ruining a few sandwiches, I finally figured out patience pays off.
- Press Gently: Use a spatula to press down lightly on the sandwich while cooking, but don’t squish it. My grandmother swore by this, and she was right: it guarantees even contact and melty cheese.
Storing and Reheating fried grilled cheese
Refrigerator Storage
Let sandwiches cool for no more than 30 minutes before wrapping in parchment paper then foil. Store in an airtight container at 40°F or below for up to 2 days. The cheese will firm up, making them easier to reheat. ❄️
Freezer Storage
For longer storage, wrap cooled sandwiches in plastic wrap then foil, and freeze for up to 1 month. Label with the date—I use 3M masking tape and a Sharpie. Thaw overnight in the fridge before reheating to maintain texture.
Skillet Reheating
Heat a clean skillet over medium-low heat. Add sandwiches and cook for 2-3 minutes per side until the exterior is crispy and the cheese melts. Adding a pat of butter to the pan revives the original richness. 🔥
Air Fryer Method
Preheat your air fryer to 350°F. Place sandwiches in the basket in a single layer and heat for 3-4 minutes, flipping halfway. This method restores the crispiness better than a microwave. I use my Ninja Foodi for this.
Nutrition Facts
Frequently Asked Questions
Can I use a different type of bread?
Sourdough or brioche work beautifully for extra crispiness. Avoid thin sandwich bread as it won’t hold up to the heat.
Why add mayonnaise to the butter?
The mayo creates a superior crust and prevents burning. It browns better than butter alone, giving that perfect golden color and extra crunch.
How do I prevent the cheese from oozing out?
Let the sandwich rest for 1 minute after cooking. This allows the cheese to set slightly so it stays inside when you cut it.
Can I make these ahead of time?
Yes! Assemble without cooking, wrap tightly, and refrigerate for up to 2 days. Cook just before serving for best results.

Trained in classic French technique but raised on slow-cooked ribs and spicy rubs, she blends culinary skill with smoke and soul.
- Hamburgers in Sauce Recipe Crock Pot: Slow-Cooked Savory Delight - October 3, 2026
- Sanjeev Kapoor Egg Biryani Recipe: Fragrant Spiced Rice With Boiled Eggs - October 3, 2026
- Recipe for French Pork Spread Gorton: Savory Gallic Flavors in a Spreadable Delight - October 3, 2026