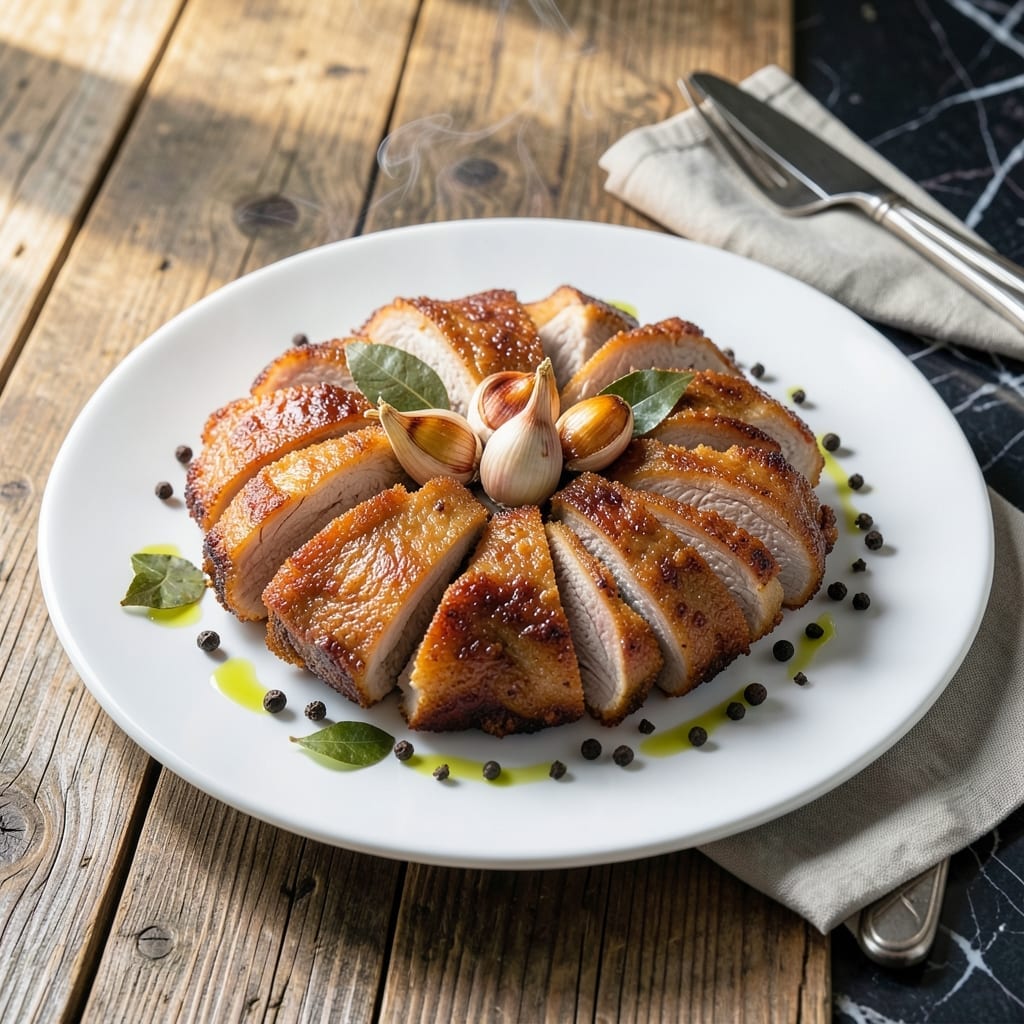
This Filipino lechon kawali delivers crispy, golden pork belly that shatters at the touch, with tender meat underneath. A traditional method of boiling then frying ensures perfect texture every time.
The secret lies in the two-step process: first simmering the pork with aromatics until fork-tender, then deep-frying for that signature crispy exterior. The garlicky vinegar dip cuts through the richness beautifully.
You’ll achieve restaurant-quality results at home with just a few simple ingredients. The vinegar dip, with its sharp tang and garlic punch, is the ideal complement to the rich pork.
Serve this as a main dish with steamed rice for a satisfying meal that’s sure to impress.
Ingredients for Fried Pork Belly Recipe Filipino
Simple ingredients deliver restaurant-quality crispy pork belly with garlicky vinegar dip at home.
| Ingredient | Amount | Notes |
|---|---|---|
| Pork Belly 🥓 | 2 lb | Skin-on, cut into 2-inch chunks |
| Water 💧 | 8 cups | For boiling pork |
| Bay Leaves 🍃 | 4 whole | Dried or fresh |
| Garlic Cloves 🧄 | 8 cloves | Smashed for boiling |
| Whole Black Peppercorns 🌶️ | 1 tbsp | Lightly crushed |
| Kosher Salt 🧂 | 1 tbsp | For seasoning pork |
| Vegetable Oil 🫒 | 4 cups | For deep frying |
| White Vinegar 🍶 | ½ cup | For dipping sauce |
| Garlic Cloves 🧄 | 6 cloves | Minced for dip |
| Soy Sauce 🥫 | 2 tbsp | For dipping sauce |
| Black Pepper 🌶️ | ½ tsp | Freshly ground for dip |
| Red Chili Flakes 🌶️ | ½ tsp | Optional for heat in dip |
[recipe_ingredient_scaler]
The pork belly quality is non-negotiable. Look for skin-on cuts with even fat distribution at Asian markets or specialty butchers—supermarkets often carry pre-cut strips that work perfectly. Bay leaves should be fresh if possible, but dried are acceptable. The peppercorns must be whole and crushed just before use for optimal aroma release during the boiling process.
No pork belly available? Pork shoulder with fat cap intact can work in a pinch, though the texture won’t be identical. For the vinegar dip, apple cider vinegar at the same amount offers a milder alternative. Fish sauce (1 tsp) can replace soy sauce for a more authentic Filipino flavor profile. The garlic in the dip can be adjusted to taste—some prefer a more subtle presence.
The cooked pork belly can be refrigerated in its broth for up to 3 days before frying. The dipping sauce keeps well in the fridge for 1 week in a sealed container. Always bring the pork to room temperature before frying to ensure even cooking and optimal crispiness.
Why You’ll Love This Recipe
- One-Pot Wonder: I just simmer the pork belly with garlic and bay leaves in one pan, then crisp it up—minimal mess, maximum flavor.
- Crispy & Savory: That garlic-infused crust with the tender fat inside? Honestly, it’s the reason I make this every week.
- Feeds the Crowd: Between us, it’s my go-to for family gatherings—everyone fights over the crackling edges.
- Budget Stretch: Pork belly is affordable here, and leftovers (if any) taste even better the next day in rice or sandwiches.
Step-by-Step Instructions for Crispy Lechon Kawali with Garlicky Vinegar Dip
This method ensures maximum crispiness with a tender interior and the perfect tangy dipping sauce.
Step 1: Boil the Pork Belly with Aromatics
Place the 2 lb Pork Belly in a large pot with the 8 cups Water, 4 whole Bay Leaves, 8 cloves Garlic Cloves (smashed), 1 tbsp Whole Black Peppercorns (lightly crushed), and 1 tbsp Kosher Salt. Bring to a boil over high heat.
Once boiling, reduce to a simmer and cook for 45-60 minutes until the pork belly is tender when pierced with a fork. This step removes impurities and infuses the meat with subtle flavor, ensuring it stays juicy after frying. Skim off any foam that rises to the surface during boiling.
Step 2: Dry and Chill the Pork for Crispiness
Remove the pork belly from the water and pat it completely dry with paper towels. Any remaining moisture will cause the oil to splatter when frying. I press firmly to absorb as much liquid as possible from both the skin and the meat.
Let the pork belly air-dry on a wire rack for 15-20 minutes at room temperature, then refrigerate uncovered for at least 1 hour. This drying process is critical—it ensures the skin crispens evenly and prevents oil absorption. The colder the pork, the better the crisp when it hits the hot oil.
Step 3: Deep-Fry the Pork Belly to Golden Perfection
Heat the 4 cups Vegetable Oil in a deep, heavy-bottomed pot to 325-350°F. Use a deep-fry or candy thermometer for accuracy. Carefully lower the pork belly chunks into the oil in batches to avoid overcrowding, which would lower the oil temperature and result in greasy meat.
Fry for 12-15 minutes until the skin is deep golden brown and blistered. Turn the pieces occasionally for even browning. You’ll know it’s ready when the skin is crisp and the internal temperature reaches 195°F. Use a slotted spoon to transfer the pork belly to a paper towel-lined plate to drain excess oil.
Step 4: Prepare the Garlicky Vinegar Dipping Sauce
While the pork fries, combine the 0.5 cup White Vinegar, 6 cloves Garlic Cloves (minced), 2 tbsp Soy Sauce, 0.5 tsp Black Pepper (freshly ground), and 0.5 tsp Red Chili Flakes in a small bowl. Stir well and let it sit for 5 minutes to allow the flavors to meld.
The vinegar should be sharp and tangy, balanced by the saltiness of the soy sauce and the heat from the chili flakes. Adjust the Red Chili Flakes to taste if you prefer more or less spice. This sauce cuts through the richness of the pork beautifully, making every bite irresistible.
Pro Tips For Making Fried Pork Belly Recipe Filipino
- Boil First: Parboil the pork belly in water with bay leaves, garlic, and peppercorns for 30 minutes first—this renders out excess fat and keeps the meat tender before frying.
- Dry Thoroughly: After boiling, pat the pork belly completely dry with paper towels. Any moisture left will cause splattering and prevent crispy skin.
- Low and Slow: I learned this the hard way—fry the pork belly on medium-low heat to render fat gradually without burning the outside before the inside cooks.
- Use Cold Water: Start the pork belly in cold water for boiling to ensure even cooking and prevent the meat from seizing up and getting tough.
Creative Variations of This Dish
Sweet and Spicy Glaze
Swap the vinegar dip for a sticky glaze by simmering ½ cup banana ketchup with 2 tbsp brown sugar and 1 tbsp soy sauce. Brush over the pork belly during the last 2 minutes of frying for a glossy finish that’s popular in some Filipino households. 🔥
Oven-Baked Alternative
For a less messy approach, roast the dried pork belly on a wire rack at 400°F for 45-60 minutes. Toss with 1 tbsp baking powder before baking to enhance crispiness. Flip halfway through for even browning.
Crispy Pork Floss
Shred the fried pork belly into fine threads for a fluffy texture. Toss with 1 tsp five-spice powder and 2 tbsp cornstarch before deep-frying again until puffed. This variation is often used as a topping for rice or congee.
Adobo-Style Twist
After boiling, marinate the pork belly in ½ cup soy sauce, ½ cup vinegar, 10 crushed garlic cloves, and 1 tsp black peppercorns for 2 hours before frying. The result is a tangy, savory version reminiscent of Filipino adobo. ✨
Stuffed Pork Belly
Butterfly the pork belly and stuff with a mix of chopped lemongrass, minced garlic, and salt. Roll tightly, secure with twine, and boil before frying. This adds aromatic depth to every bite.
Air Fryer Method
For a quicker option, air-fry the dried pork belly at 375°F for 15-20 minutes, shaking the basket halfway. Spray lightly with oil for extra crispiness. This works well for smaller batches.
Nutrition Facts
Frequently Asked Questions
Can I use pork shoulder instead of pork belly?
Yes, but the texture will differ. Pork shoulder works in a pinch but won’t be as rich or crispy.
Why do I need to boil the pork first?
Boiling removes impurities and ensures tender meat. It also infuses flavor from aromatics like garlic and bay leaves.
How do I get extra crispy skin?
Pat the pork completely dry, then refrigerate uncovered for 1 hour. This removes moisture for maximum crispiness.
Can I make the dip ahead of time?
Yes! The vinegar dip keeps well in the fridge for up to 1 week in a sealed container.

Trained in classic French technique but raised on slow-cooked ribs and spicy rubs, she blends culinary skill with smoke and soul.
- Hamburgers in Sauce Recipe Crock Pot: Slow-Cooked Savory Delight - October 3, 2026
- Sanjeev Kapoor Egg Biryani Recipe: Fragrant Spiced Rice With Boiled Eggs - October 3, 2026
- Recipe for French Pork Spread Gorton: Savory Gallic Flavors in a Spreadable Delight - October 3, 2026