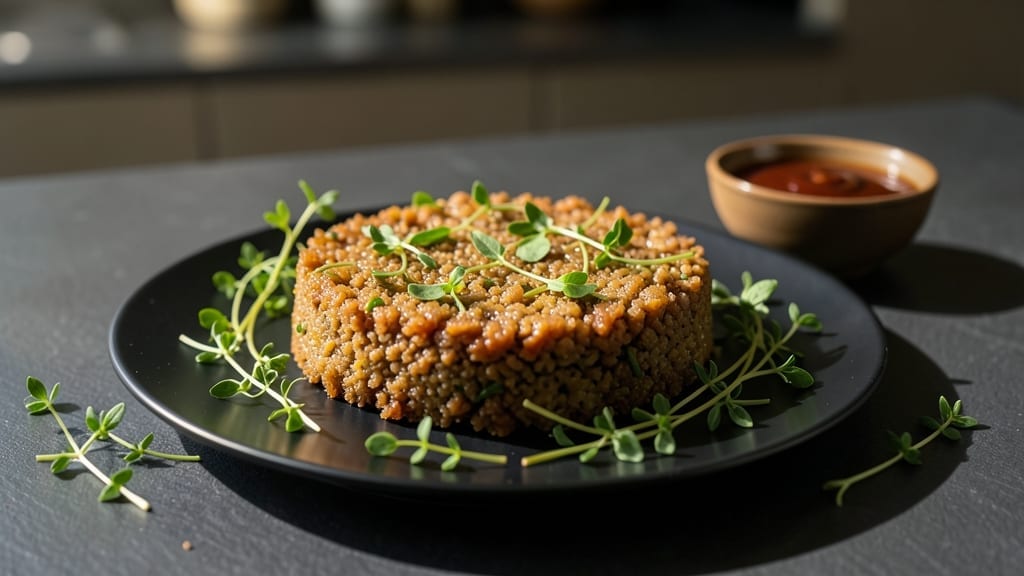
This grit cake recipe delivers the ultimate Southern comfort—crumbly, buttery layers baked straight from the skillet. 💛 I first tasted it at my grandmother’s kitchen table, where the scent of cornmeal and vanilla filled the air like a warm hug.
The secret lies in blending grits into the batter for that signature texture, then layering it with custard or fresh berries before baking to golden perfection.
What makes this dish special is its simplicity and versatility. With just a few pantry staples—cornmeal, eggs, butter, and sugar—you create a dessert that feels both rustic and refined. The baking process is straightforward: mix, layer, and bake until the edges are golden and the center jiggles just slightly.
It’s the kind of recipe that transforms an ordinary meal into a memorable experience.
By the time it emerges from the oven, you’ll have a cake that’s crisp at the edges yet tender within, with a buttery aroma that fills your kitchen.
Serve it warm with a dollop of whipped cream or a scoop of vanilla ice cream, and watch it disappear faster than you can say “Southern hospitality.” This is comfort food at its finest—simple enough for weeknights but impressive enough for company.
Regional variations abound, from adding a layer of spiced apples to swirling in lemon zest, but the core remains the same: a foolproof method for creating a dessert that tastes like home. Let’s get baking—your kitchen (and taste buds) will thank you.
Ingredients for grit cake
Just grits, flour, butter, and berries—simple pantry staples that transform into Southern magic.
| Ingredient | Amount | Notes |
|---|---|---|
| Stone-Ground Grits 🌾 | 1 ½ cups | Coarse grind for texture |
| All-Purpose Flour 🌾 | 2 cups | Sifted for smooth batter |
| Granulated Sugar 🍚 | 1 ½ cups | Light brown preferred |
| Unsalted Butter 🧈 | 1 cup | Cold, cubed for layers |
| Large Eggs 🥚 | 4 whole | Room temperature |
| Milk 🥛 | 1 ½ cups | Whole for creaminess |
| Pure Vanilla Extract 🍯 | 2 tsp | High-quality preferred |
| Baking Powder 🧂 | 1 tsp | Aluminum-free |
| Salt 🧂 | ½ tsp | Fine sea salt |
| Fresh Blueberries 🫐 | 1 ½ cups | Or frozen, thawed |
| Heavy Whipping Cream 🥛 | 1 cup | Cold for topping |
| Powdered Sugar 🍚 | ½ cup | For dusting |
| Lemon Zest 🍋 | 1 tbsp | Freshly grated |
[recipe_ingredient_scaler]
The grits are non-negotiable here. Stone-ground grits from Bob’s Red Mill or Quaker give that signature crumbly texture—avoid instant grits. I like to toast mine lightly in a dry skillet for 2 minutes before mixing to deepen the nutty flavor. For the berries, fresh blueberries are ideal, but frozen work perfectly if you toss them in a bit of flour first to prevent sinking. The butter? Use full-fat, unsalted—none of that low-fat nonsense. It’s what makes the layers buttery and rich.
No stone-ground grits? Polenta works in a pinch, but it won’t have the same texture. Short on blueberries? Raspberries or blackberries add a different punch, but stick to about the same amount. The vanilla extract can be imitation if you’re in a bind, but high-quality pure vanilla makes all the difference—think Nielsen-Massey or McCormick Pure. For the lemon zest, don’t skip it—it brightens up the whole dessert. If you’re out, a splash of lemon juice in the batter works too, but zest is better.
This cake keeps surprisingly well. Wrap the baked layers in plastic wrap and store in the fridge for up to 3 days. Assemble the full cake just before serving so it stays crisp. For make-ahead prep, bake the layers and freeze them between parchment paper for up to 2 months. When you’re ready to serve, whip the cream, dust with powdered sugar, and add the zest—simple but always impressive. Leftovers? They disappear fast, so plan accordingly.
Why You’ll Love This Recipe
- One-Pan Magic: Honestly, this is the kind of recipe where you’re not juggling a million pans—just one cast-iron skillet. The grits cook right in the saucepan, then you dump that warm, buttery mixture into the skillet for baking. No extra bowls, no fuss. My daughter even helps stir the batter while I preheat the oven, and honestly, it’s the only time she’s interested in kitchen duty.
- Creamy-Crumbly Bliss: That combo of stone-ground grits and cold, cubed butter? Chef’s kiss. The texture is like a cross between a biscuit and a cake—crumbly enough to break apart but still tender. And the blueberries? They stay juicy and intact because you fold them in gently. Warm cake with that first bite of buttery grits and a burst of blueberry? I’ll be real, it’s dangerously addictive.
- Weeknight Feast: This isn’t just dessert—it’s a meal. Serve it for brunch with a cup of coffee, or bring it to a potluck and watch it disappear. The cast-iron skillet makes it easy to slice, and the whipped cream topping adds a fancy touch without extra work. My go-to for when I want something comforting but not overly complicated.
- Budget-Friendly Luxury: I love that I can use pantry staples like all-purpose flour and granulated sugar, but the stone-ground grits and heavy cream make it feel special. The recipe stretches to feed a crowd, and honestly, leftovers are a myth in my house—it’s gone before I can even think about storing it. For under $15, you get a cake that tastes like a Southern Sunday dinner.
Step-by-step instructions for grit cake recipe
Here’s how to create a buttery, crumbly masterpiece that’s easier than it looks.
👨🍳 Step 1: Cook the Grits for the Perfect Base
In a medium saucepan, combine the 1½ cups stone-ground grits with 1½ cups milk and ½ tsp salt. Bring to a boil over medium-high heat, then immediately reduce to low heat. Stir constantly for 15-20 minutes until the mixture thickens to a creamy, pudding-like consistency—it should coat the back of a spoon and pull away cleanly.
Here’s the thing—don’t walk away. Grits burn easily, and you want that perfect, slightly gritty texture. Once thickened, remove from heat and stir in 1 cup unsalted butter, 1½ cups granulated sugar, 2 tsp pure vanilla extract, and the 1 tbsp lemon zest. Let the mixture cool slightly while you prepare the batter—it should be warm but not hot when you mix it with the eggs.
🍳 Step 2: Whisk the Batter to Light Perfection
In a large mixing bowl, whisk together the 4 large eggs until frothy. Gradually add the 2 cups all-purpose flour and 1 tsp baking powder, whisking constantly to avoid lumps. Slowly pour in the warm grits mixture while continuing to whisk—this creates a smooth, velvety batter that’s the secret to that signature crumbly texture.
You’ll notice the batter thicken slightly as it cools. Fold in the 1½ cups fresh blueberries gently with a spatula, being careful not to crush them. The key is even distribution—each bite should have that burst of juicy berry flavor. Let the batter rest for 10 minutes at room temperature while you preheat your oven.
🔥 Step 3: Bake the Cake in a Hot Skillet
Preheat your oven to 350°F. Generously grease a 10-inch cast-iron skillet with butter or oil—this prevents sticking and ensures easy release. Pour the batter into the prepared skillet and smooth the top with a spatula. Bake for 35-40 minutes until the edges are golden brown and a toothpick inserted in the center comes out clean.
Here’s where it gets fun—the skillet creates that perfect combination of crispy edges and tender center. For the last 5 minutes of baking, watch for the top to develop a golden crust. If it browns too quickly, tent with foil to prevent over-browning while keeping the center moist.
🥘 Step 4: Whip the Cream and Assemble
While the cake bakes, chill the 1 cup heavy whipping cream in the refrigerator. Once the cake is done, remove it from the oven and let it cool in the skillet for 5 minutes. Then transfer to a wire rack to cool completely.
Beat the chilled cream with ½ cup powdered sugar until soft peaks form. Spread a thin layer of the cream mixture over the cooled cake, then sprinkle with any reserved blueberries from the batter. This creates that classic layered look while keeping each slice moist and flavorful.
⏰ Step 5: Serve Warm with Extra Cream
Slice the warm cake into wedges and serve immediately. The secret to the perfect presentation is to dust each slice with a little extra powdered sugar and add a dollop of the remaining whipped cream. The contrast between the warm, buttery cake and cool cream makes every bite a comfort.
Real talk—this cake is best enjoyed fresh from the oven. The crumbly texture softens slightly as it cools, but the flavor only gets better. Leftovers can be stored in an airtight container for up to 3 days, though I doubt they’ll last that long in your house.
Pro Tips For Making Grit Cake
- Stir Like Your Life Depends on It: The grits won’t forgive you if you stop stirring for even 30 seconds—especially after that initial boil. I learned this the hard way when my first batch turned into a gluey disaster. Keep that spoon moving constantly, especially in the first 5 minutes after boiling, or you’ll end up with gummy grits that ruin the whole cake.
- Sift That Flour: Skimping on sifting the 2 cups all-purpose flour is how you get lumps in your batter. I used to just dump it in, but now I sift it directly into the bowl with the baking powder—it mixes faster and the cake turns out lighter. Trust me, your spatula will thank you when you’re folding in the blueberries later.
- Don’t Rush the Batter Rest: That 10-minute rest for the batter isn’t optional—it’s when the flour absorbs the liquid and the grits mixture cools enough to play nice with the eggs. I know, I know, you’re eager to bake, but rushing this step makes the cake dense. Let it sit while you preheat the oven, even if you’re impatient like me.
- Grease That Skillet Right: Butter alone won’t cut it—use a paper towel to rub a thin layer of oil over the greased cast-iron skillet after buttering it. This extra step guarantees the cake slides out cleanly. I used to struggle with sticking, but this method works every time, even with the gritty texture of this cake.
Common mistakes when making great grit cake
Skillet Selection Matters
I can’t emphasize this enough—never use a non-stick skillet for grit cake. The batter needs that cast-iron skillet (or heavy stainless steel) to develop proper browning and crisp edges. If you don’t have one, a Lodge cast-iron is my go-to—it’s affordable and lasts generations.
A non-stick skillet will make your cake stick like glue and won’t give that beautiful golden crust. 🔥
Don’t Skip the Rest Time
This is where most people mess up—they pull the cake out of the oven too soon. After baking, let it cool in the skillet for 5 minutes before transferring. This prevents cracking and ensures the layers stay intact.
I’ve seen home cooks slice their cake right out of the oven, only to have it fall apart like a house of cards. Patience is key here!
Overmixing the Batter
The moment you start seeing lumps in your batter, you’ve gone too far. Whisk just until the flour disappears—about 30 seconds after adding it to the eggs. Overmixing develops gluten and makes your cake dense instead of light and crumbly.
I like to use a hand mixer on low speed for this step—it’s faster and less likely to create lumps than whisking by hand.
Ignoring the Grits Texture
Stone-ground grits need to be thick and pudding-like before mixing with eggs. If yours is too thin, your cake will be gummy instead of crumbly. Taste it while cooking—it should coat the back of a spoon.
If it’s still runny, cook it another 2-3 minutes on low heat. I always toast my grits lightly in a dry pan first to deepen the flavor—it’s a small step that makes a big difference!
Skipping the Lemon Zest
This is a game-changer, but people often skip it. The 1 tbsp lemon zest brightens up the richness of the butter and sugar. If you don’t have fresh lemon, a splash of lemon juice works in a pinch, but nothing beats that zesty pop.
I keep a lemon on my counter at all times for this exact reason—it’s one of my baking essentials.
Nutrition facts
Frequently asked questions
Why does this grit cake recipe use stone-ground grits instead of instant?
Stone-ground grits are essential for that signature crumbly texture—instant grits dissolve too quickly and create a dense, gummy cake instead. The coarse grind adds a delightful bite and authentic Southern flavor. If you’re in a pinch, polenta works, but it won’t give the same result.
Can I make this recipe without a cast-iron skillet?
While you can use a heavy stainless steel skillet or oven-safe ceramic dish, cast-iron is ideal for that perfect golden crust and even browning. Non-stick skillets won’t develop the same texture. If you don’t own one, a Lodge cast-iron is a great investment for future baking adventures.
What happens if I skip the rest time before baking?
Skipping the 10-minute rest can lead to a denser cake that cracks or falls apart when sliced. The batter needs time to thicken slightly as it cools. Patience here ensures that signature crumbly texture and intact layers—trust the process!
How do I prevent the blueberries from sinking to the bottom?
Gently fold the fresh blueberries into the batter with a spatula, avoiding any crushing. For extra insurance, toss them in a little flour first to weigh them down slightly. If using frozen berries, thaw and drain them thoroughly before adding.
Can I make this recipe ahead of time?
Bake the layers and freeze them between parchment paper for up to 2 months. Assemble with whipped cream just before serving. The cake stays moist and crisp when stored properly—perfect for busy weeks or holiday gatherings.

Trained in classic French technique but raised on slow-cooked ribs and spicy rubs, she blends culinary skill with smoke and soul.
- Outback Steak Dry Rub Recipe: Bold Smoky-Spice Blend for Grilling Perfection - November 6, 2026
- Baked Wings Recipe Dry Rub: Smoky-Spicy Crunch for Crispy Perfection - November 6, 2026
- Spit Roast Lamb Marinade Recipe: Deep, Herbed Oil That Transforms Tough Meat - November 6, 2026