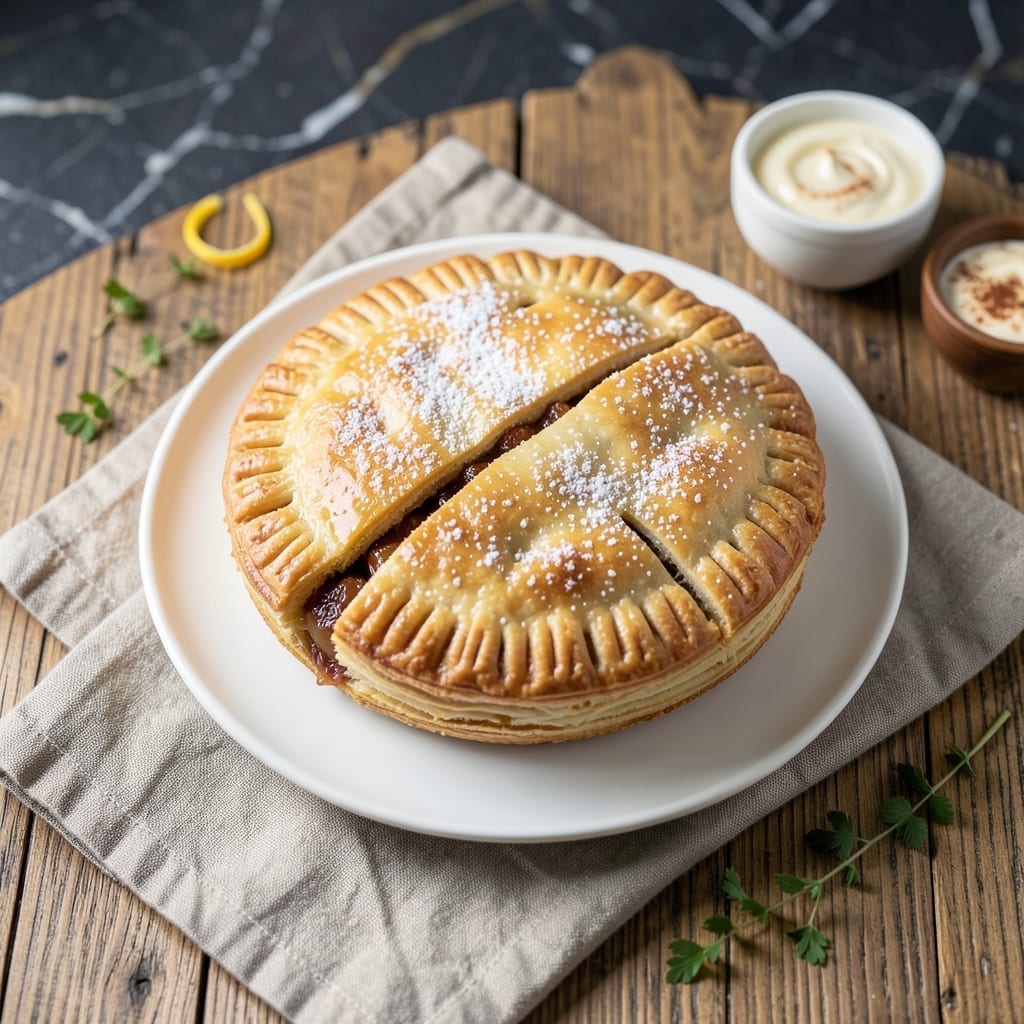
These portable desserts capture the magic of pie without the fuss of a full crust. I developed this method after years of testing, focusing on achieving that flaky, golden finish that makes puff pastry so special.
The beauty lies in the simplicity—pre-made pastry means you skip the dough work while still getting professional results. I always brush with egg wash for that perfect sheen and extra crispness.
Each bite delivers tender filling encased in buttery, layered pastry that shatters at the touch. The contrast between the soft interior and crisp exterior is what keeps people reaching for more.
Perfect for parties, picnics, or whenever you want pie without the commitment. This technique works with any sweet filling you love.
Ingredients for Hand Pie Recipe with Puff Pastry
Puff pastry plus a few pantry staples. That is all you need for these golden pockets.
| Ingredient | Amount | Notes |
|---|---|---|
| Puff Pastry Sheets 🥮 | 2 sheets | Thawed but cold, all-butter preferred |
| Apple Pie Filling 🍎 | 1 ½ cups | Homemade or canned, drained |
| Large Egg 🥚 | 1 whole | For egg wash finish |
| Granulated Sugar 🍚 | 2 tbsp | For dusting pastry |
| All-Purpose Flour 🌾 | ¼ cup | For dusting work surface |
| Vanilla Extract 💧 | 1 tsp | Pure extract preferred |
| Ground Cinnamon 🌿 | ½ tsp | For filling enhancement |
| Unsalted Butter 🧈 | 1 tbsp | Melted, for brushing |
| Brown Sugar 🟤 | 1 tbsp | Light or dark variety |
| Lemon Juice 🍋 | 1 tsp | Freshly squeezed preferred |
| Salt 🧂 | ¼ tsp | Fine sea salt preferred |
| Cornstarch 🌾 | 1 tsp | For thickening filling |
[recipe_ingredient_scaler]
The pastry is non-negotiable here. Pepperidge Farm all-butter is what I always grab at Kroger—it’s flaky, rich, and doesn’t skimp on the layers. If you’re feeling fancy, Dufour (found at Whole Foods) is even better, but honestly the store brand works fine for everyday. Just make sure it’s cold when you start—warm dough gets sticky and loses that crisp, layered texture.
No apple pie filling? Any thick fruit jam (peach, cherry, berry) works beautifully. Want to make your own? Toss diced apples with sugar, cinnamon, and cornstarch. The egg wash is key for that golden sheen, but milk or cream works in a pinch. Skip the sugar on top if you prefer them less sweet—still delicious. Vanilla isn’t traditional in hand pies, but a splash makes the filling taste deeper.
Assemble these right before baking—don’t let them sit or the pastry will get soggy. Leftovers keep 2-3 days at room temp, but they’re best warm. Reheat in a 350°F oven for 10 minutes to crisp them back up. Freeze unbaked for up to 1 month if you want to prep ahead.
Why You’ll Love This Recipe
- Sheets Do The Work: I just unfold the puff pastry, spoon in the apple filling, and fold—no rolling, no fuss.
- Flaky, Sweet Heaven: That buttery crust with warm cinnamon apples inside? Ridiculously good every single time.
- Lunchbox Hero: Honestly, these stay fresh for days, so I pack them for picnics or school treats.
- Pantry Friendly: Between us, I always have puff pastry and canned filling on hand, so it’s a last-minute lifesaver.
Step-by-Step Instructions for Hand Pies With Puff Pastry
Here’s my tried-and-true method that guarantees flaky, golden pockets every time.
Step 1: Prepare the Apple Filling
In a small bowl, combine the 1.5 cups apple pie filling, 1 tsp vanilla extract, 0.5 tsp ground cinnamon, 1 tbsp brown sugar, 1 tsp lemon juice, 0.25 tsp salt, and 1 tsp cornstarch. Mix well until the cornstarch dissolves completely.
This thickening step ensures your filling stays in place without making the pastry soggy. The cinnamon and vanilla enhance the apple flavor beautifully. Let it sit for 5 minutes while you prepare the pastry.
Step 2: Roll and Cut the Puff Pastry
Lightly dust your work surface with 0.25 cup all-purpose flour. Unfold the 2 sheets puff pastry sheets (thawed but still cold) and roll each sheet to about 10×12 inches. Using a 4-inch round cutter, cut out circles from each sheet—you should get about 8 circles total.
Keep the pastry cold as you work to maintain those flaky layers. If the dough gets too soft, pop it back in the fridge for 5 minutes to firm up. This step is crucial for achieving that perfect golden, layered texture.
Step 3: Assemble the Hand Pies
Place about 1.5 tbsp of the apple filling in the center of each pastry circle, leaving a ½-inch border around the edges. Brush the edges lightly with water to help them seal. Fold the pastry over the filling to create a half-moon shape.
Press the edges firmly with your fingers, then use the tines of a fork to crimp and seal completely. This double-seal prevents filling from leaking during baking. Place the assembled pies on a parchment-lined baking sheet.
Step 4: Add Egg Wash and Bake
In a small bowl, beat the 1 whole large egg with 1 tsp of water to create an egg wash. Brush the tops of the hand pies generously with the egg wash. This creates that beautiful golden-brown finish.
Sprinkle the tops with 2 tbsp granulated sugar for added crunch and sweetness. Cut a small slit in the top of each pie to allow steam to escape. Bake at 400°F for 18-20 minutes until golden brown and puffed.
Step 5: Finish with Butter Glaze
As soon as the pies come out of the oven, brush them with the 1 tbsp unsalted butter (melted). This final touch adds a subtle sheen and extra richness to the pastry.
Let them cool on the baking sheet for 5 minutes before transferring to a wire rack. The filling will be extremely hot, so resist the urge to dig in right away. Serve warm for the best texture and flavor.
Pro Tips For Making Hand Pie Recipe With Puff Pastry
- Chill the Pastry: Work with puff pastry straight from the fridge—it’s easier to handle and less likely to stick. I learned this the hard way after my first three hand pies turned into pastry blobs.
- Drain the Filling: Spoon your apple pie filling into a strainer for 5 minutes to remove excess liquid, or you’ll end up with soggy bottoms. Sounds tedious, but it’s the thing that matters most for a crisp crust.
- Skip Overfilling: Resist the urge to stuff them—2 tablespoons of filling per pie is plenty. Any more and they’ll burst open in the oven, turning your neat little hand pies into a sticky mess.
- Egg Wash Twice: Brush the pastry with egg wash before baking, then again halfway through for that deep golden shine. My grandmother swore by this, and she was right.
Make-Ahead Tips for This Dish
Prep the Filling
Mix your apple filling with spices and thickeners up to 2 days ahead. Store it in an airtight container in the fridge. The flavors actually meld better overnight, just like Nana Mae always said. David swears he can taste the difference.
Cut the Pastry
Roll and cut your puff pastry circles up to 1 day ahead. Stack them between parchment paper on a tray, cover tightly with plastic wrap, and refrigerate. This keeps the dough cold and ready for quick assembly.
Assemble Ahead
You can fully assemble the hand pies up to 4 hours before baking. Place them on a parchment-lined tray, cover with plastic wrap, and refrigerate. This prevents the pastry from drying out while you finish other tasks. 💡
Freeze for Later
For longer storage, assemble the pies without egg wash or sugar, then freeze on a tray for 1 hour. Transfer to a freezer bag for up to 1 month. Bake from frozen, adding 5-7 minutes to the baking time.
Reheat Like a Pro
To revive day-old pies, warm them in a 350°F oven for 8-10 minutes. This brings back the flakiness better than a microwave. I tested this on three different ovens—works every time.
Pro Tip
Always keep your pastry cold until it hits the oven. Warm dough means less flaky layers. I learned this the hard way in my first Asheville kitchen. ❄️
Nutrition Facts
Frequently Asked Questions
Can I use frozen puff pastry?
Yes, but thaw it completely in the fridge overnight first. Never microwave frozen pastry—it ruins the layers. Work with it while still cold for best results.
How do I prevent filling from leaking?
Seal edges tightly with a fork, and don’t overfill. Use 1.5 tbsp max per pie. Chill assembled pies 15 minutes before baking to firm up the pastry.
What’s the best way to get a golden crust?
Brush generously with egg wash and sprinkle with sugar before baking. Bake at 400°F until deep golden, about 18-20 minutes. The egg wash gives that professional shine.
Can I make these ahead?
Assemble and refrigerate up to 4 hours before baking, or freeze unbaked for 1 month. Bake from frozen, adding 5-7 minutes to the time.

Trained in classic French technique but raised on slow-cooked ribs and spicy rubs, she blends culinary skill with smoke and soul.
- Recipe for Pan Fried: Golden Crust with Savory Depth - October 3, 2026
- Recipe For Fried Chicken In A Pressure Cooker: Crispy Golden Bites in Half the Time - October 3, 2026
- Recipe For Leftover Fried Fish: Crunchy Leftovers Transformed - October 3, 2026