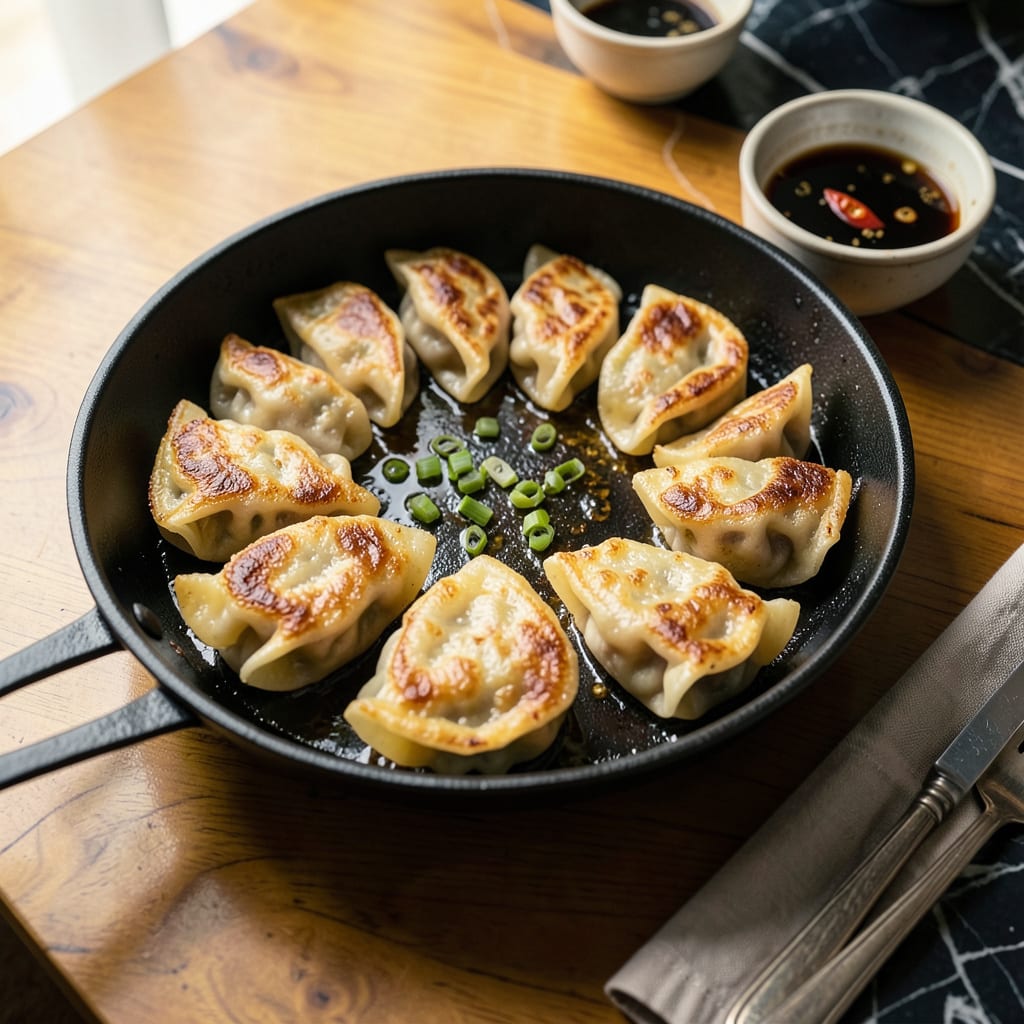
I’ll be real with you—cooking frozen gyoza perfectly is all about that crispy bottom and juicy filling. No soggy dumplings here. After burning through a few batches (literally), I cracked the code for getting that golden crust every time without overcooking the insides.
Here’s the thing—most people just toss frozen gyoza in a pan and hope for the best. But the secret is a two-step process: first searing to create that crispy base, then adding water to steam them through. It’s foolproof once you know the timing, and you don’t need any fancy equipment—just a non-stick pan and some oil.
You’ll end up with dumplings that have shatteringly crisp bottoms, tender wrappers, and hot, flavorful fillings. The kind that make you want to skip the takeout menu entirely. I like to serve them with a quick soy-vinegar dip, but they’re honestly good enough to eat straight from the pan.
Whether you’re making a quick snack or appetizers for a crowd, this method works with any frozen gyoza brand. Just follow the timing carefully—those extra 30 seconds make all the difference between perfect and overdone.
📚 In This Guide
- What You’ll Need
- Instructions
- Tips and Common Mistakes
What Youll Need
- ● Frozen gyoza – 12–16 pieces (check package for weight, usually 10–12 oz)
- ● Neutral oil – 1–2 tbsp (vegetable, canola, or avocado oil for high heat)
- ● Water – ¼ cup (for steam-frying)
- ● Non-stick skillet – 10–12″ with lid (cast iron or stainless steel works too)
- ● Tongs or spatula – for flipping and serving
- ● Plate with paper towels – to drain excess oil
- ● Dipping sauce – soy sauce, rice vinegar, chili oil, or store-bought gyoza sauce
- ● Sesame seeds or green onions – for garnish
- ● Cooking spray – to prevent sticking if your pan isn’t non-stick
Instructions
Here’s the foolproof method for achieving golden, crispy gyoza with tender fillings—every single time.
Prepare the Frozen Gyoza and Pan
Remove your frozen gyoza from the freezer and place them on a plate while you prepare the pan. Don’t thaw them—this is the secret to maintaining their shape and preventing the filling from leaking during cooking. I like to work with about 12-16 gyoza at a time for a standard 10-inch nonstick skillet, which gives them enough room to crisp without crowding.
Heat the skillet over medium-high heat for 2 minutes until it’s properly hot. You’ll know it’s ready when a drop of water sizzles and evaporates immediately upon contact. This initial heat is crucial—it creates that instant sear when the gyoza hit the pan, which locks in the juices and starts building that coveted crispy bottom.
Create the Crispy Base with Oil and Water
Add 1 tablespoon of neutral oil (like vegetable or canola) to the hot pan and swirl to coat the bottom evenly. The oil should shimmer but not smoke—if it’s smoking, your heat is too high. Arrange the frozen gyoza in a single layer, flat-side down, in a circular pattern. You’ll hear an immediate sizzle—that’s the sound of perfection starting.
Let them cook undisturbed for 2-3 minutes until the bottoms turn golden brown. Here’s the thing—resist the urge to peek or move them during this time. The steam from the frozen gyoza will initially make them stick, but they’ll release naturally once that crispy crust forms. This is where the magic happens, so be patient and let the Maillard reaction work its wonders.
Steam for Tender Perfection
After achieving that golden crust, carefully add ¼ cup of water to the pan—it will sizzle violently, so stand back slightly. Immediately cover with a tight-fitting lid to trap the steam. This dual cooking method is what makes gyoza so special: the crispy bottom from pan-frying combined with the tender, juicy filling from steaming.
Reduce the heat to medium-low and let them steam for 5-6 minutes. You’ll know they’re done when the water has completely evaporated (you’ll hear the sizzling return) and the gyoza wrappers look translucent. The filling should reach an internal temperature of 165°F—use the tip of a paring knife to check one if you’re unsure. The wrapper will feel slightly resistant but not tough.
Finish with a Second Crisp
Remove the lid and increase the heat back to medium-high. Let the gyoza cook uncovered for an additional 1-2 minutes to evaporate any remaining moisture and restore that crispy bottom. You’ll see the edges of the wrappers start to get those beautiful golden-brown frills—that’s your visual cue they’re ready.
Here’s what I do for extra insurance: gently press down on one gyoza with a spatula. If it feels firm and crispy on the bottom while still slightly soft on top, you’ve nailed it. If it gives too much, let it go another 30 seconds. This final crisping step makes all the difference between good gyoza and restaurant-quality gyoza.
Serve with the Perfect Dipping Sauce
Transfer the gyoza to a plate using a thin spatula, being careful to keep that crispy bottom intact. Arrange them crispy-side up to showcase your handiwork. The ideal gyoza should have a deep golden-brown crust covering at least 70% of the bottom, with the wrapper slightly translucent and the filling juicy but not leaking.
Serve immediately with your favorite dipping sauce—I recommend a mix of soy sauce, rice vinegar, and a touch of sesame oil with chili crisp for heat. The contrast between the crispy bottom, tender wrapper, and flavorful filling is what makes gyoza so addictive. Eat them while they’re hot, as the texture changes dramatically once they cool. Pro tip: if you have leftovers, reheat them in a dry pan to revive the crispiness.
Tips and Common Mistakes
The difference between good gyoza and restaurant-quality perfection comes down to a few critical details. Here’s what I’ve learned from making hundreds of batches.
Heat Control: That initial 2 minutes of heating your pan over medium-high heat is non-negotiable. A properly heated pan creates an instant sear that prevents sticking and starts building that crispy crust immediately. I test my pan by flicking a few drops of water—they should dance and evaporate within seconds. If they just sit and bubble, your pan isn’t hot enough yet.
The Technique That Changed Everything: When adding the ¼ cup of water in Step 3, pour it along the edge of the pan, not directly over the gyoza. This prevents the sudden temperature shock from breaking the delicate wrappers. The moment you add the water, cover immediately with a tight-fitting lid to trap all that steam—this is what transforms frozen gyoza into tender, juicy perfection during those 5-6 minutes of steaming.
Visual Cues Matter: During that final 1-2 minutes of uncovered cooking in Step 4, watch for two things: the edges of the wrappers should develop golden-brown frills, and you should hear a consistent sizzle. If the sizzling stops, your pan isn’t hot enough to restore that crispy bottom. I always do the spatula test mentioned in the instructions—it’s the surest way to check doneness without cutting into one.
Equipment Tip: Use a 10-inch nonstick skillet as specified—it’s the ideal size for 12-16 gyoza with enough room for proper crisping. If you use a larger pan, the gyoza will spread out too much and won’t steam properly. A smaller pan causes crowding, which leads to uneven cooking and soggy bottoms. The nonstick surface is crucial for easy release of that perfect crispy crust.
Pro Tips for Cook Gyoza From Frozen
- The difference between good gyoza and restaurant-quality perfection comes down to a few critical details. Here’s what…
- Heat Control: That initial 2 minutes of heating your pan over medium-high heat is non-negotiable. A properly heated p…
- The Technique That Changed Everything: When adding the ¼ cup of water in Step 3, pour it along the edge of the pan, n…
Frequently Asked Questions
Do I need to thaw frozen gyoza before cooking?
Nope! Most frozen gyoza are designed to cook straight from the freezer—no thawing required. Thawing can make them soggy or cause filling leaks. Just follow the package instructions (usually pan-frying, boiling, or steaming) for best results. If you do thaw them, pat dry with a paper towel first.
How long does it take to cook frozen gyoza?
Typically 8–12 minutes depending on the method:
- Pan-frying: 6–8 mins (crispy bottom + steamed top)
- Boiling: 3–4 mins (until they float)
- Air frying: 8–10 mins at 375°F (shake halfway)
Can I cook frozen gyoza in an air fryer?
Preheat the air fryer to 375°F, lightly spray gyoza with oil, and cook for 8–10 minutes, flipping halfway. They’ll turn out crispy without deep-frying. Pro tip: Avoid overcrowding for even cooking!
Why did my gyoza stick to the pan or fall apart?
Two common culprits:
- Not enough oil: Use 1–2 tbsp of high-smoke-point oil (like avocado or vegetable) and heat it before adding gyoza.
- Overcrowding: Leave space between each piece so steam can escape. If they’re stuck, let them crisp longer—don’t force it!
What’s the best dipping sauce for frozen gyoza?
Classic pairings:
- Simple soy-vinegar: Mix 2 tbsp soy sauce, 1 tbsp rice vinegar, and 1 tsp sesame oil.
- Spicy kick: Add ½ tsp chili oil or sriracha.
- Store-bought: Look for gyoza sauce or ponzu near the Asian foods aisle.
Cooking frozen gyoza doesn’t have to be complicated—with the right technique, you can achieve golden, crispy perfection every time! 🍳 Whether you pan-fry, steam, or air-fry them, the key is patience and a hot skillet. Now that you’ve mastered the basics, why not experiment with dipping sauces or serving them as a crowd-pleasing appetizer?
Ready to impress? Grab a bag of frozen gyoza and get cooking—your taste buds (and dinner guests) will thank you! 😋

Trained in classic French technique but raised on slow-cooked ribs and spicy rubs, she blends culinary skill with smoke and soul.
- Recipe For Fried Chicken In A Pressure Cooker: Crispy Golden Bites in Half the Time - October 3, 2026
- Recipe For Leftover Fried Fish: Crunchy Leftovers Transformed - October 3, 2026
- Recipe for Crock Pot Swiss Steak: Slow-Cooked Beef With Mushroom Gravy - October 3, 2026