Clear, flavorful broth is the foundation of exceptional cooking, and mastering fat removal transforms homemade stock from good to professional-quality. This technique separates amateur results from restaurant-worthy bases for soups, sauces, and braises. The difference between cloudy, greasy broth and a crystal-clear consommé comes down to proper fat skimming—no special equipment required.
I’ve perfected this method through years of making everything from delicate French sauces to rich barbecue mop sauces. The process relies on understanding fat behavior at different temperatures and using simple tools you already own. Whether you’re preparing a light chicken noodle soup or reducing stock for demi-glace, removing excess fat creates cleaner flavors and better mouthfeel in your finished dishes.
The most effective approach combines timing, temperature control, and the right utensils. You’ll learn to recognize when fat is at its easiest removal point and how to extract it without losing precious broth. This isn’t about removing all fat—just controlling it for optimal flavor balance. The technique works equally well for beef, chicken, or vegetable stocks.
Once mastered, this skill elevates all your broth-based recipes. Use the defatted stock in our classic French Onion Soup or as the base for risottos and pan sauces. The clarity and purity of flavor will change how you approach broth-based cooking entirely.
📚 In This Guide
- What You’ll Need
- Instructions
- Tips and Common Mistakes
What Youll Need
- ● Freshly made broth or stock – 1+ quarts (chilled for at least 4–6 hours or overnight for best results 🍲).
- ● Large, wide-mouthed bowl or pot – Prefer glass or stainless steel (avoid plastic for hot liquids).
- ● Slotted spoon, fine-mesh skimmer, or ladle – A flat, wide spoon works best for surface fat removal. ✨
- ○ Cheesecloth or paper towels – Optional, for absorbing stubborn fat traces.
- ○ Fat separator (optional but handy) – A gravy separator with a spout for easy pouring.
- ○ Ice cubes (optional trick) – 3–4 cubes to harden fat for easier skimming. ❄️
- ● Air-tight containers – For storing skimmed broth (glass jars or BPA-free plastic).
- ● Refrigerator or freezer space – Chilling is key for solidifying fat!
Instructions
Here’s the method I’ve perfected over years of stock-making—simple, effective, and foolproof.
Chill the Broth Completely
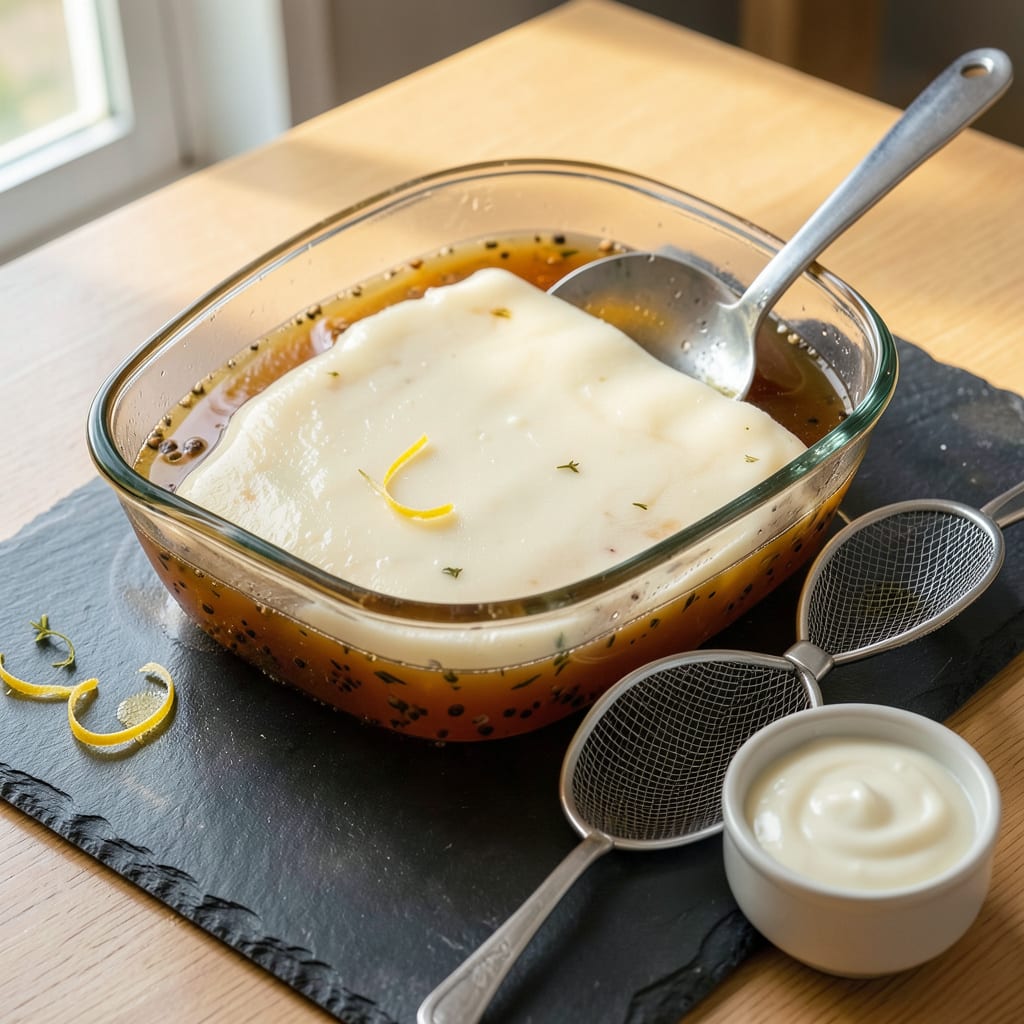
Start by transferring your freshly made broth to a wide, shallow container. I prefer using a large glass baking dish or stainless steel hotel pan because the increased surface area accelerates the cooling process. Place it uncovered in the refrigerator for at least 4 hours, though overnight works even better.
The cold temperature causes the fat to solidify into a distinct layer on top, making it much easier to remove. You’ll notice the fat transforms from liquid to a semi-solid, opaque disc that’s clearly separated from the gelatinous broth below. This is the most reliable method for complete fat separation without losing any of your precious stock.
Use the Right Tools for Removal
Once fully chilled, you’ll see that beautiful fat cap has formed. I like to use a large, flat spoon or a ladle to gently scrape the fat layer from the edges toward the center. Work slowly and carefully—you want to remove as much fat as possible without disturbing the broth beneath.
For particularly stubborn bits, I keep a small fine-mesh strainer handy. Skim the surface with the strainer to catch any remaining fat globules. The key here is patience; rushing leads to wasted broth. If you’re dealing with a large quantity, a fat separator pitcher can be helpful, though I find the spoon method gives me more control.
Employ the Ice Cube Trick for Stubborn Fat
Here’s a professional trick I learned from restaurant kitchens: if you’re struggling with small fat particles that won’t separate, run an ice cube over the surface of the broth. The cold causes any remaining fat to congeal instantly, making it easier to collect with your spoon or strainer.
This technique is particularly useful for rich bone broths where fat is more emulsified. I also use this method when I need to clarify broth quickly for immediate use. The ice cube method works best when the broth is cold but not completely gelled—aim for that sweet spot where it’s still pourable but the fat is solidifying.
Final Clarification with Paper Towels
For crystal-clear consommé-quality results, I take an extra step after skimming. Line a fine-mesh strainer with a coffee filter or several layers of cheesecloth, then pour the broth through. This catches any remaining fat particles and fine impurities, giving you that professional, jewel-like clarity.
The paper towel method also works well for removing that last bit of fat that clings to the sides of your container. Simply press a paper towel against the inner surface and it will absorb the residual fat. I always do this final pass before storing or using the broth—it makes a noticeable difference in both appearance and mouthfeel.
Reheat and Test for Clarity
Before using your defatted broth, I recommend reheating a small portion to test your work. Bring about ½ cup to a gentle simmer and observe the surface. If you see any fat bubbles forming, you’ll know you need to repeat the chilling and skimming process.
Perfectly skimmed broth should have a clean surface with no visible fat separation when heated. At this point, your broth is ready for any application—whether you’re making a delicate consommé, a rich sauce, or simply want a cleaner base for your soups. The difference in flavor purity and texture is remarkable when you take the time to do this properly.
Tips and Common Mistakes
After years of perfecting this fat-skimming technique, I’ve learned the small details that make all the difference between good and exceptional results.
The Chilling Factor: The minimum 4 hours refrigeration in Step 1 isn’t arbitrary—this is the precise window where fat solidifies enough to separate cleanly while the broth remains workable. I’ve found that using a glass container (rather than metal) actually accelerates this process slightly because glass conducts cold more evenly. For bone broths with higher fat content, I recommend extending to the full overnight chill to ensure complete separation.
Tool Selection Matters: In Step 2, the choice between a spoon and strainer depends on your broth’s fat content. For chicken broth with a thin fat layer, a large spoon gives you better control. But for rich beef or pork broths where fat is more emulsified, start with a fine-mesh strainer to catch those stubborn particles before switching to the spoon. The angle matters too—tilt your container slightly to pool the fat, making removal easier.
Temperature Sweet Spot: The ice cube trick in Step 3 works best when your broth is at that perfect semi-gelled state—cold enough that fat is solidifying but still liquid enough to pour. I test this by tilting the container: if the broth moves like thick syrup, you’re at the ideal temperature. Too warm and the ice won’t congeal the fat; too cold and you’ll struggle to remove the fat without taking broth with it.
Final Clarity Check: Don’t skip the ½ cup test in Step 5—this is your insurance policy. When reheating, watch for two things: any fat bubbles forming at the edges (indicating missed fat) and the broth’s surface tension. Perfectly defatted broth will have a smooth, almost glass-like surface when simmering gently. If you see any irregularities, a second round of chilling and skimming will save your final dish.
Pro Tips for Skim Fat Off Broth
- After years of perfecting this fat-skimming technique, I’ve learned the small details that make all the difference be…
- The Chilling Factor: The minimum 4 hours refrigeration in Step 1 isn’t arbitrary—this is the precise window where fat…
- Tool Selection Matters: In Step 2, the choice between a spoon and strainer depends on your broth’s fat content. For c…
Frequently Asked Questions
How long should I let the broth cool before skimming fat?
Let it cool for at least 1–2 hours at room temperature, then refrigerate for 4+ hours (or overnight). Cold fat solidifies into a hard layer, making removal a breeze! For speed, try the ice bath trick—it cuts cooling time in half.
Can I skim fat while the broth is still hot?
Yes, but it’s trickier! Use a ladle or fat separator to scoop from the surface. Hot fat is liquid, so you’ll lose some broth. Pro tip: Tilt the pot slightly to pool fat in one corner for easier access.
What’s the best tool for skimming fat if I don’t have a fat separator?
A slotted spoon, fine-mesh skimmer, or even a paper towel works! Drag the towel gently over the surface to absorb fat, or use a spoon to lift the top layer. Avoid stirring—it redistributes fat into the broth.
Why does my broth still look cloudy after skimming?
Cloudiness usually means emulsified fat or impurities, not just surface fat. Try simmering longer (30+ mins) or clarifying with egg whites (see our guide). If rushed, strain through a cheesecloth-lined sieve for a clearer result.
Is there a way to remove fat without cooling the broth?
Use a fat-skimming pitcher (like OXO’s) to pour broth through the spout—fat stays behind. Or, freeze the broth in a wide container; fat rises to the top as it thaws. For small batches, a turkey baster works too!
Skimming fat off broth doesn’t have to be a hassle—with the right tools and techniques, you can achieve a clear, rich, and flavorful stock every time! 🍜 Whether you prefer the classic spoon method, a fat separator, or the chill-and-lift trick, consistency is key. Now that you’ve mastered the basics, why not put your new skills to the test? Try making a homemade bone broth or elevating your next soup recipe—your taste buds (and guests!) will thank you. Happy cooking! 👨🍳

Trained in classic French technique but raised on slow-cooked ribs and spicy rubs, she blends culinary skill with smoke and soul.
- Indian Lamb Curry Recipe Pressure Cooker: Fragrant Spices in a Fraction of the Time - October 3, 2026
- Recipe for Oven Roasted: Golden Crisp Perfection Without the Fryer - October 3, 2026
- Recipe for Fried Pork Chops With Flour: Crispy Crust and Juicy Centers - October 3, 2026