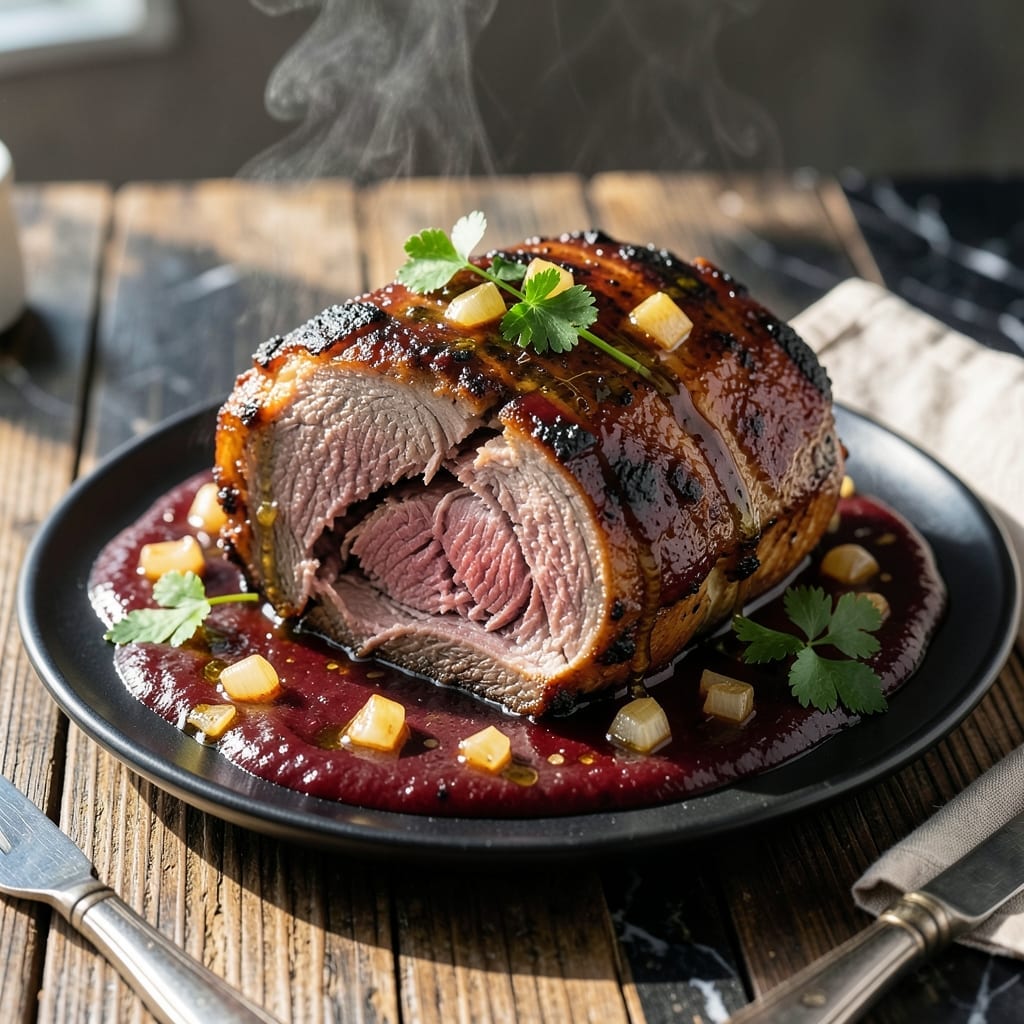
This pressure-cooked beef roast delivers smoky richness without the long wait. I’ve adapted my pitmaster techniques for the Instant Pot, ensuring tender meat with deep barbecue flavor in a fraction of the time.
Using simple ingredients and precise timing, this method locks in moisture while infusing every bite with bold, tangy notes. The result is fall-apart beef that rivals any slow-smoked version.
Ingredients for Instant Pot Bbq Beef Roast
Well-marbled beef and bold barbecue flavors require just a few quality ingredients.
| Ingredient | Amount | Notes |
|---|---|---|
| Beef Chuck Roast 🥩 | 3 lb | Well-marbled, trimmed of excess fat |
| Barbecue Sauce 🍯 | 1 ½ cups | High-quality, thick variety preferred |
| Beef Broth 🥘 | 1 cup | Low-sodium for better control |
| Apple Cider Vinegar 🍏 | 2 tbsp | Balances sweetness of sauce |
| Worcestershire Sauce 🍶 | 1 tbsp | Adds depth and umami |
| Yellow Onion 🧅 | 1 whole | Medium-sized, finely diced |
| Garlic Cloves 🧄 | 4 cloves | Minced for even distribution |
| Brown Sugar 🍚 | 2 tbsp | Light or dark, packed |
| Smoked Paprika 🌶️ | 1 tsp | Enhances smoky flavor profile |
| Dried Thyme 🌿 | 1 tsp | Rubbed between fingers to release oils |
| Kosher Salt 🧂 | 1 ½ tsp | Diamond Crystal preferred for consistency |
| Black Pepper 🌶️ | 1 tsp | Freshly ground for best flavor |
| Olive Oil 🫒 | 2 tbsp | For searing roast |
[recipe_ingredient_scaler]
The beef chuck roast is non-negotiable for this dish. Look for well-marbled pieces at Whole Foods or Costco—the fat renders down into incredible tenderness. Avoid lean cuts like sirloin; they won’t break down properly under pressure. Trim any large fat caps yourself for better texture. The barbecue sauce should be thick and high-quality—Stubs or Sweet Baby Ray’s deliver consistent results.
No beef broth? Water plus a bouillon cube works in a pinch. Swap apple cider vinegar for white vinegar at the same ratio, though the flavor will be sharper. Liquid smoke at half a teaspoon boosts smokiness if your sauce lacks depth. For a sweeter profile, increase brown sugar to 3 tablespoons. Dried thyme can be replaced with 1 teaspoon of fresh thyme leaves if available.
Store raw beef in its original packaging for up to 3 days in the fridge. Cooked roast keeps for 4-5 days refrigerated or freezes beautifully for 3 months. Reheat gently with a splash of broth to maintain moisture. Always let the roast rest before shredding to retain juices.
Why You’ll Love This Recipe
- Set It and Forget: I toss the chuck roast, broth, and vinegar in the Instant Pot, seal the lid, and walk away—no babysitting required.
- Tangy Depth: That combo of apple cider vinegar and Worcestershire gives the barbecue sauce a rich, smoky kick that’s honestly addictive.
- Leftovers for Days: One roast makes enough for sandwiches, tacos, and loaded baked potatoes. Between us, it tastes even better the next day.
Step-by-Step Instructions for BBQ Beef Roast
These tested steps deliver fall-apart tender beef with rich, smoky BBQ flavor every time.
Step 1: Sear and Season the Beef Chuck Roast
Set your Instant Pot to the Sauté function and add the 2 tbsp Olive Oil. Once the oil shimmers, pat the 3 lb Beef Chuck Roast dry with paper towels and place it in the pot. Sear on all sides for 3-4 minutes per side until deeply browned.
This searing step builds a flavorful crust that enhances the final dish. Remove the beef and set aside. The pot should have a dark fond on the bottom—this will dissolve into the cooking liquid for maximum flavor.
Step 2: Sauté Aromatics and Deglaze
In the same pot, add the finely diced 1 whole Yellow Onion and cook for 3 minutes until softened. Stir in the minced 4 cloves Garlic Cloves, 1 tsp Smoked Paprika, and 1 tsp Dried Thyme, cooking for 30 seconds until fragrant.
Pour in the 1 cup Beef Broth, 2 tbsp Apple Cider Vinegar, and 1 tbsp Worcestershire Sauce. Scrape the bottom of the pot with a wooden spoon to release all the browned bits. This deglazing ensures no flavor is wasted.
Step 3: Pressure Cook the Roast
Return the seared beef to the pot. In a small bowl, combine the 1.5 cups Barbecue Sauce, 2 tbsp Brown Sugar, 1.5 tsp Kosher Salt, and 1 tsp Black Pepper. Pour this mixture over the beef, ensuring it’s well coated.
Secure the lid, set the valve to Sealing, and cook on High Pressure** for 60 minutes. The natural release will take an additional 15-20 minutes. You’ll know it’s done when the beef shreds easily with a fork.
Step 4: Shred and Serve
Carefully remove the beef from the pot and transfer it to a cutting board. Using two forks, shred the beef into large, tender chunks. Skim any excess fat from the cooking liquid if desired.
Return the shredded beef to the pot and toss it in the remaining sauce. Let it sit for 5-10 minutes to absorb the flavors fully. Serve warm with the sauce spooned over the top.
Pro Tips For Making Instant Pot Bbq Beef Roast
- Sear the Chuck First: I learned this the hard way—searing the beef chuck in the Instant Pot before pressure cooking adds a depth of flavor that skipping this step just can’t match. Use the sauté function with a little oil until it’s browned on all sides, about 3-4 minutes per side.
- Cut Against the Grain: After cooking, let the roast rest for 10 minutes, then slice it against the grain into thick strips. This makes it easier to shred and guarantees tender, melt-in-your-mouth bites every time.
- Deglaze with Vinegar: Sounds weird, but it works: after searing, pour in the apple cider vinegar and scrape the bottom of the pot to release all those browned bits. This prevents the “burn” notice and infuses the sauce with rich, tangy flavor.
- Thicken the Sauce: Once the beef is shredded, switch to sauté mode and simmer the sauce uncovered for 5-7 minutes to reduce it. This turns a watery broth into a rich, clingy BBQ sauce that coats every bite.
Storing and Reheating This Dish
Refrigerator Storage
Let your beef cool for 1-2 hours before transferring to airtight containers. I use glass containers with locking lids to preserve freshness. Store in the fridge at 40°F or below for up to 4 days. The flavors deepen overnight as the meat soaks up the sauce. ❄️
Freezer Storage
For longer storage, freeze in quart-sized freezer bags for up to 3 months. I portion mine into meal-sized servings before freezing. Squeeze out excess air to prevent freezer burn and label with the date. Thaw overnight in the fridge before reheating.
Stovetop Reheating
My preferred method for maintaining texture: Warm in a heavy pot over medium-low heat with ¼ cup beef broth. Cover and stir occasionally for 10-15 minutes. This keeps the beef moist and prevents drying out.
Microwave Reheating
For quick meals, microwave individual portions covered with a damp paper towel. Use 70% power in 1-minute intervals, stirring between each until reaching 165°F. Add a splash of broth if it appears dry.
Make-Ahead Tip
This dish actually improves with time. I often make a double batch and freeze half for busy weeks. The flavors meld beautifully during storage, and it reheats just as well as the day it was made. 💡
Nutrition Facts

Trained in classic French technique but raised on slow-cooked ribs and spicy rubs, she blends culinary skill with smoke and soul.
- Recipe for Crock Pot Lasagna Using Ravioli: No-Boil Cheese Layers - October 3, 2026
- Recipe for Cut Up Chicken: One-Pan Crispy Bites - October 3, 2026
- Recipe For Oven Baked Haddock: Buttery Crumbs With Zesty Lemon Topping - October 3, 2026