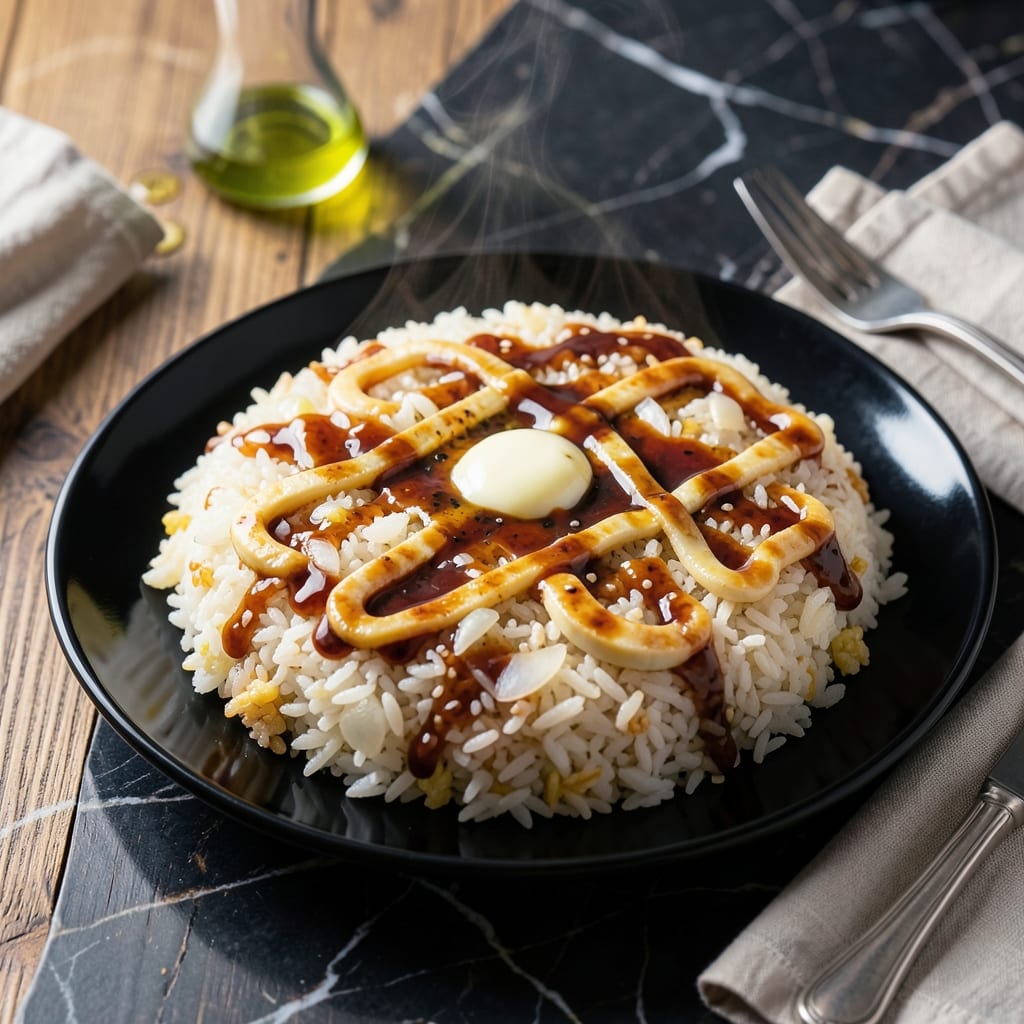
This hibachi-style fried rice brings the iconic Benihana experience to your home kitchen. I developed this recipe after too many takeout orders, determined to capture that signature smoky flavor and perfect texture.
The secret lies in high heat and a few key techniques—day-old rice, a hot wok, and the right sequence of ingredients. Soy sauce, sesame oil, and a touch of butter create that unmistakable umami depth Benihana is famous for.
You’ll achieve restaurant-quality results with tender rice, crisp vegetables, and just the right amount of char. The process moves quickly, so having everything prepped in advance is essential.
Serve immediately for the best texture, with extra soy sauce on the side for those who want to adjust the seasoning to taste.
Ingredients for Japanese Fried Rice Recipe Benihana
Cold rice, fresh veggies, and a few pantry staples bring that teppanyaki magic home.
| Ingredient | Amount | Notes |
|---|---|---|
| Day-Old Cooked White Rice 🍚 | 4 cups | Cold, preferably refrigerated overnight |
| Soy Sauce 🫕 | ¼ cup | Low-sodium preferred for control |
| Sesame Oil 🫒 | 2 tbsp | Toasted for authentic flavor |
| Unsalted Butter 🧈 | 2 tbsp | Adds Benihana’s signature richness |
| Large Eggs 🥚 | 2 whole | Beaten lightly for scrambling |
| Onion 🧅 | ½ whole | Small dice, yellow or white |
| Carrots 🥕 | 2 whole | Peeled, small dice |
| Frozen Peas 🌱 | ½ cup | Thawed or frozen works fine |
| Green Onions 🧅 | 2 whole | Thinly sliced, whites and greens separated |
| Garlic Cloves 🧄 | 2 cloves | Minced finely for even flavor |
| Vegetable Oil 🫒 | 2 tbsp | High smoke point for wok |
| Salt 🧂 | ½ tsp | Or to taste at the end |
| Black Pepper 🌶️ | ¼ tsp | Freshly ground preferred |
[recipe_ingredient_scaler]
The rice is non-negotiable—day-old, cold, and dry is what gives you those separate grains Benihana is known for. I grab jasmine or short-grain from the Asian aisle at Kroger or any bulk bin. The soy sauce? Kikkoman low-sodium is my go-to, but any brand works if it’s not too dark. Sesame oil adds that nutty depth, so don’t skip it (toasted is key here).
No peas? Swapped corn or diced bell peppers work just as well. Out of green onions? Skip ’em or sub chives. The butter might seem odd, but it’s how Benihana gets that rich, slightly caramelized flavor—margarine won’t cut it. For extra protein, toss in diced chicken or shrimp (cooked separately first).
Prep everything before you start—this moves fast. Leftovers keep 3-4 days in the fridge, but honestly, it’s best fresh. Freezing works for up to 3 months if you’re meal prepping.
Why You’ll Love This Recipe
- One Pan Magic: I love that this comes together in a single pan—just scramble the eggs, toss in the day-old rice, and let the soy sauce and sesame oil work their magic.
- Umami Bomb: The combination of butter, soy sauce, and sesame oil gives it that rich, savory depth that’s honestly hard to resist.
- Weeknight Hero: Between us, this is my go-to when I need dinner fast—ready in 15 minutes and still feels like a treat.
- Budget Stretch: Day-old rice finds new life here, and I’ll be real: it’s the perfect way to use up leftovers without sacrificing flavor.
Step-by-Step Instructions for Hibachi-Style Fried Rice
This method delivers that signature Benihana flavor with minimal effort and maximum taste.
Step 1: Prep and Cook the Vegetables
Heat 2 tbsp vegetable oil in a large skillet or wok over medium-high heat. Add the diced 0.5 whole onion and cook for 2-3 minutes until it starts to soften and turn translucent at the edges.
Add the diced 2 whole carrots and cook for another 3-4 minutes until they begin to soften. Stir in the minced 2 cloves garlic cloves and cook for 30 seconds until fragrant. Toss in the 0.5 cup frozen peas and cook for 1 minute—they just need to warm through. Transfer the vegetable mixture to a plate and set aside.
Step 2: Scramble the Eggs and Toast the Rice
In the same skillet, melt the 2 tbsp unsalted butter over medium heat. Add the beaten 2 whole large eggs and scramble until just set but still slightly soft, about 1-2 minutes. Remove the eggs and add them to the plate with the vegetables.
Increase the heat to medium-high and add the cold 4 cups day-old cooked white rice. Break up any clumps with your spatula and press the rice down firmly. Let it toast undisturbed for 2-3 minutes until you hear it sizzling and see it turning slightly crispy at the edges. This step gives you that authentic hibachi texture.
Step 3: Combine Everything with Seasonings
Return the scrambled eggs and cooked vegetables to the skillet with the rice. Drizzle in the 0.25 cup soy sauce and 2 tbsp sesame oil. Sprinkle with 0.5 tsp salt and 0.25 tsp black pepper. Stir everything together gently but thoroughly for 2-3 minutes until heated through and evenly coated.
Taste and adjust seasoning if needed. The rice should be hot with a glossy sheen from the sauces, and every grain should carry the rich, umami flavor. The vegetables should be tender but still retain a slight bite.
Step 4: Finish with Green Onions and Serve
Remove the skillet from heat and stir in the thinly sliced 2 whole green onions, reserving some of the green tops for garnish. The residual heat will soften them slightly while keeping their fresh, crisp texture.
Transfer to a serving platter and top with the reserved green onion greens. Serve immediately while hot. Each bite should deliver the perfect balance of savory soy, nutty sesame, and sweet vegetables with that distinctive Benihana-style richness from the butter. The rice should have a slight crispness to it, not mushy or clumped together.
Pro Tips For Making Japanese Fried Rice Recipe Benihana
- Chill the Rice: Use day-old rice straight from the fridge—it’s drier and fries up fluffier. I learned this the hard way after making mushy fried rice with fresh, warm rice. —
- Hot Pan, Cold Oil: Heat your pan or wok until it’s smoking hot before adding the sesame oil and butter. This prevents soggy rice and gives you that classic Benihana sear. —
- Scramble Eggs First: Push the rice to one side of the pan, melt a pat of butter in the empty space, and scramble the eggs there before mixing. It’s faster and keeps the eggs tender instead of rubbery. —
- Skip the Over-Saucing: Start with 1 tablespoon of soy sauce, taste, then add more if needed. Too much soy sauce turns the dish dark and salty—Benihana’s version is light and balanced.
Dietary Considerations for These Flavors
Gluten-Free Adaptation
For a gluten-free version, simply swap regular soy sauce for tamari—it has the same rich umami flavor without the wheat. I keep San-J tamari in my pantry for this exact purpose. Always check labels to ensure no cross-contamination if celiac is a concern. 💡
Vegetarian Option
This dish is naturally vegetarian, but you can boost the protein by adding tofu or edamame. Press and cube 8 oz firm tofu, then pan-fry until golden before mixing it in with the rice. It adds heartiness without overpowering the classic Benihana flavors.
Lower-Sodium Version
Use low-sodium soy sauce and reduce the amount to 2 tbsp. I replace the missing volume with 1 tbsp coconut aminos for depth. Skip the added salt entirely and let everyone season their plate to taste at the table.
Dairy-Free Modification
Swap the butter for 2 tbsp neutral coconut oil or olive oil. The flavor will be slightly different but still delicious. For extra richness, add 1 tsp toasted sesame oil at the end to compensate for the butter’s depth.
Egg-Free Alternative
Omit the eggs entirely or replace them with ½ cup crumbled firm tofu for texture. Sauté the tofu first with a pinch of turmeric for color. The dish will still have great flavor and that signature Benihana texture.
For nut allergies, verify your sesame oil is processed in a nut-free facility.
Nutrition Facts
Frequently Asked Questions
Why use day-old rice for this dish?
Day-old rice is drier, which prevents mushiness and gives that signature separate grain texture. Fresh rice has too much moisture and tends to clump together in the pan.
Can I add protein to this?
Cook 8 oz diced chicken or shrimp first, then set aside. Add it back in with the vegetables at the end. This keeps the cooking process clean and ensures everything is perfectly cooked.
What if my rice isn’t crispy?
Increase the heat to high and press the rice firmly into the pan. Let it sit undisturbed for 3-4 minutes to develop that coveted crispy texture. Patience is key here!
How do I store leftovers?
Store in an airtight container in the fridge for up to 3 days. Reheat in a skillet over medium heat with a splash of water to restore moisture. Avoid microwaving, as it can make the rice soggy.

Trained in classic French technique but raised on slow-cooked ribs and spicy rubs, she blends culinary skill with smoke and soul.
- Energy Ball Recipe Peanut Butter: No-Bake Protein-Packed Bites - September 24, 2026
- Jerk Chicken Recipe Crock Pot: Slow-Cooked Caribbean Heat - September 24, 2026
- Japanese Curry Recipe Kenji: Chef-Tested Rich and Velvety Sauce - September 24, 2026