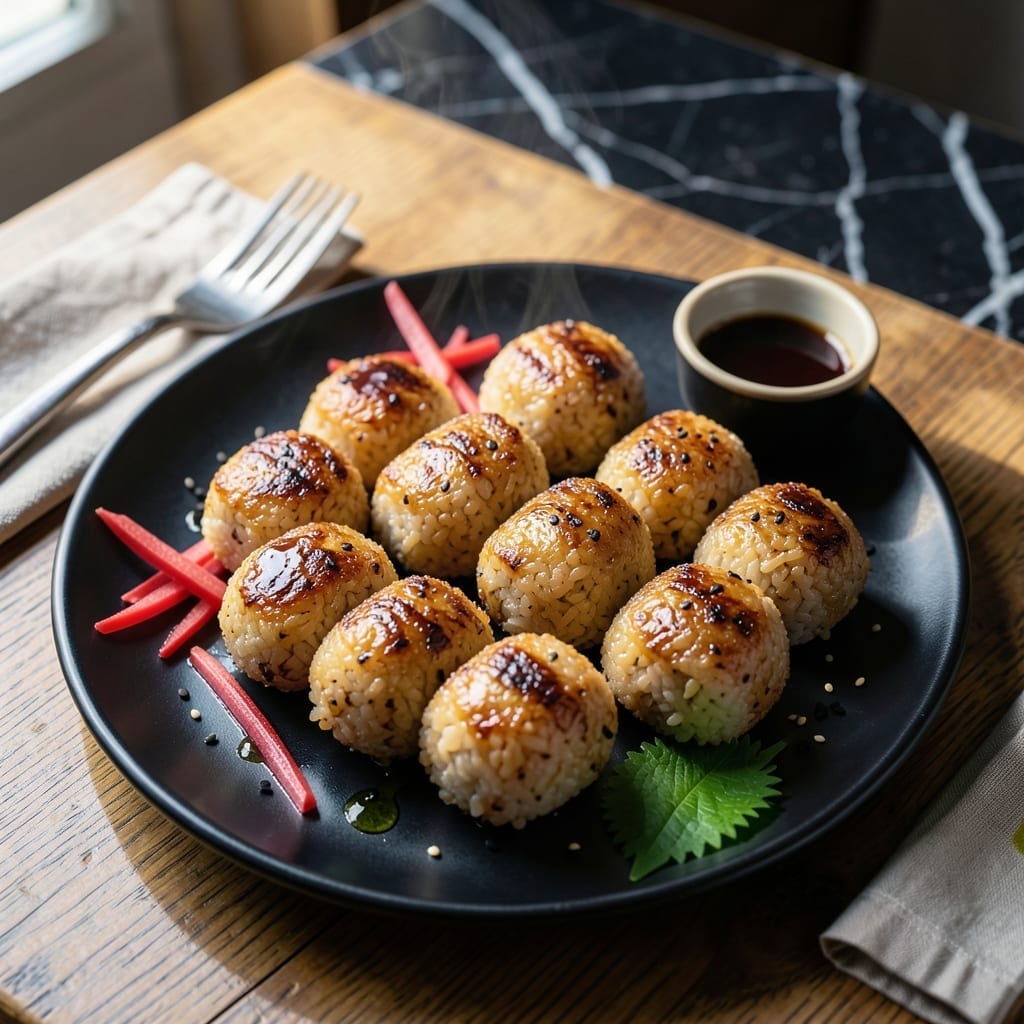
I first discovered yaki onigiri at a coastal market, where the smoky aroma drew me in like a siren’s call. This traditional method transforms simple rice into a crispy masterpiece with minimal effort.
What sets this dish apart is the two-step process: shaping the rice while warm, then grilling until golden. A light brush of soy glaze adds depth without overpowering the natural flavor.
The result is a perfect balance—golden, crispy edges giving way to a soft, pillowy center. Each bite delivers texture and umami in equal measure.
Serve these warm, straight from the grill, for an authentic taste of Japanese street food. The technique is simple, but the payoff is extraordinary.
Ingredients for Japanese Grilled Rice Balls
Simple ingredients transform into golden, crispy grilled rice balls with Japanese tradition at heart.
| Ingredient | Amount | Notes |
|---|---|---|
| Japanese Short-Grain Rice 🍚 | 2 cups | Sushi rice preferred, uncooked |
| Water 💧 | 2 ½ cups | For cooking rice |
| Soy Sauce 🫕 | 3 tbsp | Low-sodium okay |
| Mirrorin 🍶 | 1 tbsp | Sweet cooking rice wine |
| Rice Vinegar 🍚 | 1 tbsp | Seasoned rice vinegar works too |
| Granulated Sugar 🍚 | 1 tsp | Balances soy glaze |
| Vegetable Oil 🫒 | 1 tbsp | For grilling and shaping |
| Salt 🧂 | ½ tsp | For seasoning rice |
| Nori Seaweed Sheets 🌿 | 2 sheets | Optional, for wrapping |
| Sesame Seeds 🌰 | 1 tsp | Toasted, for garnish |
| Green Onions 🧅 | 2 whole | Thinly sliced, for garnish |
| Bonito Flakes 🐟 | ¼ cup | Optional, for umami topping |
[recipe_ingredient_scaler]
The rice is non-negotiable here. Japanese short-grain (sushi rice) is the only way to get that sticky, pillowy texture that holds shape on the grill. Koshihikari or Nishiki brands are the gold standard—look for them in the Asian aisle at Whole Foods or any well-stocked Asian market. Avoid jasmine or basmati; they’re too dry and won’t bind properly.
No mirin? Mix 1 tbsp rice vinegar + 1 tsp sugar as a substitute. Soy sauce can be swapped for tamari (gluten-free) or coconut aminos for a lighter flavor. Skip the nori if you’re not a seaweed fan—toasted sesame seeds add a nice crunch instead. The bonito flakes are traditional but optional; crushed furikake gives similar umami without the fish content.
Shape the rice while still warm—it’s much easier to handle. Store cooked rice in the fridge for up to 2 days before grilling, or freeze shaped balls for 1 month. Reheat on the grill or in a pan to restore that crispy texture.
Why You’ll Love This Recipe
- No-Fuss Cooking: I just mix the short-grain rice with water, shape, and grill—minimal steps, maximum payoff.
- Umami Bomb: The soy sauce and mirin glaze hits that sweet-savory spot that makes me sneak seconds.
- Picnic Star: Honestly, these stay warm in a bento box and taste just as good cold at the park.
- Budget Stretch: A cup of rice makes four balls, and the vinegar keeps them fresh for days.
Step-by-Step Instructions for Japanese Grilled Rice Balls
Master the technique for achieving that perfect contrast of textures this dish promises.
Step 1: Cook and Season the Rice Base
Rinse the 2 cups Japanese Short-Grain Rice thoroughly under cold water until the water runs clear. This removes excess starch and prevents the rice from becoming gummy. Combine the drained rice with the 2.5 cups Water in a rice cooker or pot.
Cook the rice according to your appliance’s instructions. Once done, transfer it to a large bowl and let it cool slightly for 10 minutes. Add the 3 tbsp Soy Sauce, 1 tbsp Mirrorin, 1 tbsp Rice Vinegar, 1 tsp Granulated Sugar, and 0.5 tsp Salt. Fold gently with a rice paddle to distribute the seasonings without crushing the grains.
Step 2: Shape the Rice into Balls
Wet your hands with water to prevent sticking. Scoop about ½ cup of the seasoned rice into your palm and gently press it into a loose ball, then compact it slightly. You want it firm enough to hold its shape but not so tight that it becomes dense.
Repeat with the remaining rice to make 8 balls total. Place them on a plate and let them rest for 10 minutes to set. This brief rest helps the rice adhere better during grilling.
Step 3: Grill to Crispy Perfection
Heat a grill pan or skillet over medium heat and add the 1 tbsp Vegetable Oil. Once hot, add the rice balls in a single layer, leaving space between them. Grill undisturbed for 4-5 minutes until the bottoms develop a deep golden-brown crust.
Carefully flip each ball using a spatula. Drizzle a little extra soy sauce over the cooked side if desired. Grill the second side for another 4-5 minutes until equally crispy and golden. The rice inside should remain soft and slightly sticky.
Step 4: Garnish and Serve Immediately
Transfer the grilled rice balls to a serving plate. Cut each of the 2 sheets Nori Seaweed Sheets into thin strips and wrap a strip around each ball, if using. Sprinkle with the 1 tsp Sesame Seeds and the thinly sliced 2 whole Green Onions.
Top with the 0.25 cup Bonito Flakes just before serving—they’ll dance from the heat. Serve warm while the crust is still crispy and the inside remains soft and flavorful. The contrast of textures is best enjoyed fresh from the grill.
Pro Tips For Making Japanese Grilled Rice Balls
- Use Day-Old Rice: Fresh rice is too sticky—day-old or cooled rice holds shape better when grilling. I learned this the hard way after my first batch fell apart on the grill.
- Pre-Mix the Glaze: Combine soy sauce, mirin, and rice vinegar in a small bowl before grilling—this saves frantic mixing while the rice balls are on the heat.
- Medium Heat Only: Grill over medium heat to avoid burning the outside before the inside warms through. After charring a few batches, I finally stopped rushing it.
- Wet Your Hands: Keep a bowl of water nearby to wet your hands when shaping the rice balls—this prevents sticking and makes the process way smoother.
Troubleshooting This Recipe
Rice Too Sticky
If your rice is too sticky to shape, you likely used the wrong variety or overworked it. Only Japanese short-grain rice like Koshihikari will give the right balance. Rinse thoroughly before cooking, and avoid pressing too hard when shaping. 💡
Crust Not Crispy
For a better crust, ensure your grill pan is fully preheated to medium heat and don’t flip too soon. The rice needs 4-5 minutes per side undisturbed to develop that golden-brown crust. Use vegetable oil to prevent sticking.
Falling Apart on Grill
If the balls break apart, the rice may be too warm or not compacted enough. Let the shaped balls rest for 10 minutes before grilling to help them set. Wet your hands when shaping to prevent sticking and keep the rice cohesive.
Bland Flavor
Boost the flavor by ensuring you’ve added all seasonings—3 tbsp soy sauce, 1 tbsp mirin, and 1 tbsp rice vinegar—to the rice. Taste after mixing and adjust with a pinch more salt or sugar if needed.
Uneven Cooking
To avoid uneven cooking, make sure all balls are similar in size (about ½ cup rice each). Press gently but evenly when shaping, and maintain consistent heat on your grill. Rotate the pan if some spots are hotter than others.
Nori Won’t Stick
If the nori strips aren’t sticking, lightly brush the rice balls with extra soy sauce after grilling. This adds moisture and helps the nori adhere. Alternatively, wrap the nori around the rice just before serving while it’s still warm. 🌿
Nutrition Facts
Frequently Asked Questions
What type of rice works best?
Use Japanese short-grain rice like Koshihikari or Nishiki for the right sticky texture. Other varieties won’t hold shape as well on the grill.
Can I make these ahead?
Shape the rice balls and refrigerate for up to 2 days before grilling. Or freeze shaped balls for 1 month and reheat on the grill to restore crispiness.
How do I prevent them from sticking?
Wet your hands when shaping and use 1 tbsp vegetable oil in the pan. Let the rice develop a crust for 4-5 minutes before flipping.
What can I use instead of mirin?
Mix 1 tbsp rice vinegar + 1 tsp sugar as a substitute. This maintains the sweet-tangy balance in the glaze.

Trained in classic French technique but raised on slow-cooked ribs and spicy rubs, she blends culinary skill with smoke and soul.
- Meatball Curry Recipe Kerala Style: Coconut-Spiced Gravy With Tender Bites - October 3, 2026
- Recipe for Curried Tofu: Aromatic Spices With Crispy Edges - October 3, 2026
- Recipe for Dumplings in Crock Pot: Fluffy Pillows with Minimal Effort - October 3, 2026