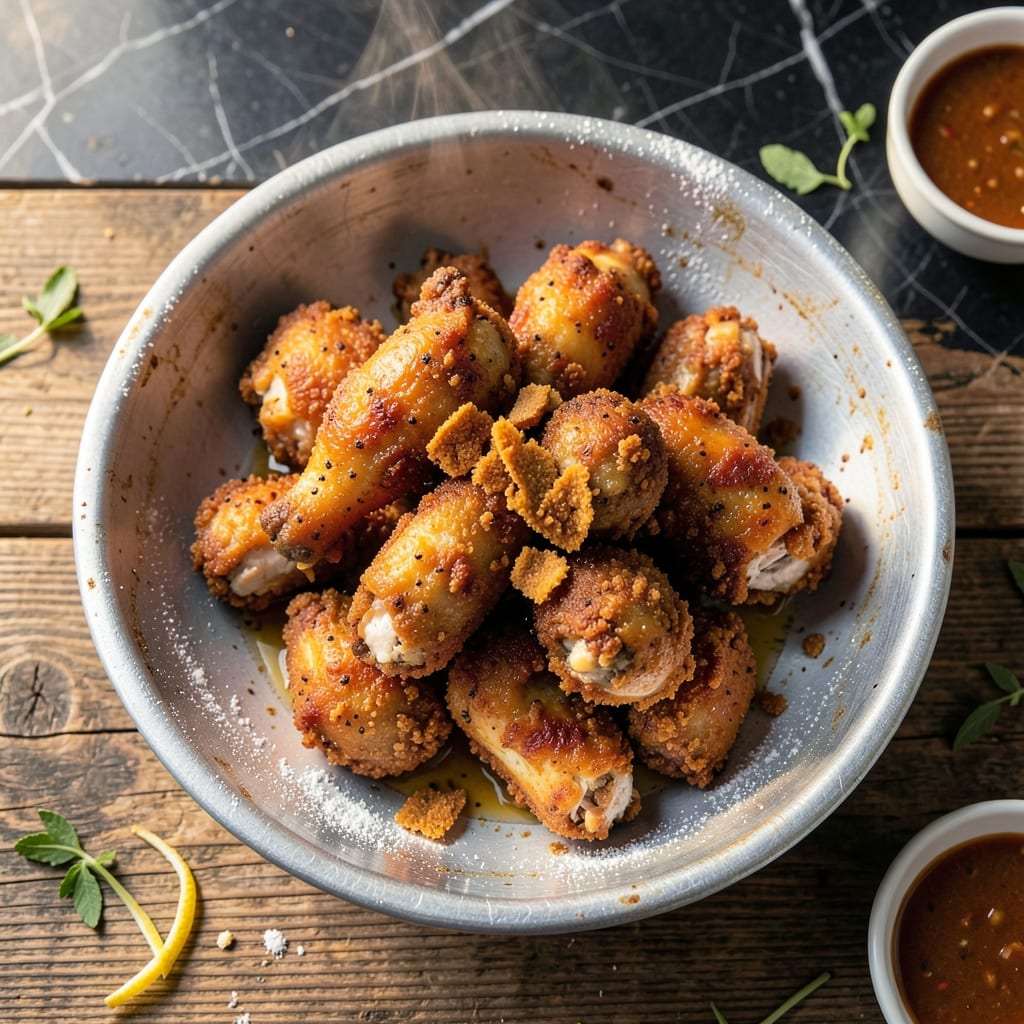
I’ve spent years perfecting this copycat recipe to match the crispy coating of the original. The secret lies in the precise blend of 11 herbs and spices, combined with a double-dipping technique for maximum crunch.
This method ensures every bite delivers that signature flavor and texture. The chicken is marinated in buttermilk for tenderness, then coated in a seasoned flour mixture before frying to golden perfection.
What you get is juicy, flavorful meat encased in a shatteringly crispy crust. The aroma alone will transport you to your favorite KFC.
Serve hot for the best experience. Here’s how to recreate this classic at home.
Ingredients for Kfc Original Recipe Chicken Thigh
Eleven herbs and spices plus chicken—this is how you nail that signature crispy coating at home.
| Ingredient | Amount | Notes |
|---|---|---|
| Chicken Thighs 🍗 | 2 lb | Bone-in, skin-on for maximum flavor |
| Buttermilk 🥛 | 2 cups | Full-fat for best tenderness |
| All-Purpose Flour 🌾 | 2 ½ cups | For the crispy coating |
| Cornstarch 🌽 | ½ cup | For extra crunch |
| Salt 🧂 | 1 ½ tbsp | Diamond Crystal kosher preferred |
| Black Pepper 🌶️ | 1 tbsp | Freshly ground for bold flavor |
| Dried Thyme 🌿 | 1 tsp | Rubbed between fingers to release aroma |
| Dried Basil 🍃 | 1 tsp | Crushed to enhance flavor |
| Dried Oregano 🌿 | 1 tsp | Mediterranean variety ideal |
| Celery Salt 🧂 | 1 tsp | Essential for authentic flavor |
| Garlic Powder 🧄 | 1 tsp | Not garlic salt |
| Onion Powder 🧅 | 1 tsp | Fine grind for even distribution |
| Dried Mustard 🌶️ | 1 tsp | For depth of flavor |
| Paprika 🌶️ | 1 tbsp | Sweet or smoked variety works |
| White Pepper 🌶️ | 1 tsp | Subtle heat without color |
| Vegetable Oil 🫒 | 4 cups | For deep frying, high smoke point |
[recipe_ingredient_scaler]
The chicken thighs are non-negotiable here—bone-in, skin-on gives you the juiciest meat and crispiest crust. I get mine from Whole Foods or Costco (their organic thighs are perfect). The buttermilk marinade is what makes the meat so tender—don’t substitute regular milk (the acidity matters). For the flour, all-purpose is standard, but if you want extra crunch, swap one cup for self-rising flour.
No buttermilk? Whole milk plus 1 tbsp vinegar or lemon juice per cup works in a pinch. Missing an herb or spice? Most are forgivable (the blend is forgiving), but don’t skip the celery salt—it’s key to that KFC flavor. For the oil, peanut oil is traditional (higher smoke point), but vegetable or canola works. If you’re avoiding deep frying, an air fryer at 375°F gets close.
Marinate the chicken for at least 4 hours (overnight is better). Once fried, keep it warm in a 200°F oven on a wire rack—never pile it up or the crust will steam. Leftovers? Reheat in the air fryer or oven (microwave = soggy). Fresh is best, but it’ll keep in the fridge for 2-3 days.
Why You’ll Love This Recipe
- One Pan Magic: I just toss the thighs in buttermilk, dredge in flour and cornstarch, and bake—no fancy steps.
- Finger-Licking Crisp: That buttermilk soak makes the meat juicy while the cornstarch gives it KFC’s signature crunch.
- Weeknight Hero: I batch-cook these on Sunday and we’re set for lunches and quick dinners all week.
- Budget Stretch: Honestly, chicken thighs are half the price of breasts and just as satisfying.
Step-by-Step Instructions for Copycat Crispy Chicken Thighs
Here’s my method for achieving that legendary crunch and flavor we all crave in every bite.
Step 1: Marinate the Chicken Thighs in Buttermilk
Place the 2 lb Chicken Thighs in a large bowl and pour over the 2 cups Buttermilk. Ensure every piece is fully submerged. I rub the buttermilk into the meat to ensure maximum tenderness and flavor penetration.
Cover and refrigerate for at least 4 hours, or ideally overnight. This long soak in the Buttermilk is non-negotiable—it breaks down proteins for ultra-tender meat while the acidity helps the coating adhere perfectly.
Step 2: Prepare the Signature Seasoned Coating
In a large bowl, whisk together the 2.5 cups All-Purpose Flour, 0.5 cup Cornstarch, 1.5 tbsp Salt, 1 tbsp Black Pepper, 1 tsp Dried Thyme, 1 tsp Dried Basil, and 1 tsp Dried Oregano.
Add the 1 tsp Celery Salt, 1 tsp Garlic Powder, 1 tsp Onion Powder, 1 tsp Dried Mustard, 1 tbsp Paprika, and 1 tsp White Pepper. Whisk until completely uniform—the spices should be evenly distributed throughout the flour mixture.
Step 3: Dredge and Rest for Maximum Crunch
Remove the Chicken Thighs from the Buttermilk, letting excess drip off. Dredge each piece in the seasoned flour mixture, pressing firmly to create a thick, even coating. Shake off any loose flour—you want a solid layer that will crisp up beautifully.
Place the coated thighs on a wire rack set over a baking sheet. Let them rest for 15-20 minutes at room temperature. This rest allows the coating to set, which prevents it from falling off during frying and creates that signature crunch.
Step 4: Deep-Fry to Golden Perfection
Heat the 4 cups Vegetable Oil in a large, heavy pot or Dutch oven to 350°F. Use a thermometer for precision—this temperature is crucial for even cooking without burning the coating. The oil should be deep enough to fully submerge the thighs.
Carefully lower the thighs into the hot oil, working in batches to avoid crowding. Fry for 12-15 minutes, turning occasionally, until the coating is deep golden brown and the internal temperature reaches 165°F. The oil should bubble steadily but not violently.
Transfer the fried thighs to a wire rack or paper towel-lined plate to drain. The coating should be audibly crisp when tapped and maintain its crunch even after cooling slightly. Serve immediately while hot for the ultimate experience.
Pro Tips For Making Kfc Original Recipe Chicken Thigh
- Brine the Thighs: Soak the chicken thighs in buttermilk for at least 4 hours—overnight if you can swing it. I learned this the hard way when my first batch turned out dry instead of juicy.
- Double Dredge: Dip the thighs in flour, then back in buttermilk, then flour again for that extra-crispy coating. Sounds tedious, but it actually changes the outcome.
- Hot Oil Test: Drop a pinch of flour into the oil before frying—if it sizzles immediately, the temperature is right. After burning three batches, I finally figured out this was the thing that mattered most.
- Rest Before Serving: Let the fried thighs sit on a wire rack for 5-10 minutes after frying. This isn’t the prettiest method, but it keeps them crispy instead of soggy.
Troubleshooting Perfect Results
Coating Falls Off
This usually happens if the chicken isn’t rested after dredging. Let it sit for 15-20 minutes on a wire rack so the coating sets properly. Also ensure your oil is at 350°F—too cool and the coating absorbs oil instead of crisping. 💡
Oily Coating
If your fried chicken looks greasy, your oil temperature was too low. Invest in a deep-fry thermometer—I use Taylor Precision—and maintain 350°F throughout. Drain on a wire rack, not paper towels, to preserve crunch.
Uneven Browning
Hot spots in your pot cause this. Use a heavy Dutch oven and rotate pieces halfway through the 12-15 minute cook time. If using an air fryer, turn pieces every 5 minutes for even exposure.
Dry Chicken Inside
Overcooking is the culprit. Pull pieces when they hit 165°F internal temperature. Bone-in thighs need that exact time to cook through without drying. Resting 5 minutes before serving helps redistribute juices.
Coating Not Crispy
Double-dip for maximum crunch: dredge in flour, dip back in buttermilk, then dredge again. The extra layer creates that signature texture. Also ensure your flour has cornstarch for that restaurant-style snap.
Bland Flavor
Don’t skip the celery salt—it’s essential for that authentic taste. I also add an extra ½ tsp of garlic powder to my blend. Let the coated chicken rest before frying so the seasoning penetrates the meat. 🔥
Nutrition Facts
Frequently Asked Questions
Can I use boneless thighs instead?
Yes, but bone-in gives better flavor and juiciness. If using boneless, reduce frying time to 8-10 minutes to avoid drying out.
Why rest the chicken after dredging?
Resting for 15-20 minutes lets the coating set, preventing it from falling off during frying. It’s key for that crispy, even finish.
Can I bake instead of fry?
Yes! Bake at 400°F for 25-30 minutes on a wire rack for a lighter but still crispy result. Flip halfway for even browning.
How do I store leftovers?
Keep in an airtight container in the fridge for up to 2-3 days. Reheat in the oven or air fryer to maintain crispiness.

Trained in classic French technique but raised on slow-cooked ribs and spicy rubs, she blends culinary skill with smoke and soul.
- Meat and Potato Recipe Ideas: Savory Pairings for Hearty Meals - October 3, 2026
- Recipe for Fried Prawns Batter: Ultra-Crispy Golden Shell - October 3, 2026
- Indian Lamb Curry Recipe Pressure Cooker: Fragrant Spices in a Fraction of the Time - October 3, 2026