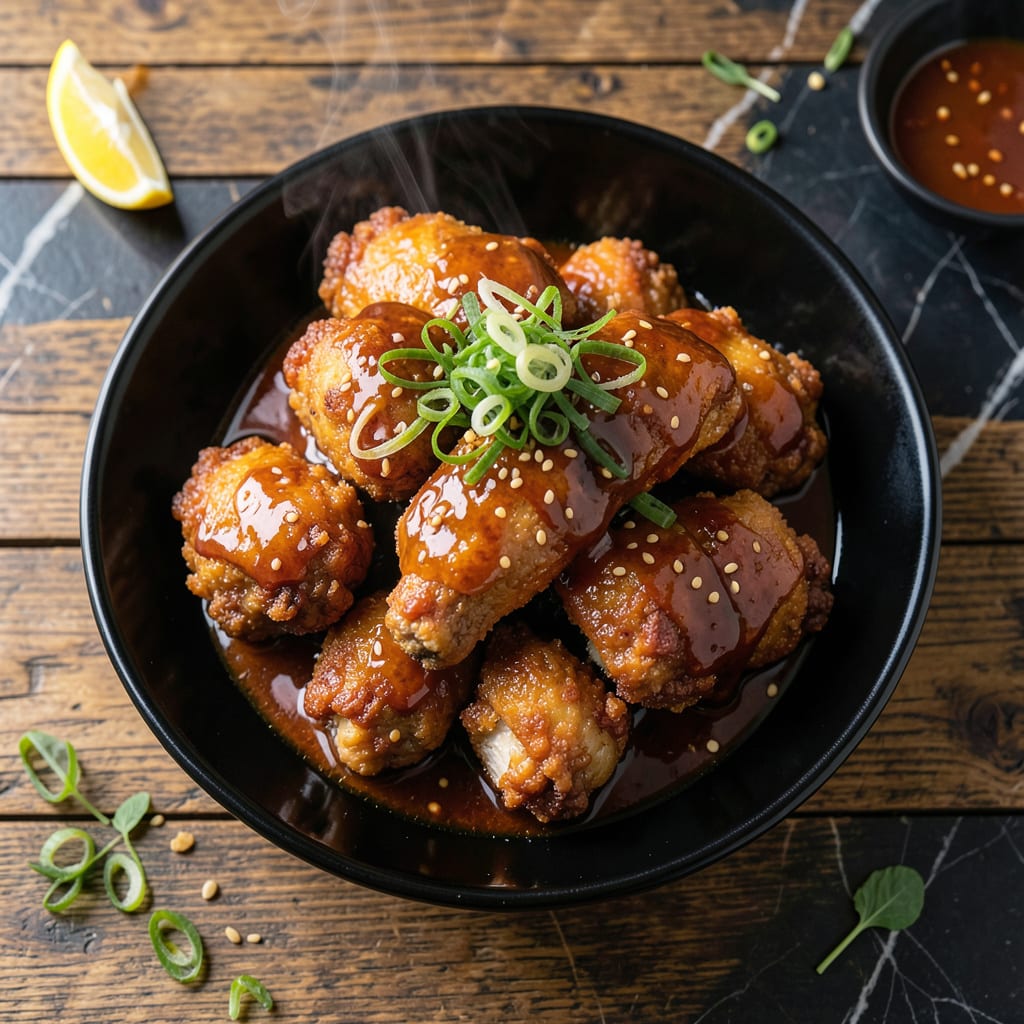
This double-fry method creates crispy perfection every time. The secret lies in the Korean BBQ glaze that caramelizes beautifully on the ultra-crunchy exterior.
I developed this technique to achieve that signature Korean fried chicken texture—crispy outside, juicy inside—with authentic sweet-spicy flavors.
Ingredients for Korean Bbq Fried Chicken
Double-fry method demands precise ingredients for that signature crispy, juicy Korean BBQ experience.
| Ingredient | Amount | Notes |
|---|---|---|
| Chicken Thighs 🍗 | 2 lb | Boneless, skin-on preferred |
| Potato Starch 🥔 | 1 cup | For ultra-crispy coating |
| All-Purpose Flour 🌾 | ½ cup | Lightly seasoned with salt |
| Baking Powder 🧂 | 1 tsp | Enhances crispiness |
| Salt 🧂 | 1 ½ tsp | Divided for seasoning |
| Black Pepper 🌶️ | ½ tsp | Freshly ground |
| Soy Sauce 🥢 | ⅓ cup | Low-sodium preferred |
| Gochujang 🌶️ | ¼ cup | Korean chili paste |
| Brown Sugar 🍚 | ¼ cup | Light or dark variety |
| Honey 🍯 | 3 tbsp | For glaze sweetness |
| Rice Vinegar 🍶 | 2 tbsp | Balances sweetness |
| Garlic Cloves 🧄 | 5 cloves | Minced for glaze |
| Fresh Ginger 🌿 | 1 tbsp | Grated, for zing |
| Sesame Oil 🫒 | 1 tbsp | Toasted variety |
| Vegetable Oil 🫒 | 4 cups | For deep frying |
| Green Onions 🧅 | 4 whole | Thinly sliced for garnish |
| Sesame Seeds 🌾 | 1 tbsp | Toasted, for garnish |
[recipe_ingredient_scaler]
The chicken thighs are non-negotiable here. Skin-on, bone-in yields the juiciest results, though boneless works in a pinch. Source from Whole Foods or a trusted local butcher for optimal quality. Potato starch is the secret to that shatteringly crisp coating—Bob’s Red Mill carries it, or check the Asian aisle at H Mart. Freshness matters, especially with the ginger and garlic.
No gochujang? Sriracha mixed with a bit of miso gets you close, but it won’t be the same. Swap honey for maple syrup if needed. Low-sodium soy sauce prevents the glaze from becoming cloying. For the oil, peanut or canola work just as well as vegetable. Baby it’s cold outside? Warm the honey slightly to make mixing easier.
Fry in batches, and keep the cooked chicken warm in a 200°F oven while you finish. Leftovers? Re-crisp in a 400°F oven for 10 minutes. The glaze thickens as it cools, so thin with a splash of water if needed. Best eaten fresh, but holds 2-3 days refrigerated.
Why You’ll Love This Recipe
- No Fuss Coating: I just toss the chicken thighs in potato starch and flour—no fancy prep, and the baking powder makes them extra crispy without deep-frying.
- Sticky Sweet Heat: That double-fry method locks in juicy meat while the Korean BBQ glaze caramelizes into a finger-licking, spicy-sweet crust.
- Crowd-Pleasing App: Honestly, it’s my go-to for game nights or lazy Sundays—everyone from picky kids to spice-loving adults devours it.
- Budget Stretch: Chicken thighs stay cheap, and one batch feeds four with leftovers that reheat surprisingly well in the air fryer.
Step-by-Step Instructions for Korean BBQ Fried Chicken
This double-frying technique guarantees ultra-crispy results with a glossy, flavorful glaze.
Step 1: Prepare and Season the Chicken
Pat the 2 lb chicken thighs dry with paper towels, removing any excess moisture. This is critical for achieving maximum crispiness. Trim off any excess fat or skin if desired, though leaving the skin on enhances texture.
Season both sides of the chicken with 1 tsp salt and 0.5 tsp black pepper. I always use freshly ground black pepper for the best flavor. Let the seasoned chicken sit at room temperature for 15 minutes while you prepare the coating.
Step 2: Create the Crispy Coating
In a large bowl, whisk together the 1 cup potato starch, 0.5 cup all-purpose flour, 1 tsp baking powder, and remaining 0.5 tsp salt. The baking powder is the secret to extra crispiness—it creates tiny air pockets in the coating.
Dredge each piece of chicken thoroughly in the starch-flour mixture, pressing gently to ensure an even, thick coating. Shake off any excess. The potato starch will give you that signature Korean fried chicken crunch that stays crispy even after glazing.
Step 3: First Fry for Even Cooking
Heat 4 cups vegetable oil in a deep, heavy-bottomed pot to 325°F. Use a thermometer for accuracy—this temperature ensures the chicken cooks through without browning too quickly. Carefully lower the coated chicken into the oil in batches, being careful not to overcrowd the pot.
Fry for 8-10 minutes, turning occasionally, until the chicken is cooked through and the coating is pale golden. The internal temperature should reach 165°F. Transfer to a wire rack set over a baking sheet to drain, leaving the oil hot for the second fry.
Step 4: Second Fry for Maximum Crispiness
Increase the oil temperature to 375°F. This higher heat will create that deep golden, ultra-crispy exterior. Fry the chicken again for 3-4 minutes until it’s deep golden brown and shatteringly crisp.
Drain on the wire rack again. This double-frying technique is what sets Korean fried chicken apart—it stays crispy much longer than single-fried chicken, even after being coated in sauce.
Step 5: Prepare and Apply the BBQ Glaze
In a saucepan, combine the 0.33 cup soy sauce, 0.25 cup gochujang, 0.25 cup brown sugar, 3 tbsp honey, 2 tbsp rice vinegar, minced 5 cloves garlic cloves, and grated 1 tbsp fresh ginger. Simmer over medium heat for 5-7 minutes until thickened.
Stir in the 1 tbsp sesame oil and remove from heat. Toss the crispy chicken in the glaze until evenly coated. Garnish with thinly sliced 4 whole green onions and 1 tbsp sesame seeds before serving immediately while hot and crispy.
Pro Tips For Making Korean Bbq Fried Chicken
- Double fry: Fry the chicken at 325°F for 8 minutes first, rest for 2 minutes, then fry again at 375°F for 4-5 minutes. I learned this the hard way—single frying leaves the inside undercooked or the outside soggy.
- Dry the thighs: Pat the chicken thighs completely dry with paper towels before dredging. After burning three batches, I finally figured out moisture makes the coating slide right off.
- Skip the overmixing: When combining potato starch, flour, and baking powder, mix just until combined—overworking it makes the coating dense and gummy.
- Use cold oil: Start with oil at 325°F, not smoking hot. Sounds weird, but it works: cold oil at the beginning helps the coating crisp evenly without burning before the chicken cooks through.
Storing and Reheating This Recipe
Refrigerator Storage
Let the chicken cool completely before storing—I spread pieces on a wire rack for 30 minutes to prevent sogginess. Transfer to an airtight container and refrigerate for up to 2-3 days. The glaze will thicken as it chills, making it perfect for reheating. ❄️
Freezer Storage
For longer storage, freeze unglazed chicken in a single layer first, then transfer to a freezer bag. This prevents pieces from sticking together. It’ll keep for up to 1 month without losing texture. I always label with the date to track freshness.
Oven Reheating
Preheat your oven to 400°F and place chicken on a wire rack over a baking sheet. Reheat for 10-12 minutes, flipping halfway, until the coating is crispy and internal temp hits 165°F. This method restores that fresh-fried crunch beautifully. 🔥
Air Fryer Method
For a quick option, use your air fryer at 375°F for 5-6 minutes. Shake the basket halfway through for even crisping. I find this works best with smaller pieces to ensure even heating.
Microwave Reheating
If you’re in a rush, microwave on 50% power for 1-2 minutes, then finish in a hot skillet for 2 minutes to revive the crust. Add a splash of water to the container to prevent drying out.
Nutrition Facts

Trained in classic French technique but raised on slow-cooked ribs and spicy rubs, she blends culinary skill with smoke and soul.
- Recipe for French Pork Spread Gorton: Savory Gallic Flavors in a Spreadable Delight - October 3, 2026
- Recipe for Pan Fried: Golden Crust with Savory Depth - October 3, 2026
- Recipe For Fried Chicken In A Pressure Cooker: Crispy Golden Bites in Half the Time - October 3, 2026