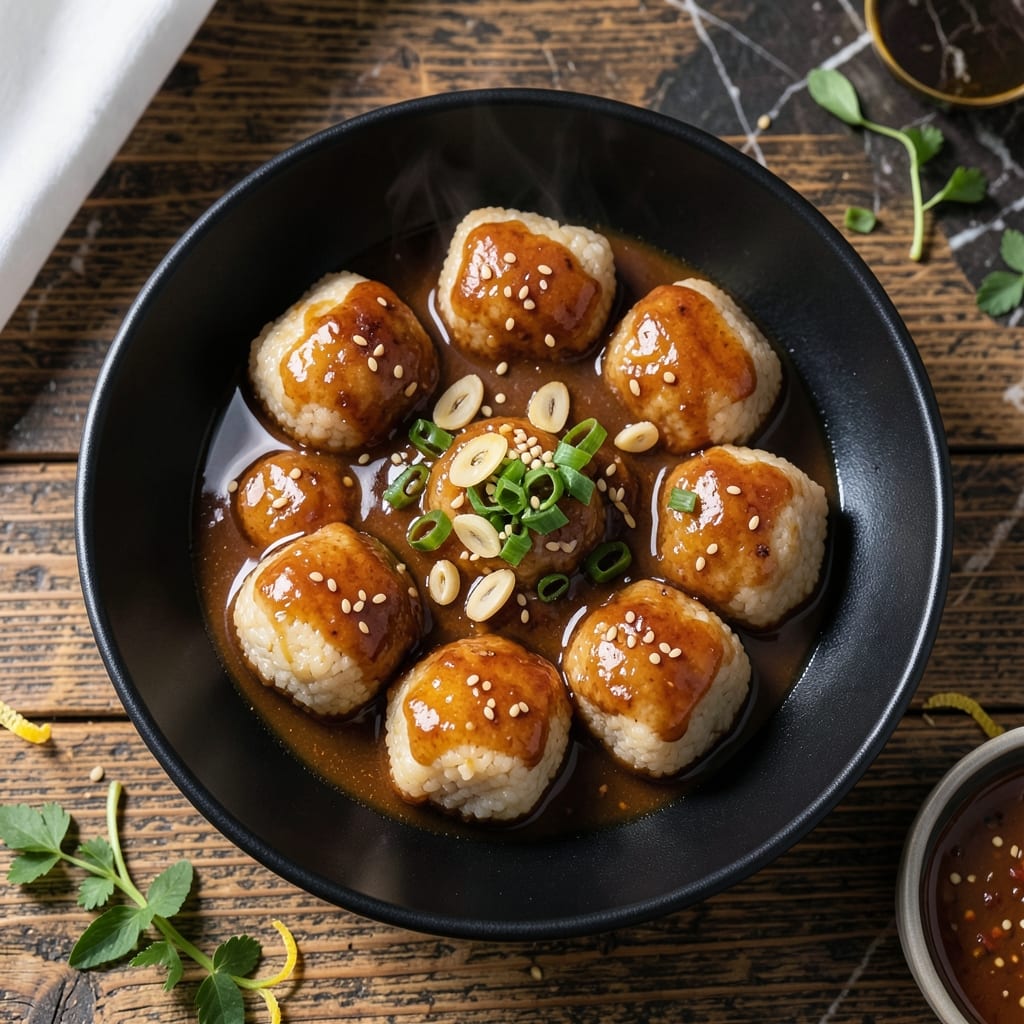
Soft, chewy rice cakes bathed in a glossy sweet soy glaze prove that Korean flavors shine without spice. I developed this vegetarian version after realizing how many people miss out on this classic dish due to heat sensitivity.
The key is using fresh rice cakes and building layers of flavor through careful reduction. A simple sauce of soy, sugar, and aromatics transforms plain rice into tender pillows with caramelized edges.
This method delivers restaurant-quality results at home with minimal effort. The rice cakes absorb the glaze while maintaining their signature chewy texture, creating a dish that’s both comforting and impressive.
Serve warm as a main or side dish. The glaze thickens beautifully as it cools, coating every bite perfectly.
Ingredients for Korean Rice Cake Recipe Non Spicy
Fresh rice cakes and a few pantry staples create tender, glaze-coated pillows with no heat.
| Ingredient | Amount | Notes |
|---|---|---|
| Korean Rice Cakes 🍚 | 1 lb | Fresh, cylindrical variety preferred |
| Soy Sauce 🥢 | ½ cup | Low-sodium for controlled flavor |
| Brown Sugar 🍚 | ⅓ cup | Light or dark works well |
| Garlic Cloves 🧄 | 4 cloves | Minced finely for sauce |
| Sesame Oil 🫒 | 1 tbsp | Toasted for nutty aroma |
| Vegetable Broth 🥣 | ½ cup | Low-sodium or homemade |
| Green Onions 🧅 | 3 whole | Thinly sliced for garnish |
| Sesame Seeds 🌿 | 1 tbsp | Toasted for garnish |
| Corn Starch 🌾 | 1 tbsp | Mixed with water for slurry |
| Neutral Cooking Oil 🫒 | 2 tbsp | For preventing sticking |
| Water 💧 | 2 tbsp | For corn starch slurry |
| Ground Black Pepper 🌶️ | ¼ tsp | Freshly ground preferred |
[recipe_ingredient_scaler]
The rice cakes are non-negotiable—fresh Korean rice cakes (tteok) from an Asian market give the right chewy texture. Pre-packaged ones work in a pinch but may be firmer. Look for cylindrical white rice cakes (not the flat disc kind). For the soy sauce, Kikkoman low-sodium is reliable and widely available. The brown sugar adds caramelization, so don’t substitute white sugar here.
No brown sugar? Coconut sugar or maple syrup at a 1:1 ratio works but may darken faster. Out of vegetable broth? Water plus a bouillon cube is fine. For gluten-free, swap soy sauce for tamari. The sesame oil is key for authentic flavor—Kadoya brand is a solid choice at most grocery stores. Skip the sesame seeds if you must, but they add a nice crunch.
Rice cakes keep 5-7 days in the fridge if unopened, but use within 2-3 days once opened. The glaze thickens as it cools, so serve warm. Leftovers reheat well with a splash of water—but consume within 3 days for best texture.
Why You’ll Love This Recipe
- One Pot Wonder: I toss everything in a pan—rice cakes, soy sauce, brown sugar—and walk away while it caramelizes.
- Sweet-Garlicky Bite: The brown sugar and garlic turn the rice cakes into these tender, savory-sweet morsels I can’t stop sneaking.
- Crowd-Pleasing Dish: Even my picky nephew cleans his plate, no spice complaints.
- Stretches Far: A pound of rice cakes feeds four easily, and leftovers taste just as good the next day.
Step-by-Step Instructions for Korean Rice Cakes with Sweet Soy Glaze
Here’s the method. Straightforward, tested, works every time.
Step 1: Soak and Prepare the Rice Cakes
Place the 1 lb Korean Rice Cakes in a bowl of warm water to cover. Soak for 15-20 minutes until they soften and become pliable. Fresh rice cakes are firm when cold, so this step ensures they cook evenly and absorb the sauce properly.
Drain the rice cakes well and pat dry with a clean towel. They should feel slightly tacky but not dripping. If they’re too wet, they’ll steam rather than sear when cooked.
Step 2: Make the Sweet Soy Sauce
In a small bowl, whisk together the 0.5 cup Soy Sauce, 0.33 cup Brown Sugar, minced 4 cloves Garlic Cloves, 1 tbsp Sesame Oil, 0.5 cup Vegetable Broth, and 0.25 tsp Ground Black Pepper. Stir until the brown sugar fully dissolves and the mixture becomes smooth.
This sauce should be glossy and slightly thick from the sugar. Taste and adjust sweetness or saltiness now—once the rice cakes absorb it, you can’t change the flavor balance.
Step 3: Cook the Rice Cakes
Heat 2 tbsp Neutral Cooking Oil in a large skillet over medium-high heat. Add the drained rice cakes and cook for 5-6 minutes, stirring occasionally, until they develop a light golden brown crust on the edges.
The rice cakes should start to puff slightly and develop a chewy exterior. Don’t let them burn—lower the heat if they’re browning too quickly. You’re building flavor, not char.
Step 4: Thicken and Finish the Dish
Pour the soy sauce mixture over the rice cakes and stir to coat evenly. Bring to a gentle simmer. In a small cup, mix the 1 tbsp Corn Starch with 2 tbsp Water to create a slurry, then stir it into the skillet.
Cook for 2-3 minutes until the sauce thickens into a glossy glaze that clings to the rice cakes. The sauce should coat the back of a spoon and look slightly syrupy, not watery.
Remove from heat and stir in the thinly sliced 3 whole Green Onions. The residual heat will soften them slightly while keeping their bright color.
Step 5: Garnish and Serve
Transfer the rice cakes to a serving dish and sprinkle with the 1 tbsp Sesame Seeds. The sesame seeds add a nutty crunch that contrasts beautifully with the soft rice cakes and sweet-savory sauce.
Serve immediately while hot. The rice cakes should be tender with a slight chew, and the sauce should be thick enough to coat each piece without pooling at the bottom of the dish.
Pro Tips For Making Korean Rice Cake Recipe Non Spicy
- Soak the Rice Cakes: I learned this the hard way—dry rice cakes turn gummy. Soak them in warm water for 10-15 minutes before cooking to guarantee a tender, chewy texture.
- Bloom the Garlic: Cook minced garlic in sesame oil for 30 seconds on medium-low until fragrant but not brown. Burnt garlic makes the whole dish bitter.
- Balance the Sauce: Taste as you go—start with 2 tablespoons brown sugar and 3 tablespoons soy sauce, then adjust. Too much sugar overpowers the savory depth.
- Finish with Sesame Oil: Stir in 1 teaspoon of sesame oil at the very end, off the heat. It adds a nutty aroma that gets lost if cooked too long.
Serving Suggestions for korean rice cake recipe non spicy
Family-Style Plating
Transfer the glaze-coated rice cakes to a large, shallow bowl so everyone can dig in. The communal style reminds me of Sunday dinners at my grandmother’s, where the best meals were always shared. Arrange them in a single layer to show off that beautiful caramelized coating. 💛
Individual Portions
For a more elegant presentation, use small white ramekins or shallow pasta bowls. Portion 4-5 rice cakes per serving, then drizzle any extra sauce from the pan on top. The contrast of white dishware against the dark glaze looks stunning.
Garnish Placement
Sprinkle the sesame seeds and green onions just before serving so they stay crisp. I like to concentrate the green onions in the center for a pop of color. The seeds will cling to the glaze, adding texture to every bite.
Side Pairings
A simple cucumber salad with rice vinegar cuts through the richness. Or try steamed bok choy drizzled with a touch of sesame oil. Both keep the meal vegetarian while adding freshness.
Temperature Tip
Serve immediately while the sauce is still glossy and hot. If you must hold it, keep covered in a 200°F oven for up to 15 minutes, but the rice cakes are best fresh from the pan. The glaze thickens as it cools, so timing matters.
The chewy texture changes if it sits too long—this is one dish that doesn’t wait well. 🔥
Nutrition Facts
Frequently Asked Questions
Can I use frozen rice cakes?
Yes, but thaw them in warm water for 20-25 minutes first. Frozen ones often have a firmer texture, so soaking is essential for even cooking.
Why did my sauce turn out thin?
Simmer it longer or add more cornstarch slurry. The sauce should coat the back of a spoon. Cook for an extra 1-2 minutes to thicken properly.
How do I make it gluten-free?
Swap regular soy sauce for tamari. All other ingredients are naturally gluten-free. Check labels to avoid cross-contamination.
Can I prepare this ahead of time?
Cook just before serving for best texture. Reheated rice cakes lose their chewiness. If needed, store components separately and combine when ready to eat.

Trained in classic French technique but raised on slow-cooked ribs and spicy rubs, she blends culinary skill with smoke and soul.