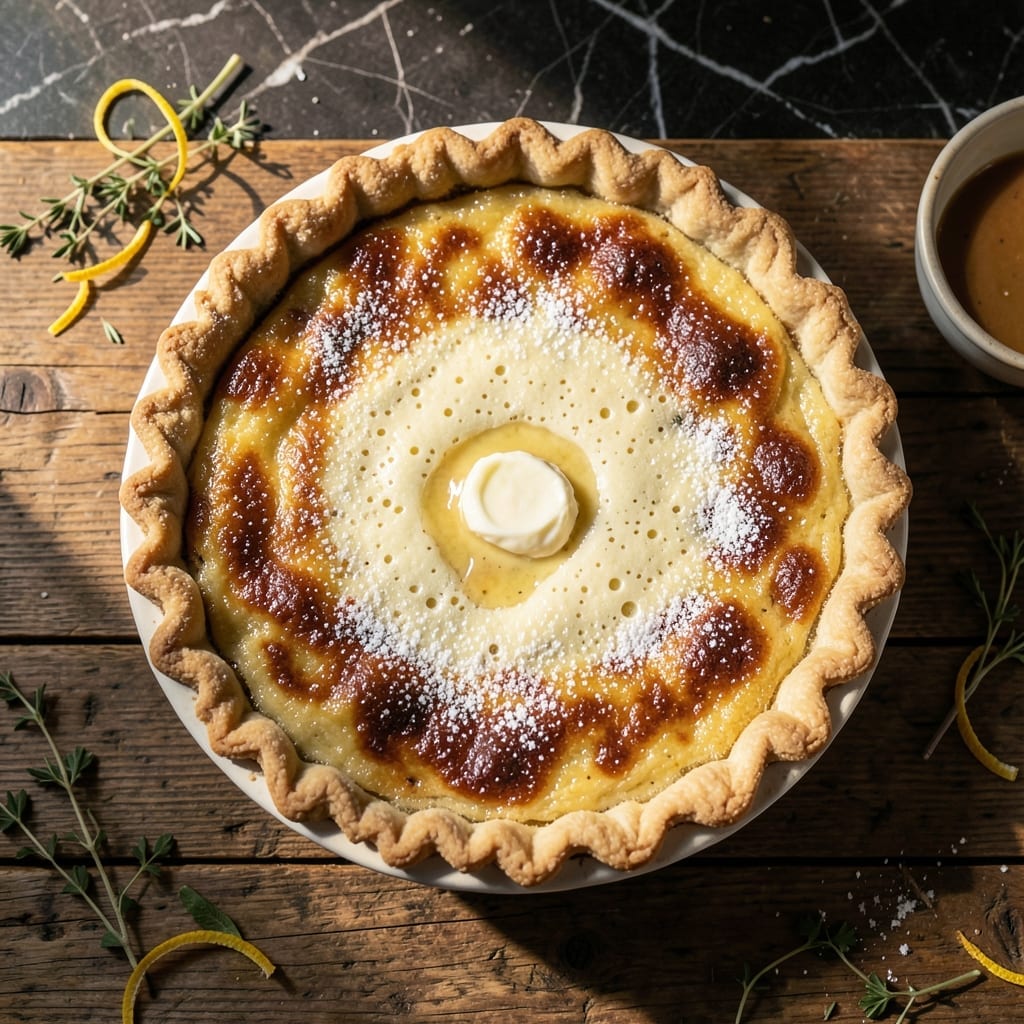
This old-fashioned custard pie delivers a creamy texture that’s both comforting and elegant. The buttermilk base creates a smooth, velvety filling with just the right amount of tang.
Simple ingredients and a straightforward method make it a timeless dessert. The result is a pie with a golden crust and a rich, custard-like center that’s perfect for any occasion.
Ingredients for Pioneer Woman Buttermilk Pie
Old-fashioned simplicity meets rich custard perfection in this timeless dessert.
| Ingredient | Amount | Notes |
|---|---|---|
| Unbaked Pie Crust 🥧 | 1 whole | 9-inch standard or homemade |
| Granulated Sugar 🍚 | 1 ½ cups | Fine white sugar preferred |
| All-Purpose Flour 🌾 | ¼ cup | For thickening custard |
| Buttermilk 🥛 | 2 cups | Full-fat for richness |
| Large Eggs 🥚 | 3 whole | Room temperature preferred |
| Unsalted Butter 🧈 | ½ cup | Melted and cooled |
| Vanilla Extract 🌿 | 1 tsp | Pure extract recommended |
| Salt 🧂 | ¼ tsp | Fine sea salt or table salt |
| Baking Soda ⚗️ | ¼ tsp | Balances acidity in buttermilk |
| Ground Nutmeg 🌰 | ¼ tsp | Freshly grated for best flavor |
| Lemon Juice 🍋 | 1 tbsp | Freshly squeezed preferred |
[recipe_ingredient_scaler]
The buttermilk is non-negotiable here. Full-fat buttermilk from Whole Foods or Organic Valley delivers that signature tang and creaminess. A well-chilled unbaked crust prevents sogginess—Pillsbury rolled pie crust works in a pinch, but homemade (with extra butter) takes it over the top. Look for buttermilk with a thick consistency, not the watery stuff.
No buttermilk? Whole milk with 1 tbsp lemon juice or vinegar per cup does the trick (let it sit 5 minutes). Out of nutmeg? Cinnamon or allspice at half the amount works. The sugar can be reduced by 1/4 cup if you prefer less sweetness, but don’t skip the melted butter—it’s key for that velvety mouthfeel. Eggs must be room temp to blend smoothly into the custard.
This pie keeps 3-4 days covered at room temperature (yes, really—it’s a custard, but the sugar preserves it). Refrigerate for up to 1 week if your kitchen runs warm. Leftovers taste even better the next day once flavors meld. Freezing isn’t recommended—the texture changes.
Why You’ll Love This Recipe
- One Bowl Wonder: I just dump everything into a single bowl, whisk, and pour—no fuss, no extra dishes.
- Custardy Bliss: That tangy buttermilk and sugar create this rich, creamy filling that’s like a cross between pie and cheesecake.
- Potluck MVP: I bring this to every gathering, and it’s always the first thing gone. Works for brunch, dessert, or a midnight snack.
- Pantry Staples: Honestly, I always have these ingredients on hand—no last-minute grocery runs needed.
Step-by-Step Instructions for Buttermilk Pie
This method ensures a silky custard with the perfect balance of sweetness and tang.
Step 1: Prepare the Pie Crust and Preheat
Begin by fitting the unbaked pie crust into a standard 9-inch pie dish. Crimp the edges decoratively and place it in the refrigerator to chill while you prepare the filling. This prevents shrinking during baking.
Preheat your oven to 350°F. The moderate temperature allows the custard to set evenly without curdling or forming a thick skin on top. I always use the middle rack position for consistent heat distribution.
Step 2: Whisk the Wet Ingredients
In a large mixing bowl, whisk together the 3 whole Large Eggs until pale and slightly frothy. Add the 1.5 cups Granulated Sugar gradually, whisking continuously until fully dissolved. This creates a smooth base for your custard.
Slowly pour in the 2 cups Buttermilk and the 1 tbsp Lemon Juice while whisking. The buttermilk provides the signature tang, and the lemon juice enhances the flavor complexity. Add the 1 tsp Vanilla Extract and the 0.5 cup Unsalted Butter (melted and cooled) and whisk until homogeneous.
Step 3: Incorporate Dry Ingredients
In a separate small bowl, combine the 0.25 cup All-Purpose Flour, 0.25 tsp Salt, 0.25 tsp Baking Soda, and 0.25 tsp Ground Nutmeg. The flour thickens the custard, while the baking soda reacts with the buttermilk’s acidity for a tender texture.
Gradually sift the dry mixture into the wet ingredients, whisking constantly to prevent lumps from forming. The batter should be smooth and pourable, with no visible streaks of flour. This careful incorporation ensures a uniform custard without pockets of dry ingredients.
Step 4: Bake Until Set
Pour the filling into the chilled pie crust. The crust should be cold to prevent the butter in it from melting prematurely. Gently tap the pie dish on the counter to remove any large air bubbles from the filling.
Bake for 45-55 minutes until the center is just set—it should jiggle slightly like gelatin when gently shaken, but not be liquid. The top should be golden brown with a slight dome. Overbaking will cause the custard to curdle or crack, so start checking at 45 minutes.
Step 5: Cool and Serve
Remove the pie from the oven and let it cool on a wire rack for at least 1 hour. The custard will continue to set as it cools. I recommend cooling completely to room temperature for the best texture.
Serve the pie at room temperature or slightly chilled. Each slice should have a smooth, velvety custard with a delicate balance of sweetness from the sugar and tang from the buttermilk. Store leftovers covered in the refrigerator for up to 3 days.
Pro Tips For Making Pioneer Woman Buttermilk Pie
- Prebake the Crust: Blind-bake your unbaked pie crust for 8-10 minutes at 350°F before adding the filling. I learned this the hard way—without it, the bottom stays soggy under the custard.
- Room Temp Eggs: Pull your eggs out 30 minutes before mixing. Sounds weird, but it works: they incorporate smoother into the buttermilk and sugar, preventing lumps in the filling.
- Skip Low-Fat Buttermilk: Use full-fat buttermilk for the richest texture. After burning three batches with the low-fat version, I finally figured out it just doesn’t set the same.
- Pull Early: Take the pie out when the center still jiggles slightly—it’ll finish setting as it cools. My grandmother swore by this, and she was right: overbaking makes it dense.
Troubleshooting Perfect Results
Curdled Custard Fix
If your pie develops a lumpy texture, you likely overbaked it. Pull it at the first sign of golden brown color, usually around 45 minutes. The center should jiggle like gelatin when shaken. Cover with foil if the top browns too quickly. 🌡️
Soggy Bottom Prevention
Pre-bake your crust for 8-10 minutes at 350°F before adding filling. I also chill my pie dish for 15 minutes after lining it. This creates a barrier that prevents the custard from making the crust soggy.
Cracked Surface Solution
A cracked top usually means the oven temperature was too high. Stick to 350°F and avoid opening the door during baking. If cracks appear, cover with whipped cream—no one will notice!
Wet Center Issue
If the center remains liquid after 55 minutes, your oven may run cool. Check with an oven thermometer. I use ThermoWorks for accuracy. The pie is done when the center reaches 175°F.
Bland Flavor Boost
If your pie lacks tang, try adding an extra 1 tbsp lemon juice next time. For more depth, use brown sugar instead of granulated. I also recommend a pinch of freshly grated nutmeg on top before baking. 💡
Crust Shrinking
To prevent shrinking, don’t stretch the dough when fitting it into the pan. Chill the crust for at least 30 minutes before baking. I use Pillsbury in a pinch, but homemade with extra butter works best.
Nutrition Facts
Frequently Asked Questions
Can I use low-fat buttermilk instead?
For best results, stick with full-fat buttermilk. The higher fat content creates the signature creamy texture. Low-fat versions may yield a thinner custard.
Why does my pie crack on top?
Cracks usually mean the oven was too hot or the pie overbaked. Stick to 350°F and remove it when the center jiggles slightly. Cover with whipped cream if needed!
How do I know when it’s done?
The center should be set but still jiggle like gelatin at 45-55 minutes. A toothpick inserted near the center should come out clean.
Can I make this ahead of time?
Yes! It keeps well covered at room temperature for 3-4 days. In fact, many find the flavor improves after a day.

Trained in classic French technique but raised on slow-cooked ribs and spicy rubs, she blends culinary skill with smoke and soul.
- Recipe for Curried Tofu: Aromatic Spices With Crispy Edges - October 3, 2026
- Recipe for Dumplings in Crock Pot: Fluffy Pillows with Minimal Effort - October 3, 2026
- Recipe For Diced Pork In Slow Cooker: Melt-In-Your-Mouth Tenderness All Day - October 3, 2026