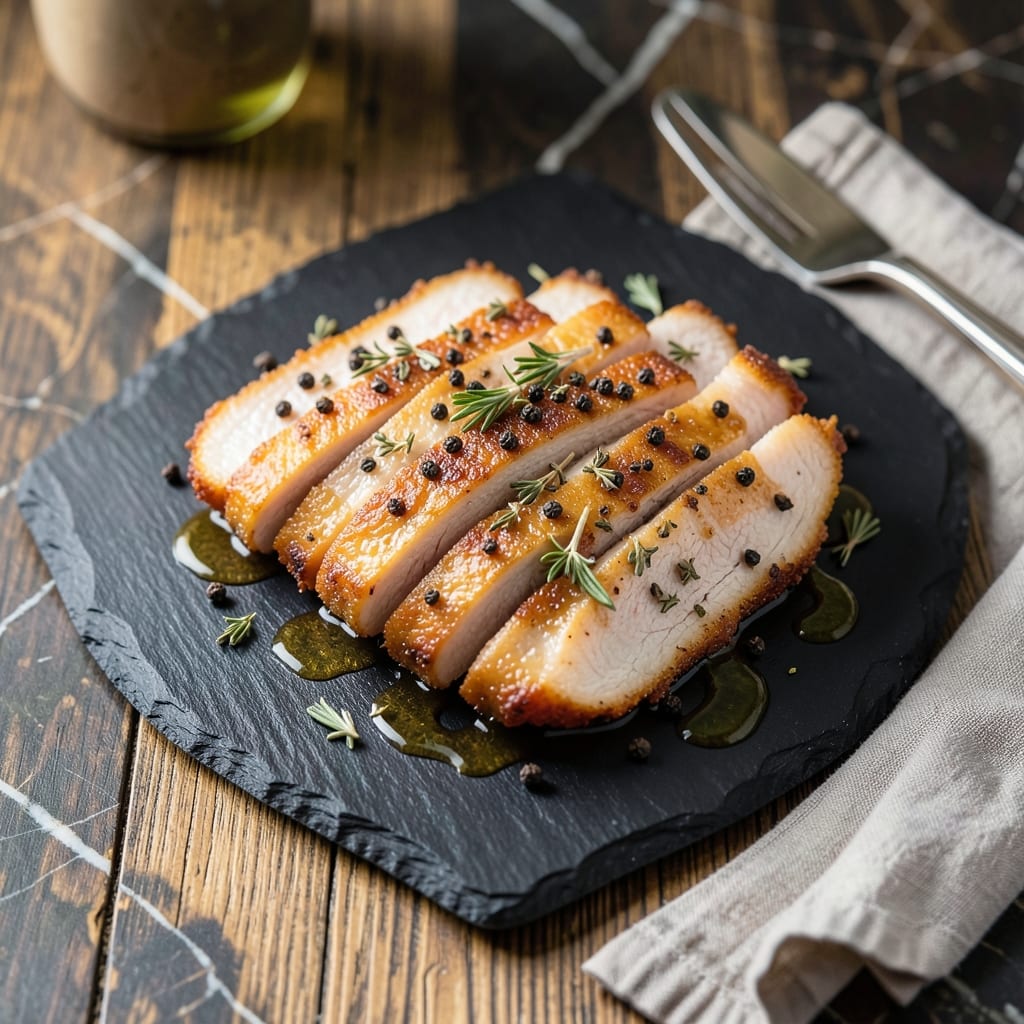
I first tried pork belly slices at a London gastropub, where the crispy layers and tender meat changed my view of this humble cut. The British approach focuses on slow roasting followed by a high-heat finish for perfect texture.
This method transforms fatty pork belly into golden, crispy slices with melt-in-your-mouth centers. The secret lies in scoring the skin deeply and patting it completely dry before cooking to ensure maximum crispness.
What emerges is a dish with shatteringly crispy tops and unctuous meat beneath, ready to serve with apple sauce or mustard. The contrast between the crackling skin and soft belly makes every bite unforgettable.
Perfect for Sunday roasts or dinner parties. Here’s how to achieve that signature British crispy result at home.
Ingredients for Pork Belly Slices Recipe Uk
A few quality ingredients transform pork belly into a Sunday showstopper.
| Ingredient | Amount | Notes |
|---|---|---|
| Pork Belly 🥓 | 2 lb | Skin-on, scored in a diamond pattern |
| Sea Salt 🧂 | 1 tbsp | Coarse, for drying the skin |
| Black Peppercorns 🌶️ | 2 tsp | Freshly cracked for best flavor |
| Fennel Seeds 🌿 | 1 tsp | Lightly toasted to release aroma |
| Dried Thyme 🍃 | 1 tsp | Crushed between fingers before using |
| Dried Rosemary 🌿 | 1 tsp | Finely chopped for even distribution |
| Garlic Cloves 🧄 | 6 cloves | Smashed but left whole |
| Bay Leaves 🍃 | 2 whole | Fresh or dried, removed before serving |
| Apple Cider Vinegar 🍏 | 2 tbsp | For balancing the richness |
| Olive Oil 🫒 | 1 tbsp | For initial searing if desired |
| English Mustard 🟡 | ¼ cup | For serving, optional but traditional |
| Apple Sauce 🍎 | ½ cup | For serving, homemade or store-bought |
[recipe_ingredient_scaler]
Pork belly is the star here—look for skin-on cuts with even fat marbling at your butcher or the meat counter at Waitrose or M&S. The skin should be thick but not tough. Ask them to score it for you if you’re unsure (saves time and ensures even cooking). I’ve had great results with free-range, outdoor-bred from local farms. Avoid pre-packaged stuff that’s been sitting too long—freshness matters for that perfect crisp.
No fennel seeds? Coriander seeds give a similar earthy note. Fresh rosemary can replace dried at one-third the amount. If apple cider vinegar isn’t handy, white wine vinegar works in a pinch. For the mustard, Dijon is a solid swap if you prefer a sharper kick. The apple sauce can be skipped, but honestly, it’s the ideal partner for cutting through all that richness.
Cooked pork belly keeps in the fridge for up to 4 days—reheat in the oven to revive the crispiness. Freezes beautifully for 3 months if wrapped tightly. Pro tip: save the rendered fat for roasting potatoes (worth the extra effort).
Why You’ll Love This Recipe
- I’ll be real: it’s my go-to for Sunday lunch, and the leftovers make killer sandwiches.
- Minimal Effort: Honestly, it’s just rub, rest, roast—no fancy steps, and the oven does all the work.
- Crispy Perfection: That crackling skin with tender meat beneath? The sea salt and fennel seeds make it irresistible.
- Feeds a Crowd: I’ll be real: it’s my go-to for Sunday lunch, and the leftovers make killer sandwiches.
Step-by-Step Instructions for Pork Belly Slices
Here’s how I get that perfect crackling every time—simple, foolproof, and utterly delicious.
Step 1: Cure and Season the Pork Belly
Pat the 2 lb Pork Belly dry with paper towels, focusing on the scored skin. This is non-negotiable for crispiness. Rub the sea salt aggressively into the skin and meat—this draws out moisture and ensures a dry surface that crackles beautifully.
Crack the 2 tsp Black Peppercorns and mix with the 1 tsp Fennel Seeds, 1 tsp Dried Thyme, and 1 tsp Dried Rosemary. Press this mixture evenly over the meat, avoiding the skin. The spices should cling without falling off.
Step 2: Slow-Roast for Tender Meat
Place the pork belly skin-side up on a wire rack set over a baking tray. Add the 6 cloves Garlic Cloves and 2 whole Bay Leaves to the tray beneath the rack. Roast in a preheated 300°F oven for 2 hours. This low and slow start renders the fat and tenderizes the meat.
After 2 hours, increase the oven temperature to 425°F. Brush the skin with the 1 tbsp Olive Oil and return to the oven for 20-25 minutes until the skin puffs up and turns a deep, golden brown. Watch it closely—this is when the magic happens.
Step 3: Rest and Crisp the Skin
Remove the pork belly from the oven and let it rest for 10 minutes. This allows the juices to settle and the skin to firm up slightly. Don’t skip this step, or the juices will spill out when you slice it.
For extra crispiness, return the pork belly to the 425°F oven for another 5-10 minutes. You’re aiming for a skin that shatters when you press it with a knife. The meat beneath should be fork-tender and richly flavored from the slow roast.
Step 4: Slice and Serve with Traditional Accompaniments
Slice the pork belly into thick pieces, ensuring each slice has a portion of the crispy skin and tender meat. Arrange on a serving platter and drizzle with the 2 tbsp Apple Cider Vinegar for a bright, tangy contrast to the richness.
Serve immediately with the 0.25 cup English Mustard and 0.5 cup Apple Sauce on the side. The mustard’s sharpness cuts through the fat, while the apple sauce adds a sweet, fruity balance. Remove the bay leaves before serving—they’ve done their job infusing flavor into the meat.
Pro Tips For Making Pork Belly Slices Recipe Uk
- Score the Skin: Use a sharp knife to cut 1cm deep slashes across the skin—this lets the fat render out properly and gives you that perfect crackling.
- Dry the Belly: Pat the pork belly completely dry with paper towels before seasoning; any moisture will steam the skin instead of crisping it.
- Season Generously: Don’t be shy with the sea salt and crushed black peppercorns—pork belly needs bold seasoning to cut through the richness.
- Rest Before Carving: Let the cooked belly rest for 10-15 minutes under foil; it keeps the juices from running out when you slice it.
Storing and Reheating This Recipe
Fridge Storage
Let your pork belly cool completely, then transfer to an airtight container with a paper towel to absorb excess fat. It keeps in the fridge for up to 4 days. The flavors deepen overnight, making leftovers taste even better. ❄️
Freezer Method
Wrap slices tightly in plastic wrap and place in a freezer bag, squeezing out all air. It freezes well for 3 months without losing texture. For best results, freeze in portion sizes you’ll actually use.
Oven Reheating
Preheat oven to 350°F and place pork belly on a wire rack over a baking sheet. Reheat for 10-15 minutes until the skin crisps up again. This method restores that perfect crackling we all love. 🔥
Quick Microwave Fix
For a fast option, microwave slices on medium power for 1-2 minutes, then finish in a hot skillet for 30 seconds per side to revive the crispiness. Cover with a paper towel to prevent splattering.
Make-Ahead Tip
Cook the pork belly a day ahead and refrigerate uncovered overnight. This dries the skin further for even better crackling when reheated. I learned this trick from a pub chef in Cornwall.
Nutrition Facts
Frequently Asked Questions
Why is my pork belly skin not crispy?
Insufficient drying is the main culprit. Ensure the skin is thoroughly patted dry before cooking, and don’t cover during roasting. Finishing at 425°F for 20-25 minutes is key.
Can I use a different cut of pork?
Pork belly is ideal for its fat-to-meat ratio. Shoulder or ribs won’t give the same texture. Stick with skin-on belly for best results.
How thick should the slices be?
Aim for 1-inch slices to balance crispy skin and tender meat. Thinner slices may dry out, while thicker ones need longer cooking.
What if I don’t have a wire rack?
Place the pork directly on a baking tray, but flip it halfway through cooking. A rack ensures even air circulation for crispier skin.

Trained in classic French technique but raised on slow-cooked ribs and spicy rubs, she blends culinary skill with smoke and soul.
- Recipe for Fried Prawns Batter: Ultra-Crispy Golden Shell - October 3, 2026
- Indian Lamb Curry Recipe Pressure Cooker: Fragrant Spices in a Fraction of the Time - October 3, 2026
- Recipe for Oven Roasted: Golden Crisp Perfection Without the Fryer - October 3, 2026