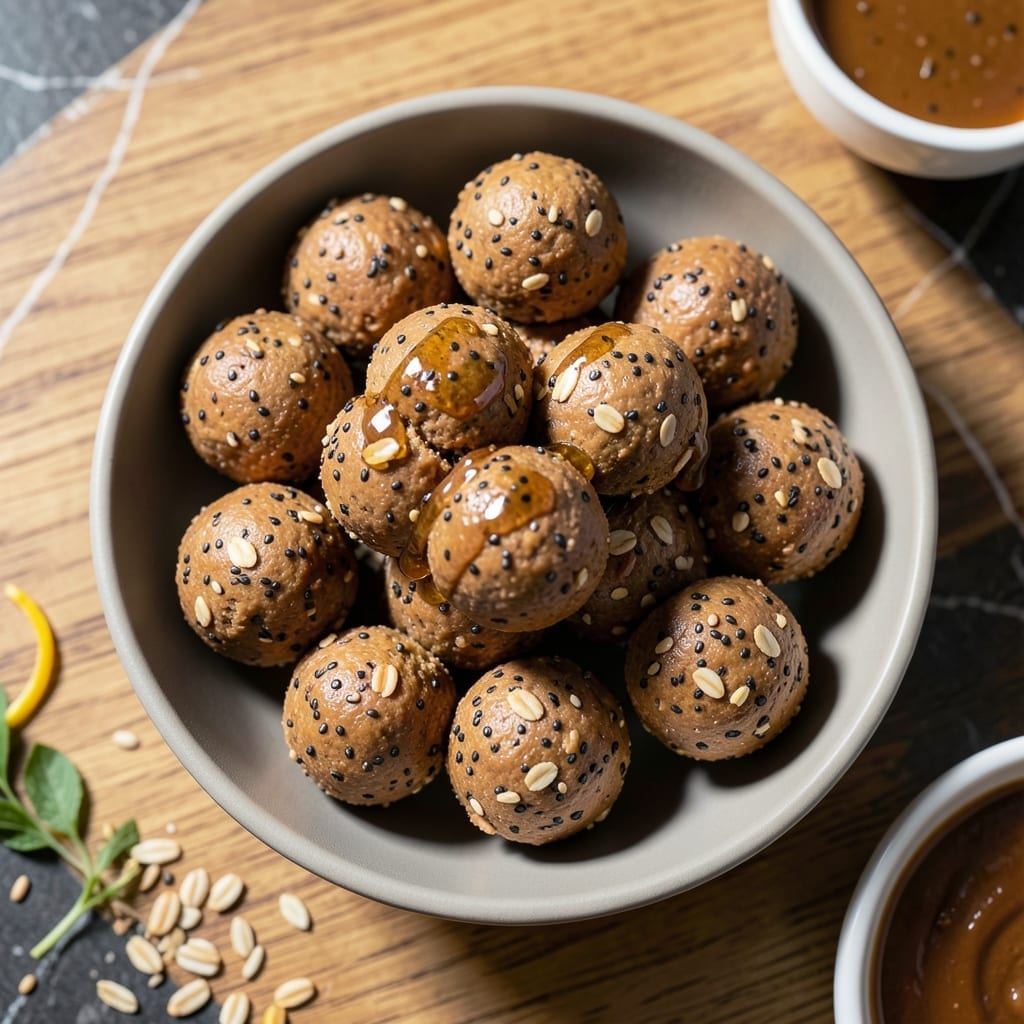
These no-bake energy bites deliver a protein-packed snack in minutes, with no oven required. The combination of oats, nut butter, and protein powder creates a satisfying texture that holds together perfectly.
Each bite offers a balanced mix of energy and nutrition, ideal for pre- or post-workout fuel. Ready in under 15 minutes, they keep well in the fridge for quick, healthy snacking.
Ingredients for Protein Balls Recipe with Protein Powder
Simple pantry staples combine to create these energy-packed bites with zero baking required.
| Ingredient | Amount | Notes |
|---|---|---|
| Old-Fashioned Rolled Oats 🌾 | 2 cups | Certified gluten-free if needed |
| Natural Peanut Butter 🥜 | ¾ cup | Unsweetened, creamy variety |
| Vanilla Protein Powder 💪 | ½ cup | Whey or plant-based variety |
| Honey 🍯 | ⅓ cup | Local raw for best quality |
| Ground Flaxseed 🌿 | 2 tbsp | For binding and nutrition |
| Chia Seeds 🌱 | 2 tbsp | Optional for extra fiber |
| Mini Chocolate Chips 🍫 | ⅓ cup | Dairy-free if preferred |
| Vanilla Extract 🌿 | 1 tsp | Pure extract for best flavor |
| Sea Salt 🧂 | ¼ tsp | Fine grain for even distribution |
| Cinnamon 🌿 | ½ tsp | Ground, for warmth and depth |
[recipe_ingredient_scaler]
The oats form the base, so use old-fashioned rolled oats for the right texture—quick oats get too mushy. Natural peanut butter (the kind with just peanuts and salt) works best; Jif Natural or Smucker’s Natural are widely available. For the protein powder, any vanilla variety works, but I prefer Orgain or Optimum Nutrition Gold Standard for smooth blending without grittiness.
No peanut butter? Almond butter or sunflower seed butter work in a pinch. Out of honey? Maple syrup at the same amount keeps it vegan-friendly. The chocolate chips are optional but highly recommended (trust me). Need to skip the protein powder? Add 2 extra tablespoons of oats and 1 tablespoon of ground flaxseed to maintain structure.
These keep beautifully in the fridge for 2 weeks or freeze for 3 months. Store in an airtight container with parchment between layers to prevent sticking. They firm up as they chill, so resist the urge to eat them all immediately (worth the wait).
Why You’ll Love This Recipe
- No-Bake Bliss: I just mix, roll, and pop them in the fridge—no oven, no fuss.
- Sweet & Nutty: The peanut butter and honey combo makes them taste like a treat, not a protein boost.
- Grab-and-Go Fuel: I toss a few in my gym bag or lunchbox for a quick energy hit.
- Budget-Friendly Bites: A batch costs pennies compared to store-bought protein snacks and lasts all week.
Step-by-Step Instructions for No-Bake Protein Balls
These simple steps yield perfectly textured energy bites with no oven required.
Step 1: Combine Dry Base Ingredients
In a large mixing bowl, I measure out the 2 cups Old-Fashioned Rolled Oats, 0.5 cup Vanilla Protein Powder, 2 tbsp Ground Flaxseed, 2 tbsp Chia Seeds, 0.25 tsp Sea Salt, and 0.5 tsp Cinnamon. The oats provide the primary structure, while the protein powder boosts nutritional value without altering texture.
Whisk these dry ingredients together until uniformly distributed. This ensures every bite contains balanced flavor and nutrition. The cinnamon adds warmth that complements the vanilla notes in the protein powder, while the salt enhances all other flavors.
Step 2: Create the Binding Mixture
In a separate microwave-safe bowl, I combine the 0.75 cup Natural Peanut Butter with the 0.33 cup Honey. The peanut butter should be creamy and unsweetened to allow the honey’s natural sweetness to shine without competition.
Microwave this mixture for 20-30 seconds until slightly warm and runny. Stir in the 1 tsp Vanilla Extract—this adds depth and rounds out the flavor profile. The warmth makes the peanut butter easier to incorporate into the dry ingredients while maintaining the no-bake integrity.
Step 3: Form the Dough
Pour the warm peanut butter mixture over the dry ingredients. Using a silicone spatula or wooden spoon, I fold everything together until fully combined. The mixture will be thick and slightly sticky—this is ideal for rolling into balls.
Add the 0.33 cup Mini Chocolate Chips and fold gently to distribute evenly. The mini size ensures each bite contains chocolate without overwhelming the texture. If the dough seems too dry, add a teaspoon of water, but I’ve found the measurements provided typically create perfect consistency.
Step 4: Shape and Set
Scoop the dough into 12 equal portions (about 2 tablespoons each) and roll between your palms into smooth balls. For uniform results, I use a cookie scoop. The dough should hold its shape without crumbling—if it doesn’t, chill the mixture for 10 minutes before rolling.
Place the rolled balls on a parchment-lined tray. Refrigerate for at least 30 minutes to firm up. This chilling time allows the ingredients to set completely, creating the ideal chewy texture that holds together when stored or transported.
Pro Tips For Making Protein Balls Recipe With Protein Powder
- Chill Before Rolling: After mixing, refrigerate the dough for 20-30 minutes—I learned this the hard way when my first batch kept falling apart mid-roll. The flaxseed and peanut butter bind better when cold.
- Toast the Oats: Spread the rolled oats on a baking sheet and toast at 350°F for 8-10 minutes until golden. Sounds weird, but it works: the nutty flavor cuts through the protein powder’s chalkiness.
- Warm the Honey: Microwave the honey for 10-15 seconds before mixing—it blends smoother with the peanut butter and prevents those annoying sticky clumps in the dough.
- Use a Scoop: Skip the spoon and use a small cookie scoop for evenly sized balls. My grandmother swore by this, and she was right: no more lopsided protein bites that refuse to stay together.
Storing and Reheating This protein balls recipe with protein powder
Fridge Storage
Once set, transfer your energy bites to an airtight container with parchment between layers to prevent sticking. They’ll stay fresh in the fridge for up to 2 weeks. I use glass containers with snap-tight lids for best results.
Freezer Storage
For longer storage, freeze the protein balls on a tray first, then transfer to a freezer bag. They’ll keep for 3 months without quality loss. Label with the date—I always forget when I made them otherwise.
Room Temperature
These treats can sit at room temperature for 2-3 days in a sealed container. Perfect for packing in lunchboxes or gym bags. Just keep them away from direct sunlight or heat sources.
Thawing Tips
Move frozen bites to the fridge overnight for best texture. For quick thawing, microwave on defrost mode for 15-20 seconds. They’ll soften slightly but maintain their shape. 💡
Reviving Dry Balls
If they dry out, wrap in a damp paper towel and microwave for 10 seconds. This restores moisture without making them soggy. Works like magic every time.
Portion Control
Store in individual containers for grab-and-go convenience. I portion mine into snack-size bags with 2-3 balls each. Makes healthy snacking effortless throughout the week. ❄️
Nutrition Facts
Frequently Asked Questions
Can I use almond butter instead of peanut butter?
Yes! Any nut or seed butter works. Use the same 0.75 cup amount and ensure it’s creamy. Almond butter adds a slightly sweeter, nuttier flavor.
Why are my protein balls crumbly?
This usually means the mixture needs more moisture. Add 1-2 teaspoons of honey or nut butter, then chill for 10 minutes before rolling again.
How long do they last in the fridge?
Store in an airtight container with parchment between layers. They stay fresh for up to 2 weeks refrigerated.
Can I skip the protein powder?
Yes, but add 2 extra tablespoons of oats and 1 tablespoon of ground flaxseed to maintain structure and binding.

Trained in classic French technique but raised on slow-cooked ribs and spicy rubs, she blends culinary skill with smoke and soul.
- Recipe for French Pork Spread Gorton: Savory Gallic Flavors in a Spreadable Delight - October 3, 2026
- Recipe for Pan Fried: Golden Crust with Savory Depth - October 3, 2026
- Recipe For Fried Chicken In A Pressure Cooker: Crispy Golden Bites in Half the Time - October 3, 2026