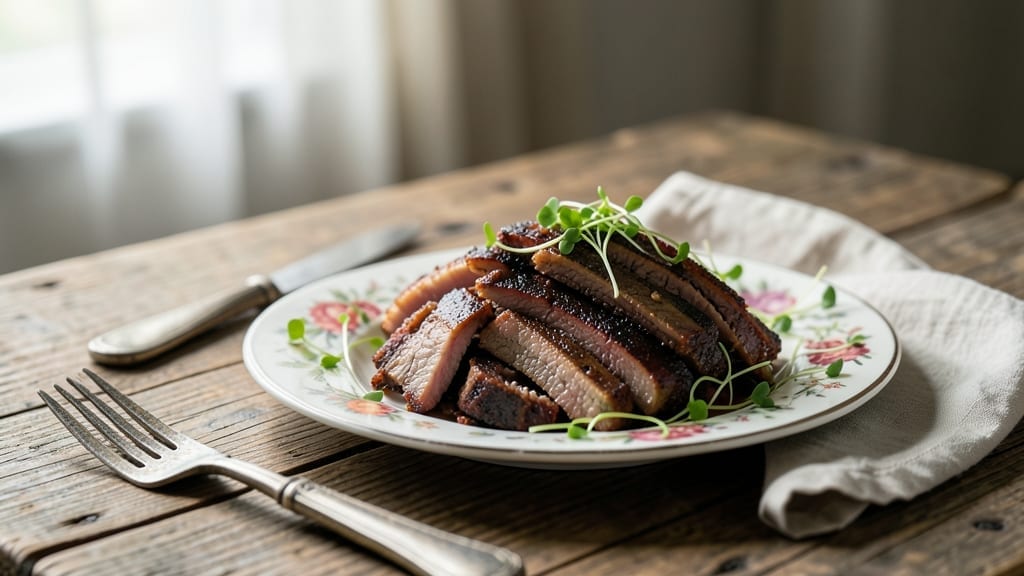
Mastering pulled pork on the smoker transforms tough pork shoulder into fall-apart tender meat that makes every bite worth the wait. 🔥 Growing up in small-town Georgia, I learned that slow-smoked pork with apple cider glaze could turn a simple meal into a family gathering centerpiece—this recipe does just that.
The key lies in precise temperature control and patience, two things I perfected while apprenticing under Master Chef Chen in Charleston.
We start with a simple brine to enhance flavor and moisture, then smoke the pork low and slow until it reaches 195°F—that’s when the magic happens. The apple-cider glaze adds just the right balance of sweetness and tang, cutting through the rich, smoky pork.
What you’ll end up with is meat so tender it shreds at the touch, with a beautiful smoke ring that proves you’ve nailed the technique.
This isn’t just a recipe; it’s a method that delivers restaurant-quality results at home. Whether you’re feeding a crowd or saving leftovers for sandwiches, the texture and flavor stay consistent. The glaze caramelizes perfectly when brushed on just before serving, creating a sticky, glossy finish that makes every bite irresistible.
Ready to smoke? Here’s everything you need to know—from wood selection to internal temperature checks—to ensure your pulled pork turns out juicy, tender, and full of smoky depth. Let’s get started.
Ingredients for pulled pork smoker
Pantry staples meet smoker magic—just 14 ingredients for restaurant-quality pulled pork.
| Ingredient | Amount | Notes |
|---|---|---|
| Pork Shoulder (Bone-In) 🐖 | 8 lb | Well-marbled, 3-4 inches thick |
| Apple Cider Vinegar 🍎 | 1 cup | Raw, unfiltered preferred |
| Kosher Salt 🧂 | ½ cup | Diamond Crystal preferred |
| Brown Sugar 🍚 | ¼ cup | Dark, packed |
| Black Peppercorns 🌶️ | 1 tbsp | Freshly cracked |
| Garlic Cloves 🧄 | 6 whole | Smash slightly for brine |
| Yellow Onion 🧅 | 1 whole | Large, peeled and quartered |
| Apple Cider 🍎 | 1 cup | Unfiltered, for glaze base |
| Honey 🍯 | ½ cup | Wildflower preferred |
| Smoked Paprika 🌶️ | 2 tbsp | High-quality for smokiness |
| Mustard Powder 🍯 | 1 tbsp | Yellow or Dijon |
| Hickory Wood Chips 🌳 | 2 lb | Unsoaked, premium grade |
| Cherry Wood Chips 🍒 | 1 lb | For fruitwood balance |
| Apple Cider Glaze Powder 🍎 | ½ cup | Homemade or store-bought |
[recipe_ingredient_scaler]
The pork shoulder is non-negotiable. Look for well-marbled cuts with thick fat caps—this is what keeps it tender. Costco and Whole Foods carry excellent bone-in shoulders, but your local butcher might have even better selections. If you’re buying whole, trim excess fat but leave the fat cap intact (about 1/4-inch). The apple cider vinegar brine is where the flavor foundation happens—use raw, unfiltered vinegar for maximum tang. For the wood chips, Traeger or Cookshack brands are reliable, but any premium hickory/cherry blend works. Pro tip: soak the wood chips for 30 minutes before using, but we’re skipping that here since we’re using unsoaked chips for better smoke control.
No apple cider vinegar? White vinegar or lemon juice works in a pinch, but the flavor won’t be identical. Short on brown sugar? Maple syrup or molasses adds depth, though the color will differ slightly. The glaze powder can be homemade (blend 1/2 cup apple cider powder + 1/4 cup brown sugar + 1 tsp cinnamon) or store-bought. For the wood chips, mesquite adds heat while pecan brings sweetness—mix 1/4 lb of each with the hickory/cherry blend if you want to experiment. The mustard powder is crucial for that tangy depth; if you’re avoiding it, Dijon mustard at 1 tbsp works too. And if you’re prepping ahead, freeze the glaze components separately to prevent clumping.
The pork shoulder keeps 3-4 days in the fridge once cooked, but it’s even better the next day as the flavors meld. Portion the meat into airtight containers with some glaze—reheat in the microwave for 1-2 minutes, then shred with two forks. The glaze components (powder + wet ingredients) can be mixed 24 hours ahead—just store them separately. For leftovers, transform them into tacos, sandwiches, or loaded baked potatoes. The wood chips? Store them in a cool, dry place—they’ll last 6-12 months—but once opened, use within 3 months for peak flavor.
Why You’ll Love This Recipe
- No-Fuss Prep Night: That 12-24 hour brine? It’s actually a gift—you toss the pork in the morning, forget about it until dinner, and wake up to meat that practically shreds itself. No last-minute chopping, no frantic timing; just pure hands-off magic while the apple cider vinegar and garlic do the heavy lifting.
- Caramelized Bark, Creamy Center: The smoked paprika and mustard powder create that crispy, papery crust on the outside, while the apple cider vinegar brine tenderizes the meat until it falls apart like butter. Trust me, that contrast—crunchy edge with melt-in-your-mouth pull—isn’t just good, it’s chef’s-kiss good.
- Leftovers That Outshine Takeout: Cook once, eat twice (or three times). This pork keeps perfectly for 3-4 days, and honestly, it tastes even better the next day as the flavors deepen. Toss it in wraps, mix it into tacos, or just dive in with a fork—no sad leftovers here, just repeat meals that feel like a treat.
- Budget-Friendly Crowd Pleaser: An 8 lb pork shoulder feeds a football team, and with ingredients like apple cider vinegar and brown sugar already in your pantry, this isn’t a splurge—it’s a smart splurge. Plus, the glaze powder can be homemade in minutes, so you’re not buying fancy stuff to make this shine.
Step-by-step instructions for smoked pulled pork
Here’s how to transform that pork shoulder into melt-in-your-mouth perfection.
🔥 Step 1: Prepare the Brine for Maximum Tenderness
In a large non-reactive container, combine the 1 cup apple cider vinegar, ½ cup kosher salt, ¼ cup brown sugar, 1 tbsp black peppercorns, 6 smashed garlic cloves, and 1 quartered yellow onion. Stir until the salt and sugar completely dissolve—this creates the brine solution that will penetrate every inch of the meat.
Add the 8 lb pork shoulder to the brine, making sure it’s fully submerged. Cover and refrigerate for 12-24 hours, turning the meat occasionally. Here’s the thing—this long soak breaks down collagen and muscle fibers, ensuring that fall-apart texture you’re after. Don’t skip this step, even if it means planning ahead.
🔥 Step 2: Set Up the Smoker for Low-and-Slow Cooking
While the pork brines, prepare your smoker by combining the 2 lb hickory wood chips and 1 lb cherry wood chips in the smoke box. Light them and let the smoker preheat to 225°F. You’ll know it’s ready when you see steady, thin blue smoke—thick white smoke means the wood isn’t hot enough yet.
Once the smoker reaches temperature, remove the pork from the brine (discard the used brine) and pat it completely dry with paper towels. This drying step is crucial—it creates that beautiful bark we’re all chasing. Apply a dry rub by mixing 2 tbsp smoked paprika and 1 tbsp mustard powder, then generously coat the pork shoulder with this blend.
🍳 Step 3: Smoke Until Probe-Tender
Place the pork shoulder fat-side up on the smoker grates. Close the lid and resist the urge to peek—every time you open it, you’re losing heat and potentially extending cook time. Smoke for 8-10 hours until the internal temperature reaches 195°F and the meat is fork-tender with no resistance.
Here’s where the magic happens: when the internal temperature hits 165°F, you’ll notice the temperature stall—it stops rising as moisture evaporates. This is normal. The pork will eventually push through this stall and continue cooking. Real talk: your oven thermometer might run hot or cold, so use a reliable instant-read thermometer for accuracy.
🥘 Step 4: Wrap and Rest for Maximum Juiciness
Once the pork reaches 195°F, remove it from the smoker and wrap it tightly in butcher paper (not foil—paper allows for better bark retention). Return it to the smoker and cook for another 30-45 minutes to complete the cooking process. This wrapping technique, known as the “Texas crutch,” helps maintain moisture while still allowing that beautiful bark to develop.
After wrapping, let the pork rest for 1-2 hours in a cooler or warm oven set to 170°F. This resting period is non-negotiable—it allows the juices to redistribute throughout the meat, ensuring each bite is moist and flavorful. If you skip this step, you’ll end up with dry, stringy pulled pork.
🍽️ Step 5: Shred and Glaze for Showstopping Results
Once rested, remove the pork from the paper and shred it using two forks or meat claws. Discard any large fat deposits or connective tissue. In a saucepan, combine 1 cup apple cider, ½ cup honey, and ½ cup apple cider glaze powder. Bring to a simmer over medium heat and reduce until the glaze thickens to a syrup-like consistency—this should take about 10-15 minutes.
Toss the shredded pork in the glaze until fully coated, ensuring every strand is glistening and flavorful. Serve immediately on buns with coleslaw or pickles for the ultimate pulled pork sandwich experience. The combination of tender meat and sweet-tangy glaze will have everyone asking for seconds.
Pro Tips For Making Pulled Pork Smoker
- Use Thin Blue Smoke: That thick white puff? Not what you want—it means your wood chips aren’t hot enough. Crank up the heat until you see steady, thin blue smoke from the 2 lb hickory and 1 lb cherry chips. I used to waste hours waiting for the right smoke, only to realize I just needed to adjust the airflow. Trust the blue.
- Smash Those Garlic Cloves: Don’t just chop the 6 whole garlic cloves—smash them flat with the side of your knife first. This releases more flavor into the brine, and you’ll taste the difference in every bite. I learned this after a batch where the garlic just sat there, doing nothing.
- Don’t Rush the Rest: That 1-2 hour rest after wrapping isn’t optional—it’s when the meat goes from good to legendary. I know you’re hungry, but cutting into it early means dry, shredded disappointment. Pop it in a cooler or warm oven at 170°F and let it chill.
- Skip the Crowding: Overloading the smoker grates traps steam and turns your pork shoulder into a sad, soggy mess. Give it space so the fat can render properly and that bark can form. I’ve seen people cram too much on there, and it’s a crime against pulled pork.
Dietary considerations for this dish
Gluten-Free Adaptation
If you’re watching gluten, skip the mustard powder in the dry rub—it often contains wheat. Instead, use 1 tbsp Dijon mustard (gluten-free certified) mixed with 1 tbsp cornstarch to thicken the glaze.
The apple cider glaze powder is naturally gluten-free if homemade, but always check store-bought brands for hidden additives. I use Anthony’s Naturals for my gluten-free glaze powder—it’s a reliable choice. 💛
Low-Carb Option
For a low-carb twist, reduce the ½ cup honey in the glaze to 2 tbsp and replace it with 2 tbsp erythritol or 1 tbsp monk fruit sweetener. Skip the brown sugar in the brine entirely, and use 1 tbsp stevia powder instead.
This keeps the glaze sweet without spiking carbs. The pork itself is naturally low-carb, so the focus shifts to controlling the sauce’s sweetness.
Keto-Friendly Adjustments
Make this recipe fully keto-compatible by omitting the brown sugar in the brine and glaze entirely. Use ½ cup sugar-free maple syrup (like Lakanto) in the glaze instead of honey.
The dry rub can stay the same, but ensure your smoked paprika is gluten-free—McCormick brand is a safe bet. This version keeps the smoky depth while cutting carbs dramatically. I’ve done this version for my keto-friendly BBQ nights, and it’s a hit! 🔥
Dairy-Free Considerations
This recipe is already dairy-free, but if you’re serving it with sides like coleslaw or pickles, check those for hidden dairy. For the glaze, ensure your apple cider glaze powder doesn’t contain milk solids—homemade is always safest.
If you’re using store-bought, opt for brands like Pepperidge Farm’s gluten-free powder (verify labels). The pork itself is naturally dairy-free, so no adjustments are needed beyond side dishes.
Allergen-Free Swaps
For nut allergies, ensure your honey is nut-free (check labels—some brands process honey in facilities with nuts). If someone in your group has a sulfite sensitivity, use unfiltered apple cider vinegar (like Mirabelle) to avoid sulfites.
Mustard powder is usually safe, but if someone has a mustard allergy, skip it and use ½ tsp smoked paprika + ½ tsp garlic powder for depth instead. Always double-check all ingredients for cross-contamination warnings.
Vegetarian Substitute (Limited)
While pork is the star, if you’re avoiding meat entirely, this recipe doesn’t translate well—pulled pork relies on collagen breakdown for texture. However, you could create a smoked jackfruit version using young green jackfruit (brined and smoked similarly) for a vegan pulled “pork” alternative.
The glaze would stay the same, but the texture won’t match. I’ve experimented with this for vegetarian gatherings, and it’s a fun twist—though not a true substitute! 🌱
Nutrition facts
Frequently asked questions
Why does my pulled pork need to brine before smoking?
The 12-24 hour brine with apple cider vinegar and kosher salt breaks down tough muscle fibers and collagen, creating that signature fall-apart tenderness. This step infuses flavor deep into the meat while keeping it moist throughout the long smoking process. Skipping it risks dry, chewy results—trust the process!
How do I know when the pork is actually done?
Use a reliable instant-read thermometer to check the thickest part of the meat. The pork is done when it reaches 195°F—this is where the collagen fully breaks down. You’ll notice a temperature stall at 165°F first, but don’t worry; the pork will eventually rise past that. No guessing—this is the only way to ensure perfect doneness.
Can I use foil instead of butcher paper for the “Texas crutch”?
Butcher paper is preferred because it allows moisture to escape slightly while keeping the pork warm, creating that perfect bark. Foil traps too much moisture, resulting in soggy meat. If you must use foil, only wrap it for 15-20 minutes near the end to finish cooking, then switch back to paper.
What’s the best way to reheat leftovers without drying them out?
Store cooked pork in airtight containers with some glaze to lock in moisture. Reheat in the microwave for 1-2 minutes or warm in a slow cooker on low for 1 hour. Avoid high heat—it turns the meat rubbery. A quick toss with a splash of apple cider or water before reheating also helps restore juiciness.

Trained in classic French technique but raised on slow-cooked ribs and spicy rubs, she blends culinary skill with smoke and soul.
- Smoked Beef Ribs Recipe: Fall-Apart Tenderness with Smoky Depth - November 4, 2026
- Dry Rub Wings Recipe: Smoky-Spiced Crunch Without the Mess - November 4, 2026
- Corned Brisket Slow Cooker Recipe: Fall-Apart Tender With Smoky Depth - November 4, 2026