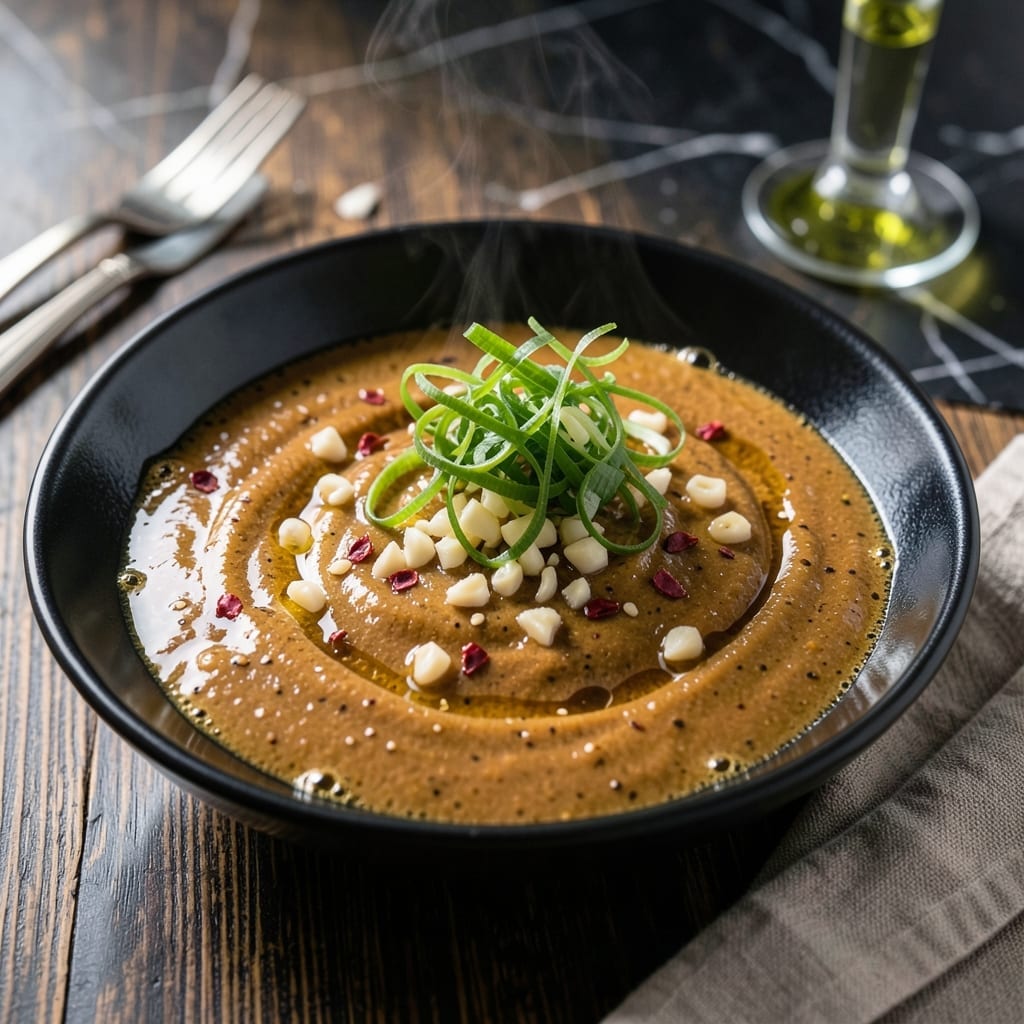
This Chinese-style garlic sauce transforms simple ingredients into a bold, umami-packed condiment that elevates any dish. The secret lies in balancing fresh garlic with savory and slightly sweet elements.
With just 10 minutes of prep, you’ll have a versatile sauce that’s perfect for dipping, drizzling, or marinating. Store it in the fridge for up to a week to enjoy its deep, aromatic flavors anytime.
Ingredients for Recipe for Garlic Sauce Chinese
Nine ingredients. Ten minutes. Bold, umami-packed flavor ready to transform any dish.
| Ingredient | Amount | Notes |
|---|---|---|
| Garlic Cloves 🧄 | 12 cloves | Freshly peeled, minced |
| Soy Sauce 🫙 | ⅓ cup | Low-sodium preferred |
| Rice Vinegar 🍚 | 3 tbsp | Unseasoned variety |
| Brown Sugar 🍚 | 2 tbsp | Packed for sweetness |
| Sesame Oil 🫒 | 1 tbsp | Toasted for depth |
| Chili Oil 🌶️ | 1 tbsp | Adjust heat to taste |
| Water 💧 | ¼ cup | To thin sauce |
| Fresh Ginger 🌿 | 1 tbsp | Grated for freshness |
| Green Onions 🧅 | 3 whole | Thinly sliced for garnish |
[recipe_ingredient_scaler]
The garlic is the soul here—use fresh cloves only (none of that jarred stuff). Look for plump, firm heads at the store with dry, papery skins. Asian markets often have the best selection, but any grocery store will do in a pinch. The soy sauce? Low-sodium lets you control the salt. I grab mine from Kikkoman or San-J—both solid choices.
No rice vinegar? Apple cider vinegar works in a pinch (slightly fruitier). Swap brown sugar for coconut sugar or maple syrup if you prefer. Out of chili oil? Sriracha or crushed red pepper can add heat—start with half the amount. The sesame oil is non-negotiable though—it’s what gives that authentic nutty aroma.
This keeps beautifully for about 1 week in the fridge. The flavors actually deepen over time. If you’ve got leftovers (unlikely), freeze in ice cube trays for up to 3 months. Just thaw before using.
Why You’ll Love This Recipe
- 5-Minute Magic: I dump everything in one bowl—no chopping beyond the garlic, no fuss. Honestly, it’s faster than waiting for takeout.
- Sweet-Savory Bomb: That brown sugar caramelizes with the soy and vinegar into this sticky, umami-packed glaze. The sesame oil at the end? Pure depth.
- Drizzle on Anything: I’ve slathered it on noodles, grilled chicken, even roasted veggies. Between us, it’s my secret for making leftovers disappear.
- Pantry Staples Only: No last-minute grocery runs. I always have these ingredients on hand, and it costs pennies compared to store-bought sauces.
Step-by-Step Instructions for Chinese Garlic Sauce
This sauce comes together fast—just follow these simple steps for bold, aromatic flavor.
Step 1: Bloom the Aromatics in Oil
Heat a small saucepan over medium-low heat and add the 1 tbsp Sesame Oil and 1 tbsp Chili Oil. Once the oils shimmer slightly, add the 12 cloves Garlic Cloves and 1 tbsp Fresh Ginger.
Cook for 1-2 minutes, stirring constantly, until the garlic turns light golden and becomes fragrant. Watch closely—you want to develop flavor without burning the garlic, which turns bitter. The ginger should soften slightly but retain its fresh aroma.
Step 2: Build the Sauce Base
Pour in the 0.33 cup Soy Sauce, 3 tbsp Rice Vinegar, and 2 tbsp Brown Sugar. Stir well to dissolve the sugar completely. The mixture should start to bubble gently within 30 seconds.
Let it simmer for 2-3 minutes until the sauce thickens slightly and the sugar fully incorporates. You’ll notice the color deepen as the soy sauce caramelizes with the sugar. This creates the rich, glossy foundation of your sauce.
Step 3: Thin and Finish the Sauce
Add the 0.25 cup Water and stir to combine. The sauce should now have a pourable consistency that coats the back of a spoon. Simmer for an additional 1-2 minutes to allow the flavors to meld.
Taste and adjust the balance if needed—though with these precise measurements, you shouldn’t need to. The sauce should have a perfect harmony of salty, sweet, tangy, and umami notes with a subtle heat from the chili oil.
Step 4: Cool and Garnish
Remove the saucepan from heat and let the sauce cool to room temperature. As it cools, the flavors will continue to develop and the sauce will thicken slightly more.
Just before serving, stir in the 3 whole Green Onions (thinly sliced). The fresh green onion adds a bright, crisp contrast to the deep, savory flavors. Transfer to a serving bowl or jar for immediate use or storage.
Pro Tips For Making Recipe For Garlic Sauce Chinese
- Mince Garlic Fine: I learned this the hard way—chunky garlic burns before it infuses the oil, so take the extra minute to mince it to near-paste consistency for even flavor.
- Bloom in Cold Oil: Start the garlic in cold oil and let it warm gradually to avoid bitter, burnt edges; this slow start actually changes the outcome.
- Balance the Sweet: Brown sugar can overpower, so add it slowly and taste as you go—about 1 teaspoon at a time does the trick for me.
- Finish with Sesame: Skip cooking the sesame oil with the rest; stir it in at the very end off the heat to preserve its nutty aroma.
Wine and Beer Pairings for These Flavors
Beer Pairings
The bold, garlicky, and umami-rich flavors of Chinese garlic sauce call for beers that can stand up to its intensity. A robust India Pale Ale (IPA) with its citrusy and hoppy notes complements the sauce’s pungency while cutting through the richness. For a smoother option, try a Belgian Witbier, where the subtle spice and citrus undertones enhance the garlic without overpowering it. 🍺
Wine Pairings
For wine lovers, a crisp Sauvignon Blanc is a fantastic match. Its bright acidity and herbal notes balance the garlic’s sharpness while highlighting the sauce’s savory depth. If you prefer reds, a light-bodied Pinot Noir with its earthy and fruity profile can harmonize beautifully with the umami flavors. 🍷
Non-Alcoholic Options
Non-alcoholic pairings can be just as delightful. A sparkling ginger beer offers a zesty kick that mirrors the sauce’s boldness, while a hibiscus iced tea provides a floral and slightly tart contrast. Both options keep the palate refreshed and ready for more of that garlicky goodness. 🥤
Nutrition Facts

Trained in classic French technique but raised on slow-cooked ribs and spicy rubs, she blends culinary skill with smoke and soul.
- Recipe for French Pork Spread Gorton: Savory Gallic Flavors in a Spreadable Delight - October 3, 2026
- Recipe for Pan Fried: Golden Crust with Savory Depth - October 3, 2026
- Recipe For Fried Chicken In A Pressure Cooker: Crispy Golden Bites in Half the Time - October 3, 2026