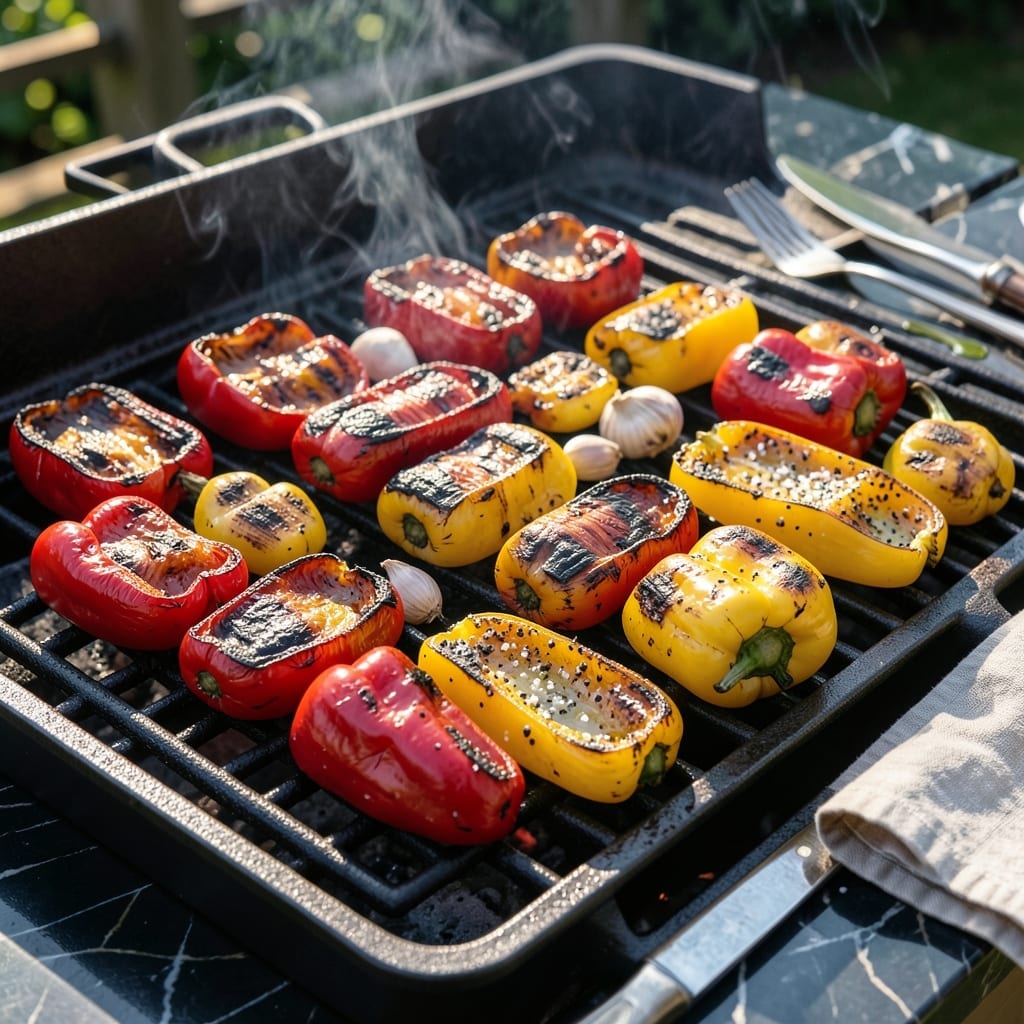
There’s nothing quite like the smoky depth that comes from roasting peppers directly over an open flame. This method transforms ordinary bell peppers into something extraordinary with minimal effort.
I’ve perfected this technique through years of grilling, and it delivers consistent results every time. The high heat charrs the skin while keeping the flesh tender and sweet.
Ingredients for Roasted Peppers on Grill
Fresh peppers, olive oil, and simple seasonings create charred, smoky perfection on the grill.
| Ingredient | Amount | Notes |
|---|---|---|
| Red Bell Peppers 🌶️ | 4 whole | Medium size, firm texture |
| Yellow Bell Peppers 🌶️ | 2 whole | Medium size, firm texture |
| Extra-Virgin Olive Oil 🫒 | 2 tbsp | For brushing peppers |
| Sea Salt 🧂 | 1 tsp | Flaky variety preferred |
| Freshly Ground Black Pepper 🌶️ | ½ tsp | Coarse grind ideal |
| Garlic Cloves 🧄 | 3 cloves | Minced for finishing |
| Fresh Parsley 🌿 | ¼ cup | Chopped, for garnish |
| Balsamic Vinegar 💧 | 1 tbsp | Aged variety recommended |
| Lemon Juice 🍋 | 1 tsp | Freshly squeezed |
| Red Pepper Flakes 🔥 | ¼ tsp | Optional for heat |
[recipe_ingredient_scaler]
The peppers are the star here—choose firm, unblemished bell peppers with thick walls for even charring. Red and yellow varieties offer the sweetest flavor profile, though green works too (just blanch first). Whole Foods and Trader Joe’s consistently stock high-quality organic options. Avoid pre-cut peppers; they lack the structural integrity needed for direct flame exposure.
No grill? A gas stovetop flame or broiler on high replicates the effect. For extra smokiness, add hickory chips to the coals. If fresh parsley isn’t available, dried oregano at half the amount works. The balsamic vinegar can be swapped for red wine vinegar, though aged balsamic adds depth. Skip the olive oil spray—brush with a high-smoke-point oil for better control.
Roasted peppers keep in an airtight container for 4-5 days refrigerated. For longer storage, peel and freeze in single layers first—they’ll hold for 3 months. Always bring to room temperature before serving to restore their vibrant texture and flavor.
Why You’ll Love This Recipe
- One Pan Wonder: I just toss whole peppers on the grill—no chopping, no fuss. A quick drizzle of olive oil and they’re ready to char.
- Smoky Sweetness: That blistered skin and caramelized flesh? Pure summer in every bite. The sea salt brings out the natural sweetness.
- Meal Prep MVP: I roast a big batch on Sunday—they keep all week for sandwiches, salads, or pasta. Honestly, my lunches thank me.
- Budget Grill Hack: Three ingredients, zero waste. Even the scraps go into stocks or sauces. Between us, it’s cheaper than takeout.
Step-by-Step Instructions for Roasted Peppers on Grill
Master the technique to achieve perfectly charred peppers with deep, smoky flavor.
Step 1: Prepare Peppers and Preheat the Grill
Begin by washing and drying the 4 whole Red Bell Peppers and 2 whole Yellow Bell Peppers thoroughly. Leave them whole—this prevents the natural juices from escaping during grilling. I like to remove any visible blemishes or stems for even cooking.
Preheat your grill to medium-high heat (about 400°F). A properly heated grill ensures immediate charring, which locks in the peppers’ sweetness while adding that coveted smoky depth. Clean the grates with a brush to prevent sticking.
Step 2: Char the Peppers Until Blackened
Place the whole peppers directly on the grill grates. Use tongs to rotate them every 2-3 minutes to ensure even charring. You want the skins to blacken and blister all over—this is your visual cue that the sugars are caramelizing beneath the surface.
This process should take 12-15 minutes total. Don’t be alarmed by the dark, charred exterior; this is essential for that signature smoky flavor. If the peppers catch fire, move them to a cooler part of the grill briefly to control the char.
Step 3: Steam and Peel the Peppers
Transfer the charred peppers to a heatproof bowl and cover tightly with plastic wrap or a clean kitchen towel. Let them steam for 10-15 minutes. This step loosens the skins, making them much easier to remove.
Once cooled slightly, gently peel away the blackened skins under running water or with your fingers. Remove the stems, seeds, and any remaining membranes. You’ll be left with tender, smoky peppers ready for finishing.
Step 4: Season and Finish
Slice the peeled peppers into thick strips and place them in a serving bowl. Drizzle with 2 tbsp Extra-Virgin Olive Oil, 1 tbsp Balsamic Vinegar, and 1 tsp Lemon Juice. Toss gently to coat evenly.
Sprinkle with 1 tsp Sea Salt, 0.5 tsp Freshly Ground Black Pepper, 3 cloves minced Garlic Cloves, and 0.25 tsp Red Pepper Flakes for a subtle kick. Garnish with 0.25 cup Fresh Parsley for a fresh, vibrant finish. Serve at room temperature to let the flavors meld beautifully.
Pro Tips For Making Roasted Peppers On Grill
- Char the Skin: Keep the peppers whole and place them directly over high heat until the skin blisters and blackens—about 5-7 minutes per side. This gives that smoky depth you can’t get any other way.
- Oil After Grilling: I learned this the hard way—skip the oil before grilling to avoid flare-ups. Toss the peeled peppers with olive oil, salt, and pepper after they come off the heat.
- Steam in a Bowl: Transfer charred peppers to a bowl, cover with a plate, and let them steam for 10 minutes. This makes the skin slide right off, no scraping or frustration.
- Use Thick Peppers: Pick the heaviest bell peppers you can find—they’re meatier and hold up better on the grill. Thin-walled ones collapse and burn before they’re done.
Pro Cooking Tips for roasted peppers on grill
Grill Temperature Control
Preheat your grill to 400°F for that perfect char. I use a Weber Genesis with a built-in thermometer for accuracy. If your grill runs hot, reduce the heat slightly—consistent medium-high heat is key for even charring without burning. 🌡️
Rotation Technique
Rotate the peppers every 2-3 minutes using long-handled tongs. This ensures all sides get equal exposure to the flame. I learned this trick at a local BBQ competition—it prevents cold spots and guarantees uniform blistering.
Char Management
Don’t panic if the peppers catch fire briefly—this adds smokiness. Move them to a cooler part of the grill if flames persist. The goal is deep black char on the skin, which peels off easily after steaming.
Steaming Method
After grilling, transfer peppers to a bowl and cover tightly with foil or plastic wrap. Let them steam for 10-15 minutes. This step is non-negotiable—it loosens the skin for effortless removal. I like to weigh them down with a plate for extra steam.
Peeling Pro Tips
Once cooled, peel under running water for minimal mess. Use your fingers for precision, but a small knife helps with stubborn bits. Remove all seeds and membranes—this ensures a silky texture in the final dish. 🔥
Finishing Touches
Slice peppers into thick strips for better texture. Toss with olive oil and seasonings while warm—they’ll absorb flavors better. Let them sit for 10 minutes before serving to meld the flavors.
Nutrition Facts
Frequently Asked Questions
Do I need to preheat the grill first?
Yes, preheating to 400°F is essential for even charring. It ensures the peppers blister properly without steaming in their own juices.
How do I know when they’re done?
Look for deep black char on all sides after 12-15 minutes. The skin should bubble and separate from the flesh. Don’t worry about the dark exterior—it peels off easily.
Can I skip the steaming step?
No, steaming for 10-15 minutes loosens the skin for easy removal. Skipping this makes peeling difficult and messy.
What if my peppers catch fire?
Brief flames add smokiness—just move them to a cooler spot. If flames persist, lower the heat slightly. The goal is controlled char, not burning.

Trained in classic French technique but raised on slow-cooked ribs and spicy rubs, she blends culinary skill with smoke and soul.
- Recipe for Boneless Leg of Lamb Roast in the Oven: Herb-Crusted and Rosy Pink Inside - October 3, 2026
- Meat Loaf Recipe With Beef And Pork: Homestyle Blend With Rich Gravy - October 3, 2026
- Hamburger Patty Recipe No Egg: Juicy Bind With Breadcrumbs and Milk - October 3, 2026