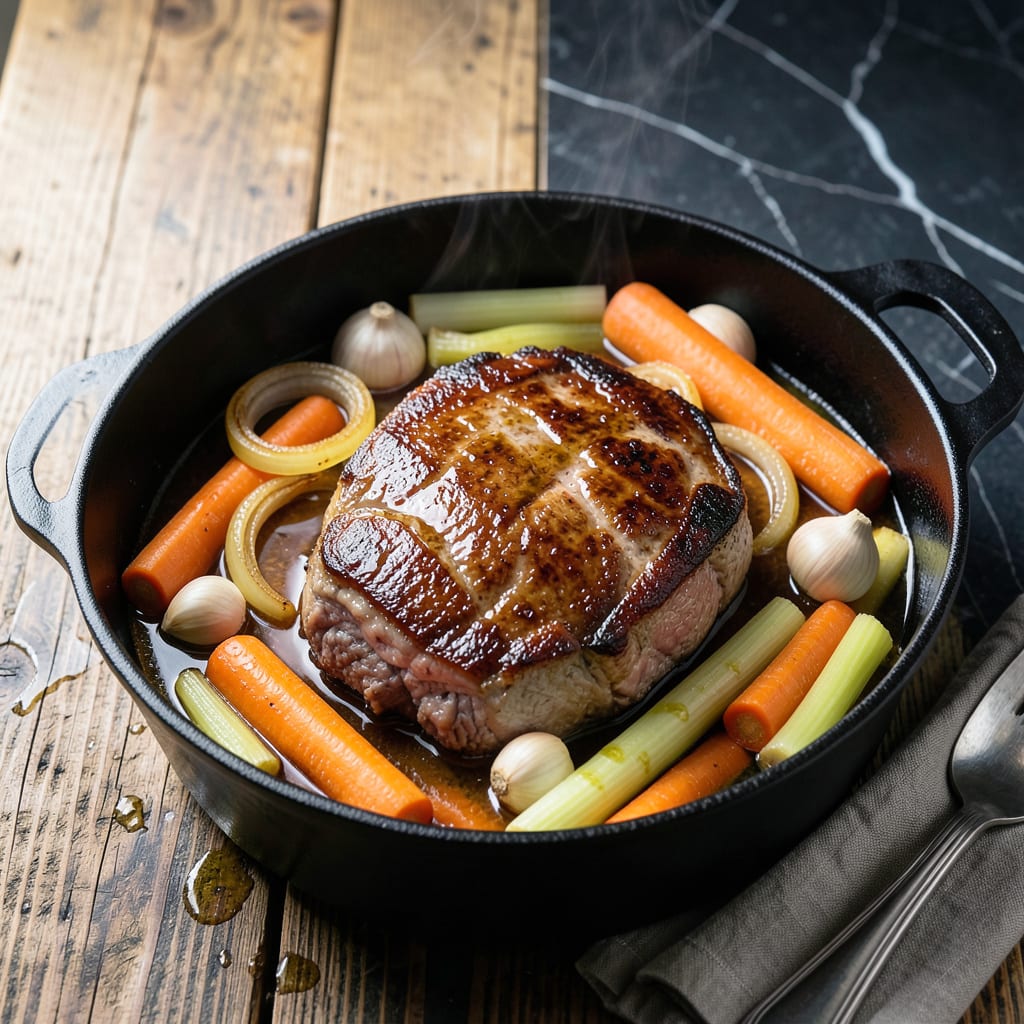
This Dutch oven method transforms tough rump roast into fall-apart tender beef with rich, deep flavor. The slow braise allows connective tissue to melt into the sauce, creating a dish that tastes like it simmered all day.
I rely on this technique for Sunday suppers, where the beef emerges juicy and flavorful with minimal effort. The Dutch oven’s even heat distribution ensures perfect results every time.
Ingredients for Rump Roast Dutch Oven
Transform tough cuts into Sunday supper perfection with these carefully selected ingredients.
| Ingredient | Amount | Notes |
|---|---|---|
| Rump Roast 🥩 | 3 lb | Well-marbled, trimmed of excess fat |
| Olive Oil 🫒 | 2 tbsp | Divided for searing and braising |
| Yellow Onion 🧅 | 1 whole | Large, diced into 1-inch pieces |
| Carrots 🥕 | 3 whole | Peeled, cut into 2-inch chunks |
| Celery Stalks 🌿 | 3 whole | Cut into 2-inch pieces |
| Garlic Cloves 🧄 | 6 cloves | Lightly crushed, peeled |
| Dry Red Wine 🍷 | 2 cups | Bold variety like Cabernet Sauvignon |
| Beef Broth 💧 | 2 cups | Low-sodium preferred |
| Tomato Paste 🍅 | 2 tbsp | For depth and umami |
| Fresh Thyme Sprigs 🌿 | 4 whole | Plus 1 tsp chopped leaves |
| Bay Leaves 🍃 | 2 whole | Dried, for aromatic depth |
| Kosher Salt 🧂 | 2 tsp | Diamond Crystal preferred |
| Black Pepper 🌶️ | 1 tsp | Freshly ground |
| All-Purpose Flour 🌾 | 2 tbsp | For thickening sauce |
[recipeingredientscaler]
The rump roast is non-negotiable for this technique. Look for well-marbled pieces—the fat renders down into the sauce, creating that signature richness. Most butchers will trim it for you if asked. Costco carries excellent quality at a good price point, but your local butcher can source grass-fed options if preferred. The wine should be something you’d drink—bold reds like Cabernet or Merlot work best.
No red wine? Substitute with additional beef broth plus 1 tbsp balsamic vinegar for acidity. Fresh thyme is ideal, but dried thyme at one-third the amount works in a pinch. The tomato paste can be swapped for tomato sauce reduced by half, though the flavor concentration won’t be as intense. For the vegetables, parsnips or turnips make excellent alternatives to carrots.
The braised beef tastes even better the next day once flavors meld. Refrigerate in an airtight container for up to 4 days or freeze for 3 months. Reheat gently on the stovetop with a splash of broth to maintain moisture. Always slice the beef against the grain before serving for maximum tenderness.
Why You’ll Love This Recipe
- Set It and Forget: I toss the rump roast, onions, carrots, and celery in the Dutch oven, pop the lid on, and let the oven do all the work.
- Feeds the Whole Crew: Between us, this makes enough for Sunday dinner plus leftovers that reheat beautifully for lunches all week.
- Budget Winner: Honestly, a tougher cut like rump roast turns luxurious with this method, and it’s way cheaper than pricier pot roast cuts.
Step-by-Step Instructions for Dutch Oven Rump Roast
Slow-braising in a Dutch oven transforms this cut into fork-tender perfection with deep flavor.
Step 1: Sear the Rump Roast for Maximum Flavor
Pat the 3 lb Rump Roast completely dry with paper towels. Season all sides generously with the 2 tsp Kosher Salt and 1 tsp Black Pepper. This creates the foundation of flavor and ensures a proper sear.
Heat 1 tbsp Olive Oil in the Dutch oven over medium-high heat until shimmering. Sear the rump roast on all sides for 3-4 minutes per side until deeply browned. You’ll know it’s ready to flip when it releases easily from the pot. Transfer the roast to a plate and set aside.
Step 2: Build the Aromatic Base
In the same Dutch oven, add the remaining 1 tbsp Olive Oil and reduce heat to medium. Add the 1 whole Yellow Onion, 3 whole Carrots, and 3 whole Celery Stalks. Cook for 5-6 minutes, stirring occasionally, until the vegetables begin to soften and develop color.
Add the 6 cloves Garlic Cloves, 2 tbsp Tomato Paste, 4 whole Fresh Thyme Sprigs, and 2 whole Bay Leaves. Stir for 1-2 minutes until the tomato paste darkens slightly—this deepens its flavor and prevents a raw taste. Sprinkle the 2 tbsp All-Purpose Flour over the vegetables and stir to coat evenly, cooking for 1 minute to remove the raw flour taste.
Step 3: Deglaze and Braise to Tenderness
Pour in the 2 cups Dry Red Wine, using a wooden spoon to scrape up any browned bits from the bottom of the pot. These fond bits are packed with flavor and will dissolve into the sauce. Simmer for 3-4 minutes until the wine reduces by about half.
Return the seared rump roast to the Dutch oven, along with any accumulated juices. Pour in the 2 cups Beef Broth, ensuring the liquid comes about halfway up the roast. Bring to a gentle simmer, then cover and transfer to a 325°F oven. Braise for 2.5 to 3 hours, turning the roast halfway through, until the meat is fork-tender and easily pulls apart.
Step 4: Rest and Serve
Carefully remove the rump roast from the Dutch oven and transfer it to a cutting board. Tent loosely with foil and let it rest for 15-20 minutes. This allows the juices to redistribute, ensuring each slice is moist and flavorful.
Skimming excess fat from the braising liquid and adjusting seasoning if needed will give you a rich, velvety sauce. Serve the roast sliced or shredded, with the vegetables and sauce spooned over the top.
Pro Tips For Making Rump Roast Dutch Oven
- Sear It Hard: Crank the heat to medium-high and get that rump roast deeply browned on all sides—this builds a flavor base that simmering can’t fix. I learned this the hard way after too many pale, bland roasts.
- Cut Veggies Evenly: Slice the carrots, celery, and onion into uniform, 1-inch chunks so they cook at the same rate. Sounds fussy, but it means no mushy carrots or crunchy celery in the final dish.
- Don’t Drown the Meat: Use just enough liquid (about 1 cup) to come halfway up the roast—too much and you’ll boil it instead of braise it. My grandmother swore by this, and she was right.
- Rest Before Slicing: Pull the roast out and let it sit under foil for 15 minutes before cutting. Skip this and all the juices will end up on the cutting board, not in the meat.
Dietary Considerations for This Recipe
Gluten-Free Adaptation
This recipe can be easily adapted for gluten-free diets by swapping the 2 tbsp All-Purpose Flour with an equal amount of cornstarch or gluten-free flour blend. The thickening power remains the same, and the sauce will be just as rich. I often use Bob’s Red Mill gluten-free blend with great results.
Low-Carb Option
For a lower-carb version, reduce the vegetables to 1 cup total of onion, carrots, and celery combined. The braising liquid will still develop deep flavor, and the beef remains the star. You can also thicken the sauce with xanthan gum instead of flour.
Dairy-Free Consideration
This dish is naturally dairy-free, but always check your beef broth label for hidden dairy derivatives. I prefer Better Than Bouillon beef base—it’s dairy-free and packed with flavor. The wine and all other ingredients are typically dairy-free as well. 💪
Low-Sodium Modification
To reduce sodium, use low-sodium beef broth and cut the 2 tsp Kosher Salt in half. You can boost flavor with extra herbs like rosemary or fresh parsley instead. Taste before serving and adjust seasoning if needed.
Keto-Friendly Adjustments
For a keto approach, omit the carrots and celery, as they contain more carbs. Stick to onion and garlic for aromatics, and thicken the sauce with xanthan gum or reduce it further to concentrate flavors. The beef itself is keto-perfect.
Allergen Notes
This recipe contains no common allergens like nuts, eggs, or dairy, but always verify your beef broth and wine labels. If you’re serving guests with allergies, check that your olive oil and spices are processed in allergen-free facilities. 💡
Nutrition Facts

Trained in classic French technique but raised on slow-cooked ribs and spicy rubs, she blends culinary skill with smoke and soul.
- Recipe For Oven Baked Haddock: Buttery Crumbs With Zesty Lemon Topping - October 3, 2026
- Recipe For Fried Salmon Patties With Flour: Crispy Golden Crust With Flaky Centers - October 3, 2026
- Meat and Potato Recipe Ideas: Savory Pairings for Hearty Meals - October 3, 2026