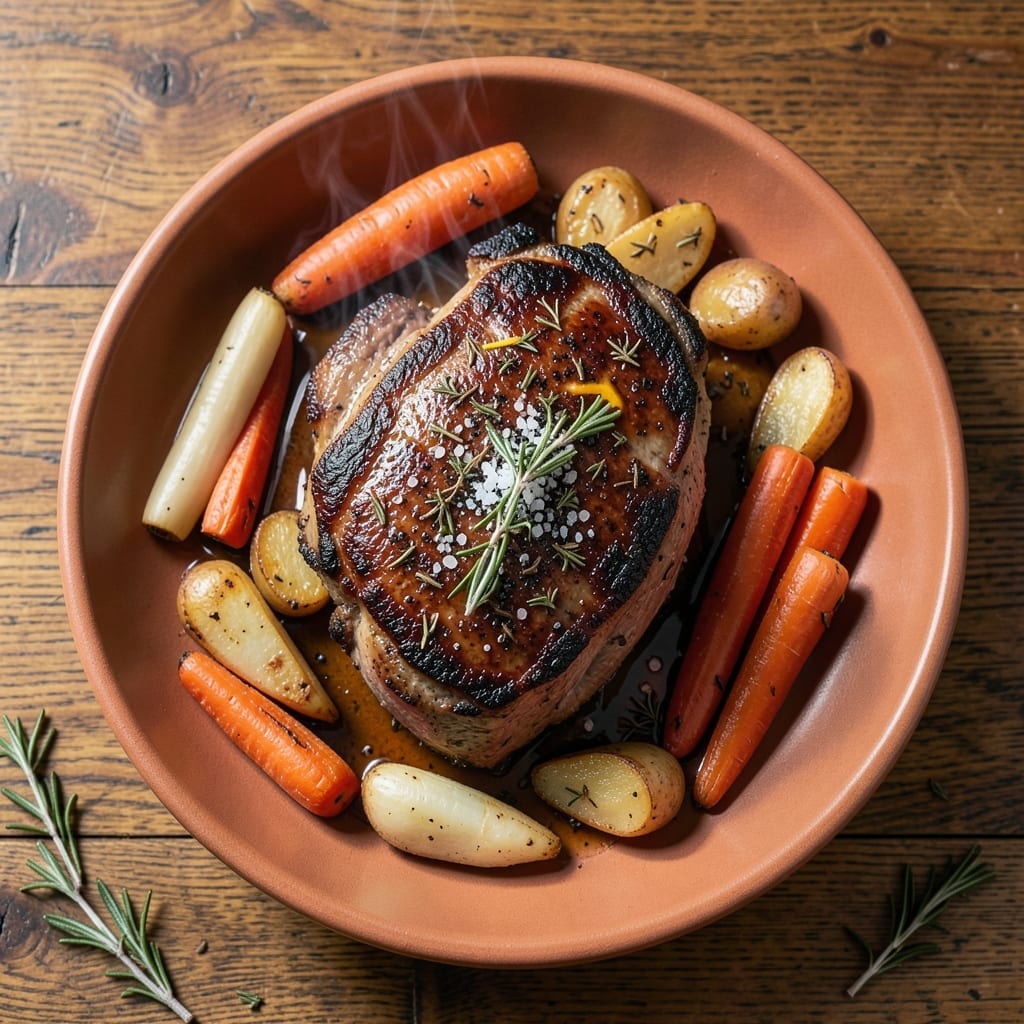
This sirloin cap roast delivers restaurant-quality beef with minimal effort. A simple seasoning and hot oven transform it into a tender, flavorful centerpiece.
Perfect for Sunday dinner, the meat develops a rich crust while staying juicy inside. Serve with roasted vegetables for a complete meal.
Ingredients for Sirloin Cap Roast
Restaurant-quality beef requires just these quality ingredients and simple seasoning.
| Ingredient | Amount | Notes |
|---|---|---|
| Sirloin Cap Roast 🥩 | 2 ½ lb | Also called Coulotte or Top Sirloin Cap |
| Diamond Crystal Kosher Salt 🧂 | 1 ½ tsp | Divided for seasoning and finishing |
| Freshly Ground Black Pepper 🌶️ | 1 tsp | Coarsely ground preferred |
| Granulated Garlic 🧄 | 1 tsp | Not garlic powder |
| Dried Rosemary 🌿 | 1 tsp | Crushed between fingers |
| Dried Thyme 🍃 | 1 tsp | Rubbed to release oils |
| Smoked Paprika 🌶️ | ½ tsp | Adds depth to crust |
| Unsalted Butter 🧈 | 2 tbsp | Melted for basting |
| Extra-Virgin Olive Oil 🫒 | 1 tbsp | High smoke point preferred |
| Fresh Rosemary Sprigs 🌿 | 2 whole | For aromatic basting |
| Fresh Thyme Sprigs 🍃 | 2 whole | Optional for garnish |
| Red Wine 🍷 | ½ cup | Dry variety for deglazing |
[recipe_ingredient_scaler]
The sirloin cap is key—look for well-marbled cuts with a thick fat cap. Whole Foods or a trusted butcher will have the best selection. Avoid pre-cut steaks; ask for the entire cap muscle (about 2.5-3 lbs). The fat cap should be at least 1/4-inch thick for proper rendering. USDA Choice or Prime grades ensure tenderness and flavor development.
No sirloin cap? Ribeye or strip steak can work, but cooking times will vary. For herbs, fresh at double the amount if using instead of dried. The red wine can be substituted with beef broth plus 1 tsp vinegar. Unsalted butter is essential—salted can make the crust too salty. European-style butter (higher fat content) gives superior results.
Let the roast rest 15-20 minutes before slicing to redistribute juices. Leftovers keep 4-5 days refrigerated, or freeze for 3 months. Slice against the grain for maximum tenderness when serving. The rendered fat can be saved for 3 weeks in the fridge for cooking.
Why You’ll Love This Recipe
- 5-Minute Prep: Just rub the salt, pepper, garlic, and rosemary on the roast and it’s oven-ready.
- Roast Beef Perfection: The sirloin cap stays juicy inside with a crust so flavorful you’ll skip the sauce.
- Feeds My Crew: One roast makes Sunday dinner and Monday sandwiches without breaking the bank.
- Leftovers Level Up: Cold slices taste even better the next day—honestly, I hide some for my lunch.
Step-by-Step Instructions for Sirloin Cap Roast
Master the technique for a perfect crust and juicy interior with this proven approach.
Step 1: Season the Sirloin Cap Roast Generously
Pat the 2.5 lb Sirloin Cap Roast completely dry with paper towels. This ensures the seasoning adheres properly and promotes even browning. In a small bowl, combine 1.5 tsp Diamond Crystal Kosher Salt, 1 tsp Freshly Ground Black Pepper, 1 tsp Granulated Garlic, 1 tsp Dried Rosemary, 1 tsp Dried Thyme, and 0.5 tsp Smoked Paprika.
Rub this mixture evenly over all surfaces of the roast, pressing gently to ensure full coverage. The smoked paprika adds depth to the crust, while the dried herbs release their oils when rubbed between your fingers. Let the seasoned roast sit at room temperature for 30-45 minutes before cooking.
Step 2: Sear the Roast for a Flawless Crust
Preheat your oven to 425°F. Heat a large oven-safe skillet or Dutch oven over medium-high heat and add the 1 tbsp Extra-Virgin Olive Oil. Once the oil is shimmering, place the roast in the pan, fat-side down. Sear undisturbed for 4-5 minutes until a deep, rich crust forms.
Flip the roast and sear the remaining sides for 2-3 minutes each, until evenly browned. The goal is a uniform, dark crust that locks in juices and creates intense flavor. Add the 2 whole Fresh Rosemary Sprigs and 2 whole Fresh Thyme Sprigs to the pan during the last minute of searing to infuse the oil with aromatic notes.
Step 3: Roast with Aromatic Basting
Transfer the skillet to the preheated oven. Roast for 20 minutes, then reduce the oven temperature to 375°F and continue roasting. Every 10-15 minutes, baste the roast with the 2 tbsp Unsalted Butter (melted), the rendered pan juices, and the fresh herb sprigs.
Basting enhances the flavor and promotes even cooking. The roast is done when an instant-read thermometer inserted into the thickest part registers 130-135°F for medium-rare. This typically takes 45-60 minutes total, depending on your oven and the roast’s thickness.
Step 4: Rest and Deglaze for Serving
Transfer the roast to a cutting board, tent loosely with foil, and let it rest for 15-20 minutes. This allows the juices to redistribute, ensuring a moist and tender result. Place the skillet on the stovetop over medium heat and add the 0.5 cup Red Wine.
Simmer for 2-3 minutes, scraping up the browned bits from the bottom of the pan to create a rich, flavorful sauce. Strain the sauce if desired, then slice the roast against the grain into ½-inch thick pieces. Serve immediately with the red wine pan sauce drizzled over the top.
Pro Tips For Making Sirloin Cap Roast
- Salt Overnight: I learned this the hard way—dry-brine the sirloin cap with Diamond Crystal salt at least 12 hours before cooking. It seasons deep and keeps the roast juicy, unlike last-minute salting that just sits on the surface.
- Room Temp First: Pull the roast out of the fridge 1-2 hours before cooking. Cold meat seizes up in the pan, and you’ll end up with uneven doneness—ask me how I know.
- Skip the Overcrowding: If searing, use a pan big enough to give the roast space, or do it in batches. Steaming from crowded meat kills the crust, and nobody wants a soggy sirloin cap.
- Rest Under Foil: After roasting, tent it loosely with foil and let it rest 15-20 minutes. Slicing too soon sends all those juices straight to the cutting board instead of your plate.
Troubleshooting Great sirloin cap roast
Uneven Cooking
If your roast is browning too quickly on one side, rotate the pan 180 degrees halfway through cooking. My Austin oven has hot spots, so I always check at 20 minutes. This ensures even exposure to heat for a consistent crust.
Tough or Chewy Texture
This usually means the roast was overcooked. Pull it at 130-135°F for medium-rare—remember it continues cooking while resting. I learned this the hard way when Emma and Jack complained about dry beef. Use a meat thermometer for accuracy.
Weak Crust Formation
For a better crust, make sure the roast is completely dry before seasoning. I pat mine with paper towels for 2-3 minutes. Also, don’t move it during searing—let it develop that dark crust for at least 4 minutes per side on medium-high heat. 💡
Dry or Overcooked
If your roast turns out dry, it likely rested too long or was sliced too soon. Rest it for 15-20 minutes tented with foil, then slice against the grain. The juices redistribute during resting, making all the difference.
Sauce Too Thin
After deglazing with 0.5 cup Red Wine, simmer uncovered for 3-4 minutes to reduce. I often add a 1 tsp cornstarch slurry if needed. The sauce should coat the back of a spoon lightly.
Herb Flavors Overpowering
If the dried herbs taste too strong, reduce the amount by half next time. I crush the Dried Rosemary and Dried Thyme between my fingers to release their oils gradually. Fresh herbs can be used, but double the quantity for balance. 🌿
Nutrition Facts
Frequently Asked Questions
What’s the ideal internal temperature for medium-rare?
Pull the roast at 130-135°F for perfect medium-rare. The temperature will rise 5-10°F while resting. Use a meat thermometer for accuracy—guesswork leads to overcooking.
How long should I let it rest before slicing?
Rest the roast for 15-20 minutes tented with foil. This allows juices to redistribute, ensuring every bite is moist and flavorful. Slicing too soon causes dryness.
Can I use fresh herbs instead of dried?
Yes! Use double the amount of fresh herbs. For example, swap 1 tsp dried rosemary for 2 tsp fresh. Crush them lightly to release their oils before applying.
What if my roast has an uneven fat cap?
Trim excess fat to ¼-inch thickness for even cooking. If one side is very thin, start searing fat-side down first to render it properly. Rotate the pan halfway for consistent browning.

Trained in classic French technique but raised on slow-cooked ribs and spicy rubs, she blends culinary skill with smoke and soul.
- Recipe for Fried Prawns Batter: Ultra-Crispy Golden Shell - October 3, 2026
- Indian Lamb Curry Recipe Pressure Cooker: Fragrant Spices in a Fraction of the Time - October 3, 2026
- Recipe for Oven Roasted: Golden Crisp Perfection Without the Fryer - October 3, 2026