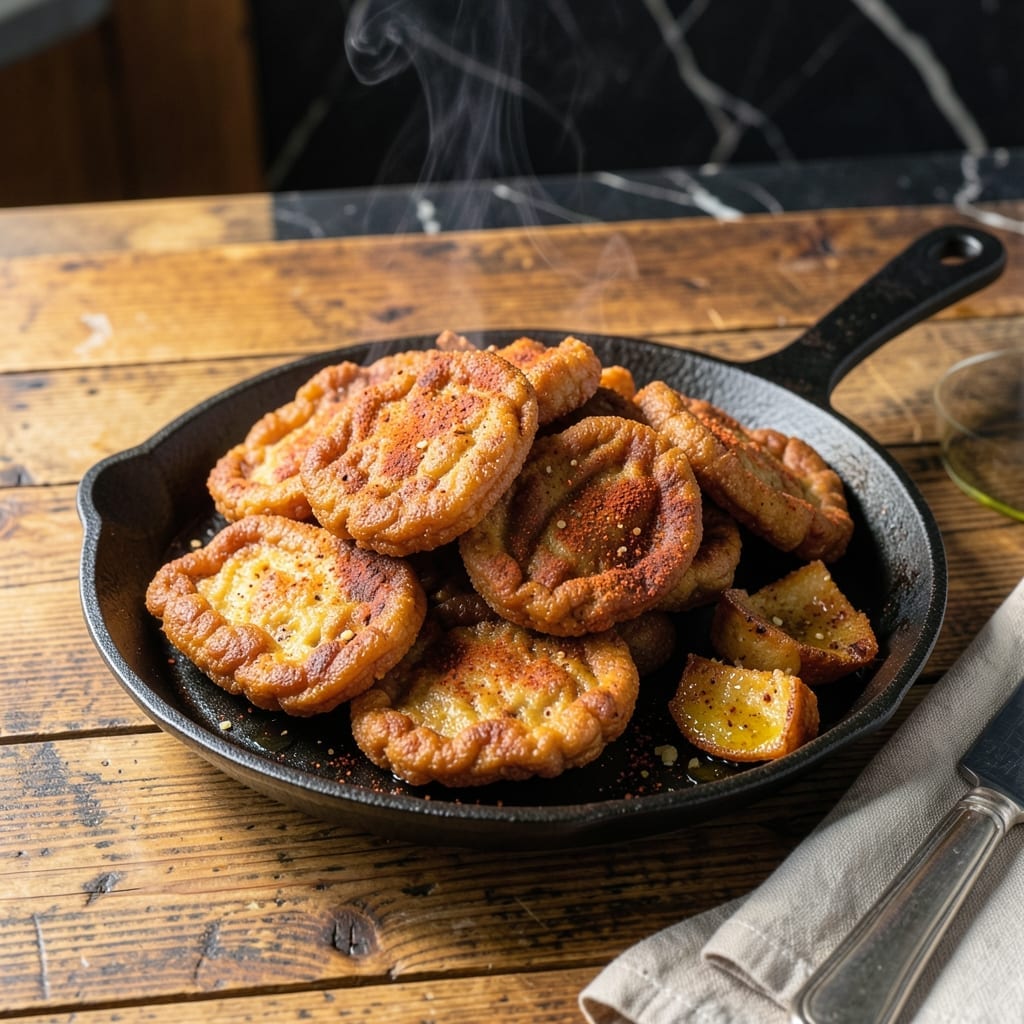
There’s an art to making pork rinds that capture true Southern flavor. This method delivers a crispy, savory snack that stays authentic to tradition.
I’ve refined this approach through years of pitmaster experience, ensuring every batch turns out perfectly golden and full of bold taste.
Ingredients for Southern Recipe Pork Rinds
Traditional pork skin and bold spices create this authentic Southern snack with perfect crunch and flavor depth.
| Ingredient | Amount | Notes |
|---|---|---|
| Pork Skin 🐷 | 2 lb | Fresh, uncooked, fat removed |
| Kosher Salt 🧂 | ½ cup | Diamond Crystal preferred for texture |
| Smoked Paprika 🌶️ | 1 tbsp | For authentic Southern smoke |
| Garlic Powder 🧄 | 1 tbsp | Fresh ground for potency |
| Onion Powder 🧅 | 1 tbsp | Complements pork flavor |
| Cayenne Pepper 🔥 | ½ tsp | Adjust for heat preference |
| Black Pepper 🌶️ | 1 tbsp | Coarsely ground for texture |
| Lard 🧈 | ½ cup | For frying, traditional choice |
| Vegetable Oil 🫒 | 2 cups | For frying if lard unavailable |
| Water 💧 | 1 cup | For initial boiling step |
| White Vinegar 🍶 | ¼ cup | Helps tenderize skin |
| Brown Sugar 🍚 | 2 tbsp | Optional, for sweet-savory balance |
[recipe_ingredient_scaler]
The pork skin must be fresh—ask your butcher for uncooked skin with fat removed, or order from a reputable supplier like Snake River Farms. Look for skin that’s thick and uniform, as thin pieces burn easily. For pitmaster-quality results, Diamond Crystal kosher salt is non-negotiable; its coarse texture adheres better and draws out moisture effectively without over-salting.
No lard? Vegetable oil or peanut oil works in a pinch, though the flavor profile shifts slightly. For a smokier taste, add liquid smoke at one-quarter teaspoon. If you’re out of smoked paprika, regular paprika plus a pinch of chipotle powder mimics the depth. The vinegar step isn’t optional—it’s what gives the rinds their signature crispness (trust the process on this one).
Once cooled, store in an airtight container with a silica packet to absorb moisture. Keeps at room temperature for up to 1 week, though they’re best within 3 days. For longer storage, freeze for up to 3 months—re-crisp in the oven before serving.
Why You’ll Love This Recipe
- One Pan Wonder: The only hands-on time is rubbing the spices into the pork skin—then the oven does the rest.
- Smoky Crunch: That combination of smoked paprika and garlic powder gives every bite a deep, savory kick.
- Snack or Side: I toss them on salads, serve with dips, or just eat straight from the pan.
- Pantry Staple: Pork skin is cheap, and a big batch keeps in the pantry for weeks of crispy goodness.
Step-by-Step Instructions for Southern Recipe Pork Rinds
This traditional method yields perfectly crispy pork rinds with authentic Southern character every time.
Step 1: Prepare and Boil the Pork Skin
Begin by thoroughly cleaning the 2 lb Pork Skin to remove any residual fat or impurities. Cut it into 1-inch strips or squares for even cooking. In a large pot, combine the 1 cup Water and 0.25 cup White Vinegar, then add the pork skin.
Bring to a boil over medium-high heat, then reduce to a simmer. Cook for 45-60 minutes until the skin becomes tender but not falling apart. This step removes excess fat and begins the tenderizing process, which is essential for achieving the right texture later.
Step 2: Season the Pork Skin
Drain the boiled pork skin and pat it dry with paper towels. In a bowl, combine the 0.5 cup Kosher Salt, 1 tbsp Smoked Paprika, 1 tbsp Garlic Powder, 1 tbsp Onion Powder, 0.5 tsp Cayenne Pepper, and 1 tbsp Black Pepper. Toss the pork skin in this mixture until evenly coated.
The spices should adhere well to the slightly tacky surface of the skin. For a sweet-savory balance, sprinkle the 2 tbsp Brown Sugar over the seasoned skin and toss again. Let it marinate for at least 30 minutes to absorb the flavors fully.
Step 3: Dry the Seasoned Pork Skin
Arrange the seasoned pork skin on a wire rack set over a baking sheet. Place it in a 200°F oven for 2-3 hours to dry completely. The skin should become leathery and slightly shriveled, with no moisture remaining.
This drying step is crucial—it ensures the skin will puff and crisp properly during frying. Check periodically and rotate the racks if your oven has hot spots. The skin is ready when it feels dry to the touch and slightly stiff.
Step 4: Fry to Crispy Perfection
In a deep, heavy-bottomed pot, heat the 0.5 cup Lard and 2 cups Vegetable Oil to 375°F. Use a thermometer to maintain this temperature precisely. Working in batches to avoid overcrowding, carefully add the dried pork skin to the hot fat.
Fry for 8-12 minutes, stirring occasionally, until the pork rinds puff up and turn golden brown. They should float to the surface and become crispy. Remove with a slotted spoon and drain on a paper towel-lined plate. Sprinkle with a bit of extra Kosher Salt while still hot, if desired.
Step 5: Cool and Store
Allow the pork rinds to cool completely at room temperature. As they cool, they’ll become even crispier. Once cooled, store in an airtight container at room temperature for up to 1 week, though they’re best enjoyed fresh.
The finished pork rinds should be light, airy, and shatteringly crisp with a deep, savory flavor from the spices. Serve as a snack or alongside your favorite dips.
Pro Tips For Making Southern Recipe Pork Rinds
- Dry the Skin: Pat the pork skin completely dry before seasoning—I learned this the hard way after my first batch turned out chewy instead of crispy.
- Low and Slow: Bake at 250°F for 2-3 hours to render the fat and achieve that perfect crunch without burning the spices.
- Skip the Substitutes: Use fresh pork skin, not pre-packaged, as the texture and fat content are non-negotiable for authentic southern-style rinds.
- Season Twice: Dust with half the seasoning before baking, then toss with the rest while warm—this layers the flavor way better than doing it all at once.
Dietary Considerations for southern recipe pork rinds
Keto-Friendly Crunch
These pork rinds are naturally zero-carb and high-protein, making them a perfect snack for keto diets. With no added sugars in the base recipe, they fit seamlessly into low-carb meal plans. I often pack them for BBQ competitions where carb counts matter. 💪
Gluten-Free by Nature
Since pork rinds contain no wheat, barley, or rye, they’re inherently gluten-free. The only ingredients are pork skin and spices, so there’s no risk of hidden gluten. Always verify your spice blends are pure—some store brands add fillers.
Low-Sodium Adjustments
To reduce sodium, cut the Kosher Salt by half and boost other spices like smoked paprika and garlic powder to compensate. The vinegar in the boiling step helps enhance flavor without extra salt. I find ¼ cup salt still delivers great taste.
Allergen Considerations
These contain no dairy, nuts, or soy, making them safe for many common allergies. However, they’re fried in lard or vegetable oil, so those with pork or oil allergies should avoid them. Always check your oil source if cross-contamination is a concern.
Diabetic-Friendly
With no sugar in the base recipe, these are diabetic-friendly. The optional 2 tbsp brown sugar adds minimal carbs—just 26g per batch. For strict diabetic needs, simply omit the sugar entirely. The spices provide plenty of flavor.
Paleo and Whole30
For paleo, use only lard for frying and skip the brown sugar. Whole30 requires omitting sugar entirely and verifying all spices are compliant. I’ve found the basic recipe works beautifully for both eating styles. ✨
Nutrition Facts
Frequently Asked Questions
What’s the best way to cut pork skin for even cooking?
Cut skin into 1-inch strips or squares to ensure even frying and consistent texture throughout. Avoid thin pieces as they burn easily.
Can I use an air fryer instead of deep frying?
Yes, though results differ. Air fry at 375°F for 12-15 minutes, shaking occasionally. They won’t puff as much but will still crisp up nicely.
How do I keep them crispy after frying?
Cool completely on a rack, not paper towels, to prevent steam. Store in an airtight container with a silica packet to absorb moisture.
Why did my rinds turn out chewy?
Insufficient drying or low frying temperature is usually the culprit. Ensure skin is completely dry before frying and maintain 375°F oil heat.

Trained in classic French technique but raised on slow-cooked ribs and spicy rubs, she blends culinary skill with smoke and soul.
- Recipe for Crock Pot Swiss Steak: Slow-Cooked Beef With Mushroom Gravy - October 3, 2026
- Recipe for Kabsa Rice: Spiced Middle Eastern Feast in One Pot - October 3, 2026
- Hamburger Stir Fry Recipe Healthy: Lean Protein and Veggie-Packed Dinner - October 3, 2026