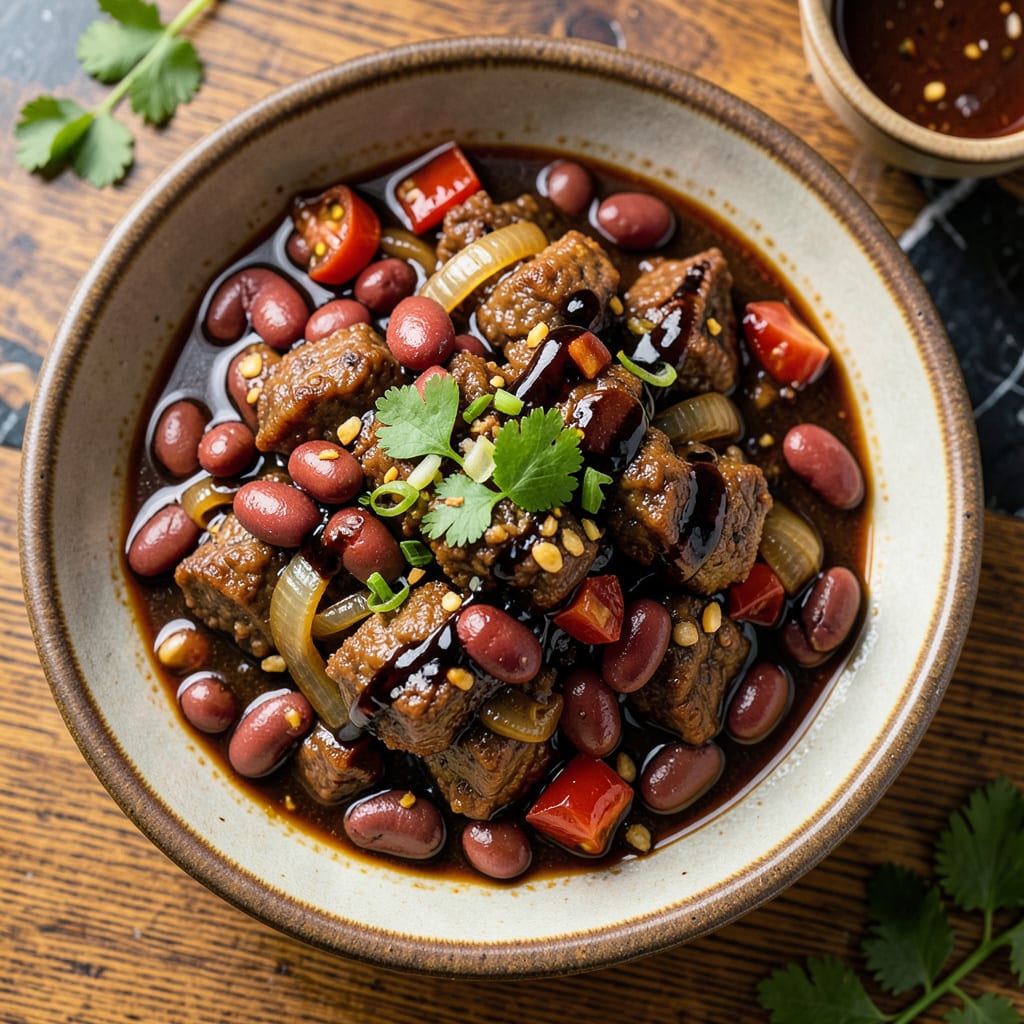
I’ll never forget the first time I stirred soy sauce into my chili pot—it was one of those “why didn’t I think of this sooner?” moments. That single ingredient transformed my good chili into something extraordinary, adding layers of umami depth that had been missing. This isn’t your average chili recipe; it’s the version I’ve perfected over years of backyard cookouts and competition judging.
The soy sauce works quietly in the background, enhancing the natural richness of the beef and beans without overpowering the dish. I use just enough to amplify the savory notes while letting the traditional chili spices shine through. What you get is a pot of chili with complex, well-rounded flavor that lingers on your palate—no one-dimensional heat here.
This recipe delivers restaurant-quality results with simple ingredients and straightforward technique. The meat becomes incredibly tender after a slow simmer, while the beans absorb all those rich, savory flavors. I’ve tested this with everything from ground beef to chunky brisket, and it never disappoints.
Serve it with cornbread for soaking up every last drop, or over rice for a heartier meal. The soy sauce addition makes this chili versatile enough for game day crowds or quiet weeknight dinners. Here’s how to make your best pot yet.
📚 In This Guide
- What You’ll Need
- Instructions
- Tips and Common Mistakes
What Youll Need
- ● Ground meat: 2 lbs (80/20 beef for richness or turkey/chicken for a lighter option 🥩)
- ● Soy sauce: 3–4 tbsp (low-sodium preferred to control saltiness—key ingredient!)
- ● Beans: 2 cans (15 oz each) kidney or pinto beans, drained (or 3 cups cooked 🌱)
- ● Tomatoes: 1 can (28 oz) crushed or 6 fresh Roma tomatoes, diced 🍅
- ● Aromatics: 1 large onion (diced), 4 garlic cloves (minced), 1 bell pepper (chopped)
- ● Spices: 2 tbsp chili powder, 1 tsp cumin, 1 tsp smoked paprika, ½ tsp cayenne (adjust to heat preference 🔥)
- ● Broth: 2 cups beef/vegetable broth (or water + bouillon cube)
- ● Oil: 2 tbsp neutral oil (vegetable, avocado, or olive oil)
- ● Large pot or Dutch oven (5–6 quart, heavy-bottomed for even cooking)
- ● Wooden spoon or spatula (for stirring and scraping)
- ● Sharp chef’s knife + cutting board (prep those veggies like a pro! 🔪)
- ● Measuring cups/spoons (precision matters for balance!)
- ● 1 tbsp tomato paste (for extra depth)
- ● 1 tsp fish sauce (boosts umami with soy sauce)
- ● 1 bay leaf (subtle herbal note)
- ● Toppings: shredded cheese, sour cream, green onions, or cilantro 🧀
Instructions
Here’s how to transform your chili with soy sauce—simple steps, incredible depth of flavor.
Bloom Your Aromatics with Soy Sauce
Start by heating your pot over medium heat. Add your usual chili base—onions, garlic, and peppers—and cook until softened. Here’s the game-changer: when the onions turn translucent, add 1-2 tablespoons of soy sauce right into the pot with the aromatics. I use regular soy sauce for this step, not the low-sodium version.
The soy sauce will sizzle and caramelize slightly as it hits the hot pan, creating a deep, savory foundation. Cook for 2-3 minutes until the raw soy sauce smell dissipates and you’re left with a rich, umami aroma. This early addition allows the soy sauce to permeate every layer of flavor as the chili builds.
Build Your Chili Base with Layered Flavors
Add your ground meat (beef, turkey, or plant-based crumbles) to the pot and brown it thoroughly. As the meat cooks, you’ll notice the soy sauce from the previous step creating a beautiful fond on the bottom of the pot—that’s pure flavor waiting to be unlocked. Deglaze with a splash of broth or water, scraping up all those browned bits.
Now add your tomatoes, beans, and remaining liquids. The soy sauce will immediately start working its magic, enhancing the natural sweetness of the tomatoes and adding complexity to the beans. I always notice how the color deepens slightly when the soy sauce is properly incorporated—it’s your visual cue that the flavors are developing.
Simmer for Maximum Flavor Integration
Bring your chili to a gentle boil, then reduce to low heat and let it simmer uncovered for at least 30 minutes. This is where the soy sauce truly shines. As the chili reduces, the soy sauce concentrates, intensifying that savory depth without making the dish taste “soy saucy.” Stir occasionally and taste after 20 minutes—you’ll be amazed at how much richer the flavor profile has become.
The soy sauce also helps balance the acidity from the tomatoes and the earthiness from the beans. I’ve found that chilis with soy sauce develop a more rounded, satisfying flavor profile faster than traditional recipes. The aroma will become deeper and more complex as it simmers, with that characteristic umami note coming through clearly.
Adjust and Finish Like a Pro
After simmering, taste your chili carefully. The soy sauce should enhance the existing flavors, not dominate them. If needed, you can add another ½ tablespoon of soy sauce at this stage, but go slowly—it’s easier to add more than to fix an overly salty pot. I often find that the initial amount is perfect, but every batch of tomatoes and beans varies slightly in their natural saltiness.
Let the chili rest for 10 minutes off the heat before serving. This resting period allows the soy sauce to fully integrate with all the ingredients. You’ll notice the flavors have melded beautifully, with that elusive umami depth that makes people ask for your secret. The soy sauce gives the chili a restaurant-quality complexity that’s surprisingly easy to achieve at home.
Tips and Common Mistakes
Here’s what I’ve learned from years of perfecting this technique—small details that make a world of difference in your final pot.
Heat Control: When you’re cooking the aromatics in Step 1, that medium heat is crucial. Too high and the soy sauce will burn before it caramelizes; too low and you won’t develop that rich fond. I’ve found that when the onions just start to turn translucent—that’s your perfect moment to add the soy sauce. The 2-3 minutes of cooking after adding it should be active—you’ll see it darken slightly and smell the raw edge cook off.
Simmering Strategy: During the 30-minute simmer in Step 3, don’t walk away completely. Stir every 5-7 minutes, scraping the bottom to prevent sticking. The soy sauce makes the chili more prone to developing a delicious fond, but you don’t want it to burn. After 20 minutes, taste carefully—the flavors should be coming together but the soy sauce shouldn’t be the dominant note. If it tastes too forward, a splash of broth will balance it without diluting the depth.
Resting Revelation: That 10-minute rest in Step 4 isn’t just about cooling—it’s when the soy sauce works its final magic. I learned this the hard way after serving immediately once: the flavors were good but not cohesive. The resting time lets the soy sauce distribute evenly through every bite. You’ll notice the difference when you taste it—the umami will be present but perfectly balanced with all other elements.
Soy Sauce Selection: While the instructions call for regular soy sauce, I’ve experimented with different varieties. Regular gives you that perfect balance of salt and umami, but if you want to geek out, try a mix of half regular and half dark soy sauce for even deeper color and complexity. Just be careful—dark soy is stronger, so start with just 1 tablespoon total in Step 1 and adjust at the end.
Pro Tips for Soy Sauce In Chili
- Here’s what I’ve learned from years of perfecting this technique—small details that make a world of difference in you…
- Heat Control: When you’re cooking the aromatics in Step 1, that medium heat is crucial. Too high and the soy sauce wi…
- Simmering Strategy: During the 30-minute simmer in Step 3, don’t walk away completely. Stir every 5-7 minutes, scrapi…
Frequently Asked Questions
Can I add soy sauce directly to chili while it’s cooking?
Stir it in during the last 30 minutes of simmering to preserve its bold flavor. Adding it too early may cause the umami notes to mellow out. Start with 1-2 tablespoons, taste, then adjust. Pro tip: Mix it with a splash of broth first for even distribution!
What’s the best soy sauce for chili—light, dark, or tamari?
For classic depth, dark soy sauce (richer, slightly sweeter) works best. Light soy sauce is saltier and brighter—use sparingly. Tamari (gluten-free) is a great alternative with a smoother taste. Avoid “reduced-sodium” unless you’re watching salt—it lacks punch.
How much soy sauce should I use per pound of meat?
A good rule of thumb: 1 tablespoon per pound of meat (or 1.5 tablespoons for plant-based chili). Overdoing it can make your chili too salty or soy-forward. Balance it with a pinch of brown sugar or extra tomatoes if needed.
My chili tastes too soy-saucy—how do I fix it?
No stress! Dilute the flavor by adding:
- ½ cup broth + 10 extra simmering minutes, or
- 1 diced potato (it absorbs excess salt), or
- A splash of vinegar (apple cider or white) to brighten the pot.
Are there soy sauce alternatives for chili?
Yes! Try these for similar umami depth:
- Worcestershire sauce (1:1 swap, but check for anchovies if vegan).
- Miso paste (dissolve 1 tsp in broth first).
- Fish sauce (use half the amount—it’s potent!).
- Coconut aminos (lighter, slightly sweet).
Adding soy sauce to chili is a game-changer—unlocking layers of savory umami that elevate every spoonful. Whether you’re sticking to a classic recipe or experimenting with bold flavors, this simple tweak proves that small ingredients can make a big difference. 🍲
Ready to take your chili to the next level? Grab that bottle of soy sauce, tweak your favorite recipe, and taste the magic for yourself. Don’t forget to share your results—or your own secret twists—with fellow chili lovers!

Trained in classic French technique but raised on slow-cooked ribs and spicy rubs, she blends culinary skill with smoke and soul.