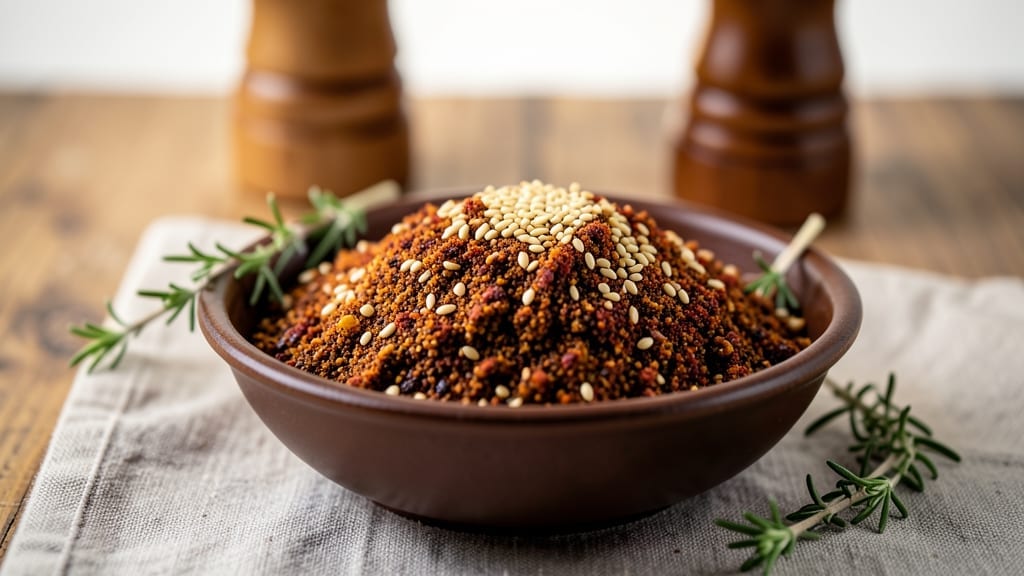
This sweet and spicy dry rub recipe transforms ordinary grilled meats into finger-licking masterpieces with just a few simple ingredients. The day I realized French technique could elevate my rubs changed everything—now I blend bold spices with caramelized brown sugar for that perfect balance of heat and sweetness.
Every time I sprinkle this mix on ribs or chicken, the aroma fills my kitchen like a smoky hug.
What makes this rub special is its versatility—it works on chicken, ribs, pork, or even fish, delivering restaurant-quality flavor with minimal effort. The secret lies in precise measurements: a mix of chili powder, paprika, garlic powder, and brown sugar that creates a sticky, flavor-packed crust.
Store it in an airtight container for up to six months, so you always have bold flavor at your fingertips.
By the time you finish applying this rub, your meat will be coated in a glossy, caramelized crust that crackles with every bite. The sweetness mellows the spice, creating a perfect harmony that lingers long after the last bite.
Whether you’re grilling for a crowd or treating yourself to a weeknight meal, this rub guarantees flavor that stands out.
Pair it with your favorite protein and let the smoker or grill do the rest. The possibilities are endless—try it on brisket, wings, or even roasted vegetables for a bold, smoky twist. Let’s get seasoning!
Ingredients for sweet and spicy dry rub
A perfect blend of bold spices and caramelized sweetness for restaurant-quality flavor.
| Ingredient | Amount | Notes |
|---|---|---|
| Brown Sugar 🍯 | ½ cup | Light or dark, packed |
| Chili Powder 🌶️ | 3 tbsp | Medium heat preferred |
| Smoked Paprika 🌶️ | 2 tbsp | For smoky depth |
| Garlic Powder 🧄 | 1 tbsp | Freshly ground preferred |
| Onion Powder 🧅 | 1 tbsp | For sweet base |
| Ground Cumin 🌿 | 1 tbsp | Toasted for warmth |
| Dried Oregano 🍃 | 1 tsp | Mexican preferred |
| Black Pepper 🌶️ | 1 tsp | Freshly cracked |
| Cayenne Pepper 🔥 | ½ tsp | Adjust for heat |
| Kosher Salt 🧂 | 1 tsp | Fine grain preferred |
[recipe_ingredient_scaler]
The brown sugar is your sweetness anchor—light or dark both work, but dark adds a deeper molasses note. Penzeys or Trader Joe’s have the best quality in bulk bins, but any grocery store’s light brown sugar works fine. For the chili powder, look for medium heat—too mild and the rub won’t pack a punch. Smoked paprika gives that signature smoky aroma, so don’t skip it. If you’re feeling fancy, toast the cumin seeds in a dry pan for 30 seconds before grinding them—game changer. The Mexican oregano has a different flavor profile than regular oregano, but if you can’t find it, regular dried oregano works in a pinch.
No smoked paprika? Regular paprika plus a pinch of liquid smoke gets you close. Too much cayenne? Cut it with a little more brown sugar. The garlic powder can be swapped for 1/2 tsp garlic salt plus 1/2 tsp regular salt. For a sweeter rub, add 1/4 cup more brown sugar. Want more heat? Kick it up with red pepper flakes instead of cayenne. The kosher salt is crucial—it balances all the flavors, so don’t skip it. If you’re making this for fish or vegetables, cut the cayenne in half to avoid overpowering.
This rub keeps 6-12 months in an airtight container in a cool, dark place. I like to portion it into small jars—one for grilling, one for smoking, one for backup. For extra stickiness, mix in 1 tbsp cornstarch before storing. Once opened, use within 3 months. Trust me, you’ll go through this fast—it’s that good.
Why You’ll Love This Recipe
- No-Frills Magic: Honestly, this rub takes less than 15 minutes—just measure, mix, and boom. No chopping, no fussing, just a bowl, a fork, and ingredients that blend together like they were meant to. I pack the brown sugar first because, trust me, that’s the secret to avoiding clumps later.
- Sweet Heat Balance: The cayenne gives that little kick, but the brown sugar and onion powder keep it from being overpowering. It’s like a hug for your taste buds—smoky from the paprika, garlicky warmth from the powder, and just enough spice to make you crave more. That’s the kind of rub that disappears into the meat without fighting for attention.
- Grill or Pan, Any Day: I use this on everything from chicken thighs to grilled peppers, and it’s always a win. Perfect for weeknight dinners when you want flavor fast, or for weekend BBQs where you’re feeding a crowd. Even my picky teen sister asks for it on her burgers—chef’s kiss.
- Budget-Friendly Treasure: This is one of those recipes where you pay in spices, not in time or money. A jar of brown sugar and a spice rack are all you need, and it makes enough for months. I’ve got jars of this sitting in my pantry from last summer, still just as good as the day I made it.
Step-by-step instructions for sweet and spicy dry rub
Here’s how to blend this bold, balanced rub that transforms grilled meats into finger-licking masterpieces.
Measure All Ingredients Precisely
Start by gathering all your ingredients on a clean work surface. I like to use a large mixing bowl for this step. Begin with the brown sugar—pack it firmly into your measuring cup to ensure you get the full ½ cup. This sweet base will balance the heat later, so don’t skimp.
Next, measure out the chili powder using the 3 tablespoons. I use a small spoon to scoop it directly from the container to avoid spills. The smoked paprika comes next—2 tablespoons of this adds that beautiful smoky depth that makes this rub special. Remember, these measurements are critical for achieving the perfect flavor balance.
Combine Dry Ingredients Thoroughly
Add all the dry ingredients to your mixing bowl: the 1 tablespoon each of garlic powder and onion powder, the 1 tablespoon of ground cumin, 1 teaspoon each of dried oregano and black pepper, and the ½ teaspoon of cayenne pepper. The cayenne might seem small, but it’s what gives this rub its signature kick.
Use a whisk to combine everything gently at first. You’ll want to break up any clumps in the brown sugar and spices. Then, switch to a fork and stir vigorously for about 2 minutes. This ensures all the spices are evenly distributed and the brown sugar coats everything uniformly. You should see a fine, powdery mixture with no visible separate clumps.
Add the Kosher Salt and Final Mix
Now add the final ingredient: 1 teaspoon of kosher salt. This might seem like a small amount, but it’s crucial for enhancing all the other flavors. Don’t substitute table salt here—the coarser texture of kosher salt dissolves better and prevents clumping in the rub.
Give everything one final mix with your whisk or fork. You’re looking for a completely homogeneous blend where you can’t distinguish individual spices. The rub should look like fine, even granules with no streaks of brown sugar or clumps of chili powder. This even distribution is what makes the flavor consistent every time you use it.
Store Properly for Maximum Flavor
Transfer your completed rub to an airtight container. I prefer glass jars with tight-sealing lids because they let me see the rub and keep it fresh longer. Label the container with the date and contents—this rub keeps well for up to 6 months in a cool, dark place.
Before using, give the container a good shake to redistribute any settled spices. This rub works beautifully on ribs, chicken, pork shoulders, or even vegetables for grilling. Just remember: a little goes a long way, so start with about 1 tablespoon per pound of meat and adjust to taste.
Pro Tips For Making Sweet And Spicy Dry Rub
- Whisk First, Fork After: DESCRIPTION: Start with a whisk to break up clumps in the brown sugar and spices, then switch to a fork and stir vigorously for about 2 minutes. The whisk gets everything moving, but the fork’s tines actually work the mixture into a fine, even powder—no streaks of chili powder or hidden sugar crystals left behind.
- Pack That Sugar: DESCRIPTION: When measuring the ½ cup brown sugar, pack it firmly into the measuring cup. I learned this the hard way—loose sugar means less sweetness in your rub, and that throws off the balance between the heat and smokiness. A quick tap on the counter ensures you get every gram.
- Toast the Cumin: DESCRIPTION: Heat your 1 tablespoon ground cumin in a dry skillet for 30 seconds until fragrant—just until you smell that warm, nutty aroma. Toasted cumin adds depth that ground cumin straight from the jar can’t match. Let it cool before mixing, or you’ll risk burning the other spices.
- Shake Before Using: DESCRIPTION: No matter how well you mix it, spices settle. Give your jar a good shake right before applying the rub to the grill. I’ve seen cayenne and smoked paprika pool at the bottom—if you don’t redistribute, you’ll end up with uneven heat and flavor on your meat. A 10-second shake makes all the difference.
Essential equipment for this recipe
Your Trusty Mixing Bowl
I swear by a ceramic mixing bowl with a rimmed edge for this rub—it catches any stray spices and makes cleanup a breeze. A 1-quart capacity works perfectly for this recipe.
If you’re on a budget, a sturdy plastic bowl will do, but I prefer the non-reactive quality of ceramic. Just make sure it’s clean and dry before mixing. 🥣
Whisk and Fork Combo
A balloon whisk for the initial blend and a sturdy wooden or metal fork for the final mix are essential. The whisk breaks up clumps in the brown sugar, while the fork ensures every spice gets evenly distributed.
I keep a 3-inch whisk and a 6-inch fork in my kitchen for this purpose—both are affordable and last forever. Trust me, this combo makes all the difference.
Precision Measuring Tools
Invest in a set of stainless steel measuring spoons—they’re non-reactive and accurate. For the brown sugar, use a measuring cup with a leveling edge to avoid packing errors.
I love the OXO Good Grips set because the handles are ergonomic, and the measurements are clear. No more guessing with these tools! 📏
Storage Containers
Glass jars with tight-sealing lids are my go-to for storing this rub. I use Mason jars (half-pint or pint size) because they’re airtight and let me see the rub’s color. If you prefer plastic, look for BPA-free containers with snap-on lids.
Label each jar with the date—this rub lasts for months, but freshness matters! Labeling keeps you from wondering when it was made.
Optional Upgrade: Spice Grinder
If you want to take it up a notch, a small spice grinder lets you toast and grind whole spices like cumin seeds right before mixing. I use my KitchenAid mini grinder for this—it’s compact and does wonders for freshness.
Just toast the seeds in a dry pan for 30 seconds before grinding, and your rub will taste even deeper and more complex.
Nutrition facts
Frequently asked questions
Why does this rub need kosher salt instead of regular table salt?
Kosher salt has larger, coarser grains that dissolve more evenly and prevent clumping in the dry rub. 1 teaspoon of kosher salt provides the same saltiness as ½ teaspoon of table salt but distributes better, ensuring consistent flavor in every application. This is especially important for dry rubs where texture matters as much as taste!
Can I adjust the heat level in this rub?
For less heat, reduce the ½ teaspoon cayenne to ¼ teaspoon or skip it entirely. Want more kick? Add ½ teaspoon red pepper flakes or increase the cayenne to 1 teaspoon. The brown sugar will still balance the spice, so you can experiment freely without losing the signature sweet-spicy harmony.
What’s the best way to apply this rub to meat?
Pat your meat dry first to help the rub adhere better. Rub it generously—1 tablespoon per pound of meat—then let it sit for at least 30 minutes (or overnight in the fridge) before cooking. This lets the flavors penetrate deeply, creating that perfect caramelized crust when grilled or smoked.
Will this rub work on non-meat foods?
Yes! While it’s fantastic on grilled meats, this rub also works beautifully on vegetables like bell peppers, zucchini, or potatoes. For veggies, cut the cayenne in half to avoid overpowering their natural flavors. The sweet-spicy combo adds a delicious twist to roasted or grilled plant-based dishes.
Why does the recipe specify “packed” brown sugar?
Packing brown sugar ensures you get the full ½ cup measurement without air gaps. Loosely packed sugar measures less, which could throw off your rub’s balance. Use a spoon to press it firmly into the cup—this small step makes a big difference in flavor consistency!

Trained in classic French technique but raised on slow-cooked ribs and spicy rubs, she blends culinary skill with smoke and soul.
- Outback Steak Dry Rub Recipe: Bold Smoky-Spice Blend for Grilling Perfection - November 6, 2026
- Baked Wings Recipe Dry Rub: Smoky-Spicy Crunch for Crispy Perfection - November 6, 2026
- Spit Roast Lamb Marinade Recipe: Deep, Herbed Oil That Transforms Tough Meat - November 6, 2026