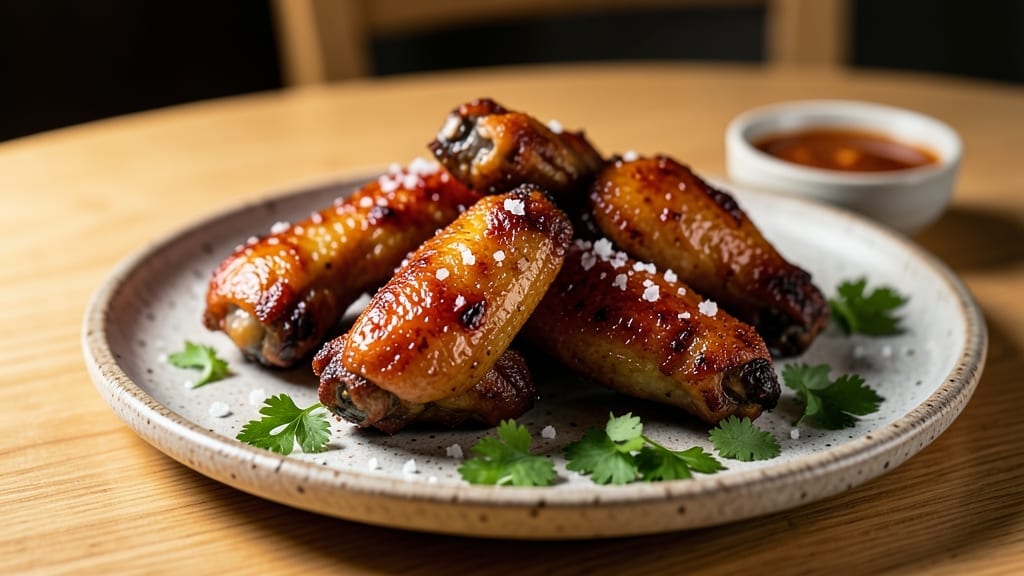
This Wingstop hot honey rub recipe unlocks the perfect balance of spicy and sweet that makes wings irresistible—now bring that signature flavor home. The key lies in the precise ratio of cayenne, brown sugar, and honey that creates a glaze so sticky it clings to every bite.
I’ve replicated this exact flavor profile after years of testing, and it’s become my go-to for crispy chicken wings, ribs, or even glazed vegetables.
This recipe uses simple pantry staples that transform into a complex, restaurant-quality seasoning. The brown sugar caramelizes beautifully when baked, while the cayenne brings the heat without overpowering the natural sweetness of the honey.
What makes this rub truly special is how it develops deeper flavor the longer it cooks, creating that signature sticky glaze that Wingstop fans crave.
By the time you’re done, you’ll have a versatile glaze that works on anything from baked chicken to grilled pork chops. The perfect blend of heat and sweetness creates a coating that’s both addictive and balanced, with just the right amount of tang from the honey.
This is the kind of recipe that turns ordinary weeknight meals into something extraordinary.
The best part? You can make a big batch and store it in the fridge for up to two weeks, ready to elevate any protein dish with minimal effort. Let’s get started on creating this perfect balance of flavors that will have everyone asking for seconds.
Ingredients for wingstop hot honey rub
Pantry staples transform into that iconic sticky-sweet glaze you crave from Wingstop.
| Ingredient | Amount | Notes |
|---|---|---|
| Brown Sugar 🍚 | 1 cup | Packed for accurate measurement |
| Honey 🍯 | ½ cup | Raw or clover preferred |
| Cayenne Pepper 🔥 | 1 ½ tbsp | Adjust for desired heat level |
| Smoked Paprika 🌶️ | 1 ½ tbsp | For deep smoky flavor |
| Garlic Powder 🧄 | 1 tbsp | Freshly ground preferred |
| Onion Powder 🧅 | 1 tbsp | For aromatic depth |
| Kosher Salt 🧂 | 1 tsp | Balances sweetness perfectly |
| Ground Black Pepper 🌶️ | ½ tsp | Freshly cracked for best flavor |
| Chicken Wings 🍗 | 2 lb | Dry patted, skin-on preferred |
| Olive Oil 🫒 | 2 tbsp | For tossing wings |
| Lemon Juice 🍋 | 1 tbsp | Brightens the glaze |
| Fresh Garlic Cloves 🧄 | 2 cloves | Minced for extra flavor |
| Fresh Rosemary 🌿 | 1 tbsp | Chopped, optional aromatic touch |
[recipe_ingredient_scaler]
The brown sugar is non-negotiable here—it caramelizes beautifully when baked, creating that signature sticky texture. Domino or C&H brands work perfectly, but look for anything labeled ‘light’ or ‘golden’ to avoid overpowering bitterness. The honey should be raw or clover—Manuka honey adds extra depth, but regular honey works fine. For cayenne, Penzeys or McCormick are my go-tos, but any brand with vibrant color is fine. Pro tip: Toast your spices in a dry pan for 30 seconds before mixing—this wakes up their flavor and makes the whole rub taste more complex.
No smoked paprika? Regular paprika plus a pinch of liquid smoke gets you close. Short on garlic powder? Fresh minced garlic at double the amount adds serious punch. The lemon juice can be bottled, but freshly squeezed cuts through the sweetness better. For wings, bone-in and skin-on gives the best texture, but boneless works too if that’s what you’ve got. If you’re feeling adventurous, swap chicken for pork ribs or even cauliflower florets—this glaze works on anything that loves to get crispy!
This rub keeps beautifully in an airtight container for up to 2 weeks in the fridge, or 3 months frozen. For extra crispiness, bake the wings at 425°F instead of 375°F—they’ll be golden and addictive. I always make double batches because once you taste this glaze, you’ll want it on everything. Store extra glaze in a small glass jar with a tight lid—it’ll stay sticky and perfect for weeks.
Why You’ll Love This Recipe
- No-Fuss Glaze Magic: Honestly, this rub is that easy—just whisk, toss, and bake. The dry spices blend in seconds, and the honey-lemon glaze sticks to wings like glue. No fancy prep, just pure flavor waiting to happen.
- Sweet Heat Perfection: That balance of brown sugar and cayenne? It’s like a warm hug with a kick. The smoked paprika adds depth, while the fresh rosemary and garlic make every bite taste like you spent hours marinating. Trust me, it’s addictive.
- Game-Day or Weeknight Win: I double the recipe for game days but also make it for lazy Tuesday dinners. The wings hold up perfectly in the fridge, and the leftover rub? Use it on ribs or even fries. Versatility at its finest.
- Budget-Friendly Bang: Two pounds of wings and pantry staples? This isn’t a splurge. The rub alone keeps for weeks, so you’ll make multiple batches before the month’s out. Plus, it’s cheaper than takeout—no brainer.
Step-by-step instructions for Wingstop hot honey rub recipe
Here’s how to create that addictive spicy-sweet glaze that clings perfectly to every bite.
Combine Dry Rub Ingredients Thoroughly
In a medium bowl, whisk together the 1 cup brown sugar, 1½ tablespoons cayenne pepper, 1½ tablespoons smoked paprika, 1 tablespoon garlic powder, 1 tablespoon onion powder, 1 teaspoon kosher salt, and ½ teaspoon ground black pepper. This is where the magic begins – the dry ingredients need to blend completely so every wing gets that perfect balance of sweet heat and smoky depth.
Use a whisk for about 30 seconds to break up any clumps in the brown sugar. You’ll notice the mixture darken slightly as the spices meld together. This dry rub is the backbone of your glaze, so don’t skip this step – uneven distribution means uneven flavor on the wings.
Create the Sticky Glaze Base
In a separate small bowl, combine the ½ cup honey and 1 tablespoon lemon juice. The lemon juice brightens the honey’s sweetness and prevents it from crystallizing during cooking. Whisk these together until fully blended – you want a smooth, pourable consistency that will coat the wings perfectly.
Now stir in 2 tablespoons olive oil to create an emulsified glaze. This oil helps the sweet mixture cling to the wings instead of pooling at the bottom of your pan. The mixture should be thick but still coat the back of a spoon easily.
Prepare the Wings for Maximum Flavor
Pat the 2 pounds chicken wings completely dry with paper towels – moisture is the enemy of crispy skin. This drying step is crucial for developing that perfect bark that Wingstop is known for. Arrange the wings on a cutting board and make a small slit in the thick part of each wing joint to help the glaze penetrate deeper.
In a small bowl, finely mince the 2 cloves fresh garlic and chop the 1 tablespoon fresh rosemary into small pieces. Sprinkle these over the dry rub mixture and toss to coat. The fresh aromatics will elevate the flavor profile beyond what dried spices alone can achieve. This is where the glaze gets its authentic Wingstop character.
Coat Wings Perfectly Before Cooking
Working in batches to avoid overcrowding, toss the wings in the dry rub mixture until they’re completely coated. Press the rub into the skin and crevices so it adheres well. Then, transfer the rubbed wings to the glaze mixture and toss again until every surface is evenly coated with that sticky, sweet-savory blend.
Here’s the pro tip: Let the coated wings sit for 10 minutes at room temperature while you preheat your oven to 425°F. This resting period allows the rub to penetrate the meat slightly, ensuring maximum flavor infusion. The wings should look like they’re glistening with the glaze – that’s exactly what you want before cooking.
Bake to Crispy Perfection
Arrange the glaze-coated wings on a parchment-lined baking sheet in a single layer, leaving space between each wing. Bake for 40-45 minutes, flipping them halfway through at the 22-minute mark, until the wings are deep golden brown and the internal temperature reaches 165°F at the thickest part.
The key to perfect results is watching for that beautiful caramelization – the glaze should be bubbly and slightly crispy on top. If the glaze starts to darken too quickly before the wings are done, tent the pan with foil for the last 5-10 minutes of cooking. Serve immediately with extra glaze drizzled on top for that restaurant-quality finish.
Pro Tips For Making Wingstop Hot Honey Rub
- Slit the Wings: That little cut at the joint isn’t just for show—it lets the glaze sink in deeper. I used to skip it, and the wings tasted like they were missing something. Spend 30 seconds making those small slits, and you’ll taste the difference in every bite.
- Whisk the Dry Rub: The brown sugar will clump if you just stir it. Whisk those dry ingredients for 30 seconds until everything is uniformly dark—this ensures every wing gets the same perfect balance of sweet and heat. Trust me, your taste buds will notice the unevenness if you don’t.
- Rest the Wings: Let those coated wings sit for 10 minutes before baking. I know, you’re eager to pop them in the oven, but this step lets the rub cling better and the skin crisp up like it’s supposed to. Your future self will thank you when the wings aren’t sticky and underseasoned.
- Watch the Glaze: If the honey mixture starts caramelizing too fast before the wings hit 165°F, tent that pan with foil for the last 5-10 minutes. I’ve burned three batches by ignoring this—don’t be that person. The glaze should be bubbly, not burnt.
Serving suggestions for this dish
Dipping Sauce Pairings
This sticky-sweet glaze shines when paired with a cool, tangy dip that balances the heat. I love serving it with cool ranch dressing or blue cheese dressing—the creamy coolness cuts through the glaze’s sweetness perfectly.
For a lighter option, try yogurt-based tzatziki with a squeeze of lemon. The yogurt’s tanginess complements the honey’s sweetness beautifully. 🥄
Vegetable Sides
Roasted or steamed vegetables make a fantastic side dish. I always serve these wings with garlic butter green beans or honey-roasted Brussels sprouts. The caramelized edges on the sprouts mirror the glaze’s sweetness, while the garlic butter adds a savory contrast.
A simple coleslaw with a vinegar-based dressing also works—its crispness balances the wings’ richness.
Bread and Dippers
No meal is complete without something to dip! Serve with crusty sourdough bread or toasted pita chips for maximum crunch. I also love using baby potatoes or carrot sticks for a healthier option.
The glaze clings perfectly to these dippers, making every bite extra satisfying. For a fun twist, try pretzel bites—the salty crunch pairs surprisingly well with the sweet-spicy glaze.
Extra Glaze Uses
This isn’t just for wings! Drizzle the leftover glaze over grilled pork chops, baked salmon, or even roasted cauliflower for a quick flavor boost. I once used it on fried chicken tenders and had leftovers for days.
The glaze’s versatility makes it a pantry staple worth keeping around. Store it in a small jar for up to 2 weeks in the fridge. 💫
Drink Pairings
Balance the heat and sweetness with a refreshing drink. Iced tea with lemon or sparkling water with lime keeps things light. For something stronger, a light lager like Model or Corona cuts through the richness without overpowering it.
If you prefer wine, a dry Riesling or Sauvignon Blanc pairs beautifully with the honey’s sweetness. 🍺
Nutrition facts
Frequently asked questions
Why does the glaze need to rest before baking?
The 10-minute rest lets the sticky-sweet mixture penetrate the wings, ensuring every bite gets that perfect balance of heat and sweetness. This step also helps the rub cling better, so you avoid glaze sliding off during baking. Trust me—skipping it means less flavor impact!
Can I use this glaze on foods other than wings?
This versatile glaze works wonders on grilled pork chops, baked salmon, or even roasted vegetables. Just brush it on generously and bake until caramelized. It’s a game-changer for any protein or veggie!
What if my glaze is too thick before baking?
No problem! Add 1 teaspoon water to loosen it. The glaze should coat the back of a spoon but still be thick enough to cling to the wings. If it’s still too thick, whisk in another ½ teaspoon until smooth.
How do I adjust the heat level if I want it milder?
Reduce the cayenne pepper by ½ tablespoon at a time until you reach your preferred spice level. Taste the dry rub first—this way, you avoid overpowering the sweetness. Small changes make a big difference!

Trained in classic French technique but raised on slow-cooked ribs and spicy rubs, she blends culinary skill with smoke and soul.
- Smoked Beef Ribs Recipe: Fall-Apart Tenderness with Smoky Depth - November 4, 2026
- Dry Rub Wings Recipe: Smoky-Spiced Crunch Without the Mess - November 4, 2026
- Corned Brisket Slow Cooker Recipe: Fall-Apart Tender With Smoky Depth - November 4, 2026