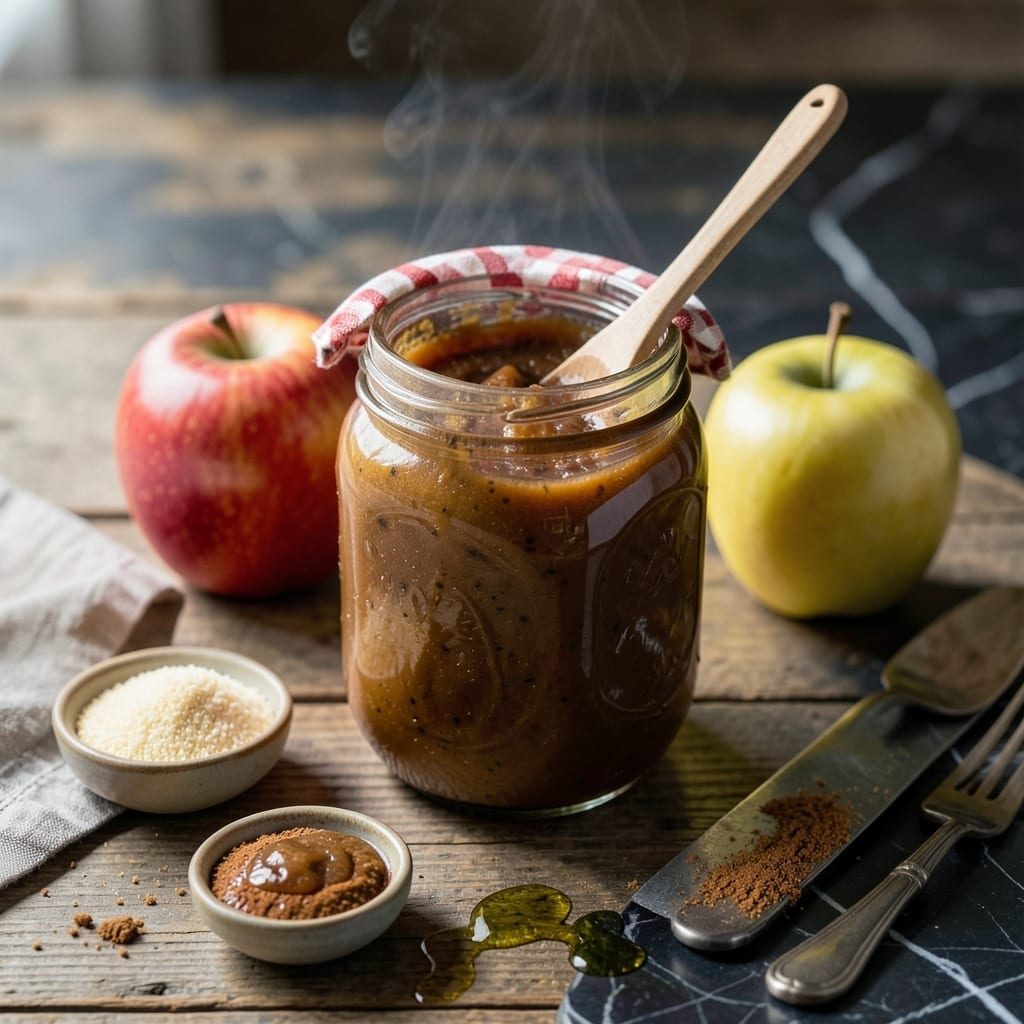
There’s nothing like spreading homemade apple butter on warm toast, knowing exactly what went into that jar. This small-batch recipe captures the essence of fall with spiced, slow-cooked apples that transform into a smooth, rich spread.
Perfect for canning, this version skips preservatives and relies on simple ingredients for a shelf-stable result. The process is straightforward, with clear safety guidelines to ensure every jar stays fresh and delicious for months.
Ingredients for Apple Butter Recipe for Canning
Ten simple ingredients transform apples into rich, spiced sweetness for your pantry shelves.
| Ingredient | Amount | Notes |
|---|---|---|
| Sweet Apples 🍎 | 4 lb | Peeled, cored, and diced |
| Granulated Cane Sugar 🍚 | 1 ½ cups | Adjust to taste preference |
| Light Brown Sugar 🟤 | ½ cup | Packed, for depth of flavor |
| Ground Cinnamon 🌿 | 2 tsp | Freshly ground preferred |
| Ground Cloves 🌶️ | ¼ tsp | Use sparingly for warmth |
| Ground Nutmeg 🥜 | ¼ tsp | Freshly grated if possible |
| Lemon Juice 🍋 | 2 tbsp | Freshly squeezed for brightness |
| Vanilla Extract 🌿 | 1 tsp | Pure extract for best flavor |
| Salt 🧂 | ¼ tsp | Fine sea salt preferred |
| Water 💧 | ½ cup | To prevent sticking initially |
[recipe_ingredient_scaler]
The apples are the foundation here. Mix sweet varieties like Fuji or Gala for the best flavor balance—avoid tart apples as they’ll require more sugar. Local orchards or farmers markets often have the freshest picks in fall. For the spices, Penzeys or bulk bins at natural food stores offer superior quality. Freshly ground spices make a noticeable difference in the final depth of flavor.
Short on sugar? Maple syrup or coconut sugar can replace up to half the granulated sugar (adjust liquid accordingly). No nutmeg? Allspice at half the amount works well. If you prefer a smoother texture, blend the cooked apples before the final reduction. The lemon juice isn’t just for flavor—it’s crucial for safe canning (don’t skip it!).
This keeps beautifully at room temperature for 6-12 months once properly canned. Store unopened jars in a cool, dark place. After opening, refrigerate and use within 3 weeks. The flavor deepens over time, so resist the urge to dig in immediately!
Why You’ll Love This Recipe
- Slow Cooker Magic: I toss in the apples, spices, and sugars, then let the slow cooker do all the work while I go about my day.
- Warm Spiced Comfort: The cinnamon and cloves turn sweet apples into a rich, velvety spread that tastes like autumn in a jar.
- Gift Jar Ready: I can these in cute mason jars and suddenly I’m the most popular person at holiday potlucks.
- Pantry Stable: One batch makes enough to fill my shelves, so I’ve got homemade apple butter ready for toast, oatmeal, or last-minute hostess gifts.
Step-by-Step Instructions for Apple Butter for Canning
This method ensures a smooth, deeply spiced spread with proper preservation technique.
Step 1: Prepare and Cook the Apples
Peel, core, and dice the 4 lb sweet apples into uniform pieces. I prefer a consistent size for even cooking—about 1-inch cubes works well. Place them in a large, heavy-bottomed pot with the 0.5 cup water. The water prevents sticking during the initial cooking phase.
Bring the mixture to a boil over medium-high heat, then reduce to medium-low heat. Cover and cook for 20-25 minutes, stirring occasionally, until the apples soften completely. You’ll notice the fruit breaking down and releasing its juices, creating a fragrant, chunky compote.
Step 2: Sweeten and Spice the Mixture
Once the apples are soft, stir in the 1.5 cups granulated cane sugar, 0.5 cup light brown sugar, 2 tsp ground cinnamon, 0.25 tsp ground cloves, 0.25 tsp ground nutmeg, 2 tbsp lemon juice, 1 tsp vanilla extract, and 0.25 tsp salt. The lemon juice brightens the flavor and balances the sweetness.
Return the pot to medium heat and cook uncovered for 10-15 minutes, stirring frequently. This step allows the sugars to dissolve and the spices to meld into the apple mixture. Watch for the mixture to thicken slightly and develop a deeper, caramelized color.
Step 3: Puree to Smooth Consistency
Remove the pot from heat and let the mixture cool slightly for 5-10 minutes. Using an immersion blender, puree until completely smooth. If you don’t have an immersion blender, carefully transfer the mixture to a standard blender in batches, filling no more than halfway each time to prevent pressure buildup.
The apple butter should have a velvety texture with no visible chunks. For an extra-smooth finish, pass it through a fine-mesh sieve. Return the pureed mixture to the pot if it needs further reduction.
Step 4: Reduce to Desired Thickness
Place the pureed mixture back over low heat and cook for another 30-45 minutes, stirring frequently to prevent scorching. The apple butter is ready when it thickens enough to mound slightly on a spoon and holds its shape briefly before spreading.
This reduction step intensifies the flavors and achieves the proper consistency for canning. The color will deepen to a rich amber, and the aroma will fill your kitchen with warm, spiced notes. Taste and adjust sweetness if needed, though the flavors will concentrate further during canning.
Step 5: Prepare for Canning
Ladle the hot apple butter into sterilized jars, leaving ¼-inch headspace. Remove any air bubbles by running a clean knife or skewer around the inside of each jar. Wipe the rims clean with a damp cloth to ensure a proper seal.
Process the jars in a water bath canner for 10 minutes (adjust for altitude if necessary). After processing, let the jars cool undisturbed for 12-24 hours. You’ll hear the satisfying “ping” of the lids sealing as they cool. Store in a cool, dark place for up to a year.
Pro Tips For Making Apple Butter Recipe For Canning
- Cook It Low and Slow: Simmer the apples on low heat for 6-8 hours, stirring occasionally, to let the flavors deepen and the mixture thicken naturally—I learned this the hard way after scorching a batch on high.
- Use a Mix of Apples: Combine sweet varieties like Fuji or Gala with a tart one like Granny Smith to balance the sugar and add complexity to the final spread.
- Skip the Over-Spicing: Ground cloves can overpower quickly, so start with 1/4 teaspoon for a 6-quart batch and adjust after tasting—my first attempt tasted like a Christmas candle.
- Blend While Hot: For a silky texture, use an immersion blender right after cooking while the apple butter is still warm, then can immediately—it saves time and prevents lumps.
Dietary Considerations for This Dish
Vegan-Friendly Sweetener Options
This recipe is naturally vegan as written, with no animal products. The granulated cane sugar and light brown sugar are both plant-based. For strict vegans, ensure your sugar isn’t processed with bone char—Wholesome Sweeteners is a reliable brand.
Gluten-Free by Nature
Apple butter contains no gluten ingredients, making it safe for those with celiac disease or gluten sensitivity. The spices and sweeteners used are all naturally gluten-free. Just verify your spices are certified gluten-free to avoid cross-contamination.
Sugar Reduction Tips
You can reduce the sugar by up to 25% without affecting safety, though the texture may be slightly thinner. For a no-sugar version, use unsweetened applesauce as a base and add 1-2 tsp stevia for sweetness. 💡
Allergen Information
This spread is free from common allergens like dairy, eggs, nuts, and soy. However, always check your spice labels—some brands add anti-caking agents that may contain allergens. Store-bought cinnamon blends can sometimes include wheat flour.
Diabetic Considerations
For diabetic-friendly apple butter, replace the sugar with 1 cup erythritol or monk fruit sweetener. The lemon juice and spices will still provide great flavor. Note that sugar alcohols may cause digestive issues for some people.
Low-FODMAP Adaptation
Apples are high-FODMAP, but you can use 1 lb pear and 1 lb green banana instead. Reduce the serving size to 1 tbsp per portion. The spices remain the same, but omit the vanilla extract as it can be high-FODMAP. 🌱
Nutrition Facts
Frequently Asked Questions
How long does canned apple butter last?
Properly sealed jars stay fresh at room temperature for 12-18 months. Store in a cool, dark place. Once opened, refrigerate and use within 3 weeks for best quality.
Can I reduce the sugar in this recipe?
Yes, you can safely cut sugar by up to 25% without affecting preservation. For no-sugar versions, use unsweetened applesauce as a base and add 1-2 tsp stevia for sweetness.
Why did my apple butter turn out watery?
This usually happens if it wasn’t cooked long enough. After pureeing, continue reducing over low heat for 30-45 minutes, stirring frequently, until it mounds on a spoon.
Do I need to sterilize jars before canning?
Wash jars in hot, soapy water and keep them hot until filling. Sterilizing prevents contamination and ensures a proper seal. Never skip this step for safety.

Trained in classic French technique but raised on slow-cooked ribs and spicy rubs, she blends culinary skill with smoke and soul.
- Recipe for Boneless Pork Chops in Cast Iron Skillet: Sear and Baste to Juicy Perfection - October 3, 2026
- Recipe for Boneless Cross Rib Roast: Slow-Roasted Beef with Herb Crust - October 3, 2026
- Hamburgers in Sauce Recipe Crock Pot: Slow-Cooked Savory Delight - October 3, 2026