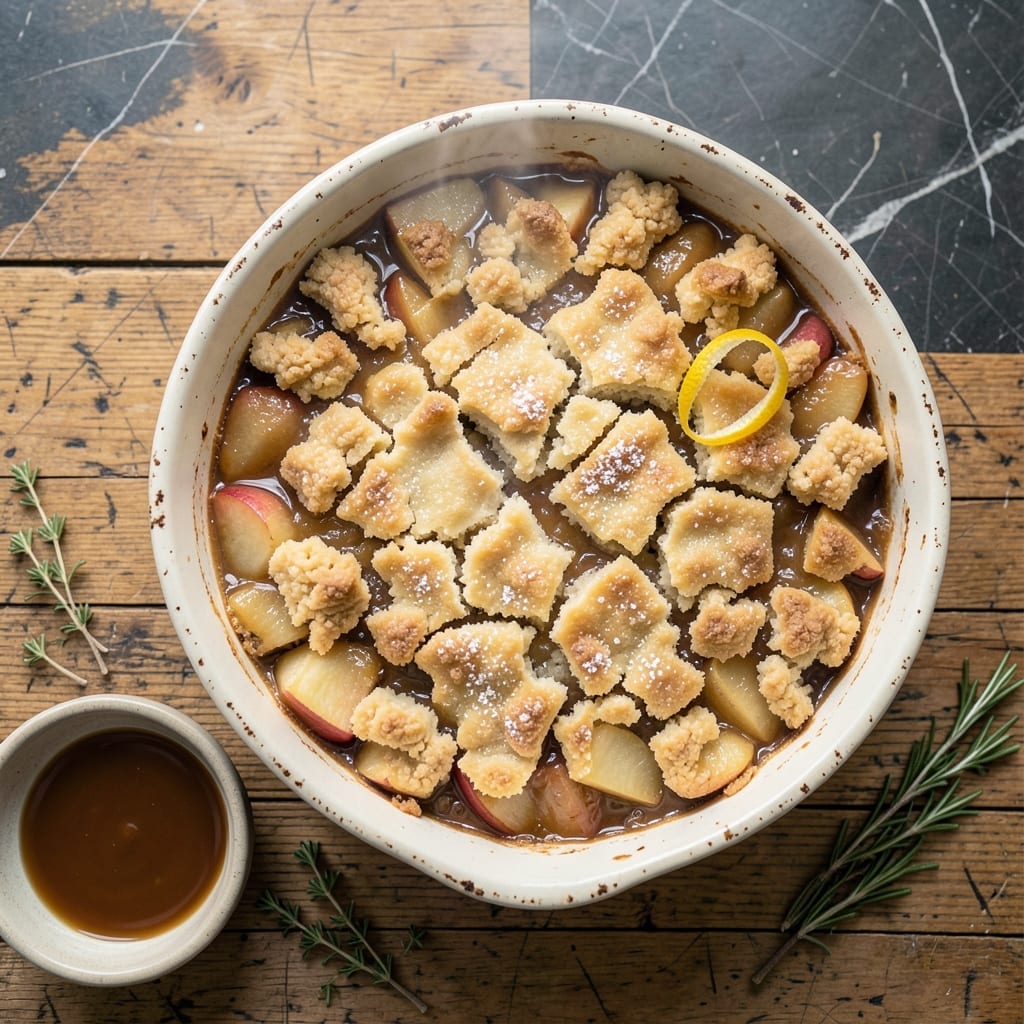
This dessert proves that canned apples can deliver homemade flavor without the fuss. The biscuit topping bakes up golden and buttery, creating a perfect contrast to the tender fruit below.
With just a few pantry staples and 20 minutes in the oven, you’ll have a warm, comforting treat that tastes like it came from a country kitchen. No peeling or coring required.
Ingredients for Apple Cobbler Recipe with Canned Apples
Pantry raid time. Canned apples and biscuit staples make this effortless dessert.
| Ingredient | Amount | Notes |
|---|---|---|
| Canned Apple Pie Filling 🍎 | 2 cans | 21 oz cans, undrained |
| All-Purpose Flour 🌾 | 1 ½ cups | Spoon and level method |
| Granulated Sugar 🍚 | ½ cup | Plus extra for sprinkling |
| Baking Powder 🧂 | 2 tsp | Fresh for best rise |
| Salt 🧂 | ½ tsp | Table salt or fine sea salt |
| Cold Unsalted Butter 🧈 | ½ cup | Cut into small cubes |
| Whole Milk 🥛 | ¾ cup | Cold for flaky biscuits |
| Ground Cinnamon 🌿 | 1 tsp | For warm spice flavor |
| Vanilla Extract 💧 | 1 tsp | Pure extract preferred |
| Light Brown Sugar 🍯 | 2 tbsp | Packed, for topping |
[recipe_ingredient_scaler]
The canned apples are the shortcut here. Look for apple pie filling (not just sliced apples)—it’s already spiced and sweetened perfectly. I grab mine from Walmart or Target in the baking aisle. The butter needs to be cold (like, straight-from-the-fridge cold) for those flaky biscuit layers. If you’re out of whole milk, 2% works in a pinch but won’t be quite as rich.
Out of apple pie filling? Regular canned apple slices plus a splash of apple juice and a shake of cinnamon gets you close. No milk? Buttermilk at the same amount adds a nice tang. Want extra flavor? Add 1/4 tsp nutmeg to the biscuit dough. The brown sugar topping can be swapped for white sugar, but the molasses notes in brown give it that caramelized edge.
Leftover cobbler keeps at room temp for 2 days (covered). Reheat in the oven at 350°F for 10 minutes to revive the topping. The biscuit topping is best fresh, but honestly? It’s still delicious the next day (just a little softer).
Why You’ll Love This Recipe
- No Fuss Prep: I just dump the canned apple pie filling into the pan and stir the dry ingredients—no peeling, no chopping, no stress.
- Warm Spiced Comfort: The cinnamon-kissed apples and buttery crust taste like fall in every bite, honest to goodness.
- Feeds the Crew: Between us, it’s my go-to for potlucks, Sunday suppers, or any night I need to feed six with zero fuss.
- Budget Friendly: A can of filling and pantry staples make this dessert ridculously affordable, and the leftovers (if any) reheat like a dream.
Step-by-Step Instructions for Apple Cobbler With Canned Apples
This comes together fast with simple steps and no stress.
Step 1: Prepare the Apple Filling Base
Empty the 2 cans Canned Apple Pie Filling into a 9×13-inch baking dish. Spread it evenly across the bottom—the filling is already sweetened and spiced, so no prep needed. I like to gently press down with a spatula to remove any large air pockets.
Sprinkle the 1 tsp Ground Cinnamon evenly over the apples, then dust with the 0.5 cup Granulated Sugar. This extra layer of cinnamon and sugar enhances the natural flavors and creates a caramelized sauce as it bakes. The filling should look evenly coated with a light dusting of sugar.
Step 2: Make the Biscuit Topping
In a large bowl, whisk together the 1.5 cups All-Purpose Flour, 2 tsp Baking Powder, and 0.5 tsp Salt. I always sift my flour first for a lighter texture, but spooning and leveling works too. The baking powder ensures your topping rises nicely for that classic cobbler look.
Cut in the 0.5 cup Cold Unsalted Butter (already cubed) using a pastry cutter or your fingers. Work quickly so the butter stays cold—this creates flaky layers. The mixture should resemble coarse crumbs with pea-sized butter pieces visible. Then stir in the 0.75 cup Whole Milk and 1 tsp Vanilla Extract until just combined.
Step 3: Assemble and Top the Cobbler
Drop spoonfuls of the biscuit dough evenly over the apple filling—don’t worry about making it perfect. The dough will spread as it bakes. I use a large spoon to create rustic, uneven mounds for a homemade look. Leave small gaps between the dough portions so the filling can bubble up through.
Sprinkle the 2 tbsp Light Brown Sugar (packed) over the top of the dough. This adds a caramelized, slightly crisp layer that contrasts beautifully with the soft biscuit topping.
Step 4: Bake Until Golden and Bubbly
Place the baking dish in a preheated 375°F oven. Bake for 35-40 minutes until the biscuit topping is golden brown and the filling is bubbling around the edges. You’ll know it’s done when a toothpick inserted into the biscuit comes out clean.
I check at the 30-minute mark—if the top is browning too quickly, I loosely cover it with foil. The filling should be thick and syrupy, with the apples tender and the biscuit topping fully cooked through.
Step 5: Cool Slightly and Serve Warm
Remove the cobbler from the oven and let it cool for 10-15 minutes. This allows the filling to thicken slightly so it doesn’t run off the plate. The biscuit topping will firm up just enough to hold its shape when served.
Serve warm as is, or with a scoop of vanilla ice cream for the ultimate comfort dessert. The contrast of the warm, spiced apples and the buttery, flaky biscuit topping is what makes this dish so irresistible. Each serving should have a generous portion of both filling and topping.
Pro Tips For Making Apple Cobbler Recipe With Canned Apples
- Drain the Apples: Drain the canned apple pie filling well—about 5 minutes in a colander—to prevent a soggy topping. I learned this the hard way after my first cobbler turned into apple soup.
- Chill the Dough: Pop the flour-sugar-baking powder mixture in the fridge for 10 minutes before adding the liquid. Sounds weird, but it works to keep the topping crisp.
- Skip the Overmixing: Stir the batter just until the dry ingredients disappear—lumps are fine. After overworking the dough once, I ended up with a dense, tough layer instead of a fluffy one.
- Start Hot, Finish Low: Bake at 375°F for 25 minutes, then drop to 350°F for the last 10. This guarantees a golden crust without burning the edges.
Storing and Reheating This Recipe
Room Temperature Storage
Let your cobbler cool completely at room temperature, then cover the dish tightly with plastic wrap or aluminum foil. It’ll stay fresh for up to 2 days on the counter. I love how the biscuit topping softens slightly overnight, making it perfect for breakfast the next morning. 💛
Refrigerator Storage
For longer storage, refrigerate the covered cobbler for up to 5 days. The flavors deepen as it chills, and the filling thickens beautifully. Just be sure to use an airtight container or wrap it well to prevent drying out.
Freezing Instructions
This dessert freezes wonderfully for up to 3 months. Portion into individual servings in freezer-safe containers, leaving ½ inch headspace. Thaw overnight in the fridge before reheating. I use Glasslock containers for easy freezing and reheating.
Oven Reheating
Preheat your oven to 350°F and warm the cobbler covered with foil for 15-20 minutes. This method revives the biscuit topping better than any other. Uncover for the last 5 minutes to crisp the top. 🔥
Microwave Reheating
For single servings, microwave on 50% power for 45-60 seconds, then check and continue in 15-second bursts until warm. The biscuit won’t be as crisp, but it’s perfect when you need a quick treat.
Serving After Storage
If the topping seems dry after reheating, drizzle with a little warm caramel sauce or serve à la mode. The contrast of warm cobbler and cold ice cream is my favorite way to enjoy leftovers.
Nutrition Facts
Frequently Asked Questions
Can I use regular canned apple slices instead of pie filling?
Yes, but you’ll need to add 1/4 cup sugar and 1 tsp cinnamon to compensate for the missing seasoning. Drain the slices first to prevent a watery filling.
Why is my biscuit topping dense instead of flaky?
Overworking the dough or using warm butter causes this. Keep ingredients cold and mix just until combined. Pea-sized butter pieces should remain visible.
How do I prevent the topping from browning too fast?
Cover loosely with foil after 20 minutes of baking. This protects the biscuits while allowing the filling to bubble through.
Can I make this ahead and bake later?
Assemble the dish, cover, and refrigerate for up to 12 hours. Add 5 minutes to the baking time if chilled.

Trained in classic French technique but raised on slow-cooked ribs and spicy rubs, she blends culinary skill with smoke and soul.
- Hamburger Patty Recipe No Egg: Juicy Bind With Breadcrumbs and Milk - October 3, 2026
- Recipe for Oven Baked Halibut: Buttery White Fish with Zesty Lemon Topping - October 3, 2026
- Meatball Curry Recipe Kerala Style: Coconut-Spiced Gravy With Tender Bites - October 3, 2026