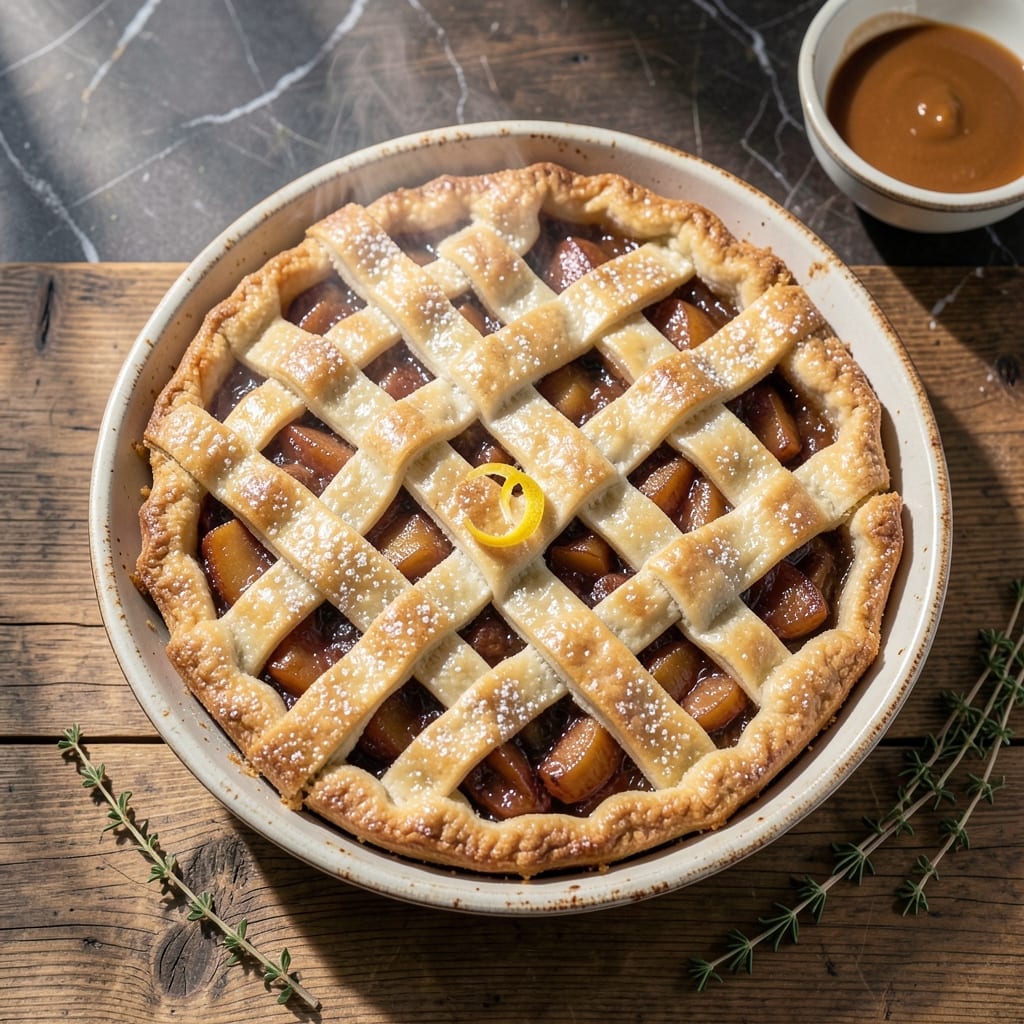
Achieving a flaky crust with canned apples requires the right technique and balance of spices. This method delivers professional results without fresh fruit.
I’ve refined this approach through years of baking, ensuring the filling stays tender and flavorful. The crust remains perfectly crisp, proving great pie isn’t limited by ingredient choice.
Ingredients for Apple Pie Recipe Using Canned Apples
Professional results start with quality canned apples and a perfectly balanced spice blend for the filling.
| Ingredient | Amount | Notes |
|---|---|---|
| All-Purpose Flour 🌾 | 2 ½ cups | Plus extra for dusting work surface |
| Unsalted Butter 🧈 | 1 cup | Cold, cut into small cubes |
| Granulated Sugar 🍚 | ¼ cup | Divided for crust and filling |
| Salt 🧂 | 1 tsp | Fine sea salt or table salt |
| Ice Water 💧 | ½ cup | Plus 1 tbsp as needed |
| Canned Apple Pie Filling 🍎 | 2 cans | 21 oz cans, undrained |
| Ground Cinnamon 🌿 | 1 ½ tsp | Freshly ground preferred |
| Ground Nutmeg 🌰 | ¼ tsp | Freshly grated optimal |
| Lemon Juice 🍋 | 1 tbsp | Freshly squeezed for brightness |
| Vanilla Extract 🌿 | 1 tsp | Pure extract recommended |
| Cornstarch 🌾 | 1 tbsp | For thickening filling |
| Large Egg 🥚 | 1 whole | For egg wash finish |
[recipe_ingredient_scaler]
The crust demands precision. King Arthur Flour delivers consistent protein content for that flaky texture. Butter must be cold and high-fat—Plugrá or European-style are ideal. Don’t substitute shortening; the moisture in butter creates steam for layers. For the apples, Lucky Leaf or Comstock brands maintain texture well. Look for cans labeled ‘pie filling’ rather than applesauce.
No canned pie filling? Drained apple slices plus 1/4 cup sugar and spices can substitute. For the crust, lard works at a 1:1 ratio but changes flavor. Nutmeg can be allspice at equal measure. The cornstarch is non-negotiable for thickening—arrowroot at same amount is the only acceptable swap. Fresh apples won’t work without pre-cooking to remove excess moisture.
Completed pie keeps at room temperature 1 day, refrigerated 5 days. Freeze unbaked pie for 2 months—thaw in fridge overnight before baking. The egg wash is optional but recommended for that professional sheen (worth the extra minute).
Why You’ll Love This Recipe
- No Chopping Needed: I love that canned apples mean zero peeling or coring—just drain, dump, and get baking.
- Buttery Flaky Crust: The cold butter and ice water make this crust so tender it practically melts in your mouth.
- Weeknight Dessert: Honestly, I can start this after dinner and still serve warm pie before bedtime.
- Budget Friendly: Canned apples cost a fraction of fresh, and I always have flour and sugar on hand.
Step-by-Step Instructions for Apple Pie With Canned Apples
Master the art of a flaky crust and perfectly spiced filling with this professional approach.
Step 1: Prepare the Pie Crust Dough
In a large bowl, combine the 2.5 cups All-Purpose Flour, 1 tsp Salt, and 0.25 cup Granulated Sugar. I cut the 1 cup Unsalted Butter (cold and cubed) into the flour mixture using a pastry cutter until the texture resembles coarse crumbs with pea-sized butter pieces visible.
Gradually add the 0.5 cup Ice Water, 1 tablespoon at a time, mixing gently with a fork until the dough just comes together. The dough should hold when pressed but not be sticky. Overworking develops gluten, which toughens the crust and ruins the flaky texture we’re after.
Step 2: Enhance the Canned Apple Pie Filling
In a saucepan, combine the 2 cans Canned Apple Pie Filling with 1.5 tsp Ground Cinnamon, 0.25 tsp Ground Nutmeg, 1 tbsp Lemon Juice, 1 tsp Vanilla Extract, and 1 tbsp Cornstarch. The cornstarch ensures the filling thickens properly during baking.
Cook over medium heat for 5-7 minutes, stirring constantly until the mixture bubbles and thickens to the consistency of applesauce. This step transforms store-bought filling into something special with deeper spice notes and balanced sweetness. Remove from heat and let cool completely before assembling the pie.
Step 3: Roll and Assemble the Pie
Divide the chilled dough in half and roll each portion on a lightly floured surface into a 12-inch circle. I roll from the center outward, rotating the dough 90 degrees after each pass to maintain an even thickness. This prevents sticking and ensures uniform baking.
Transfer one crust to a 9-inch pie dish, pressing it gently into the bottom and sides without stretching. Spoon the cooled filling into the crust, mounding it slightly in the center. Moisten the edges of the bottom crust with water, then place the second crust on top. Trim and crimp the edges to seal, then cut 4-5 slits in the top crust to allow steam to escape.
Step 4: Bake to Golden Perfection
Preheat your oven to 425°F. Brush the top crust with a beaten large Egg for a glossy, golden finish. Place the pie on a baking sheet to catch any drips and bake for 40-45 minutes, or until the crust is deep golden brown and the filling is bubbling through the vents.
If the edges begin to brown too quickly, cover them with a pie shield or strips of aluminum foil. This prevents burning while allowing the center to finish baking. The pie is done when the crust is uniformly golden and the filling is visibly thickened through the slits.
Step 5: Cool and Serve
Transfer the pie to a wire rack and let it cool for at least 2 hours before slicing. This allows the filling to set completely—cutting too soon results in a runny, unappetizing slice. The crust should be flaky and tender, shattering slightly with each bite, while the filling remains rich and spiced.
Serve warm or at room temperature, ideally with a scoop of vanilla ice cream or a dollop of whipped cream. The contrast of the crisp crust and soft, fragrant filling delivers the classic apple pie experience, elevated by the careful attention to technique.
Pro Tips For Making Apple Pie Recipe Using Canned Apples
- Chill the Dough: After mixing the flour, butter, and ice water, let the dough rest in the fridge for at least 30 minutes—this keeps the crust flaky instead of tough. I learned this the hard way after my first few pies came out chewy.
- Drain the Apples: Canned apples release a lot of liquid, so drain them thoroughly and pat them dry to avoid a soggy pie filling. Sounds tedious, but it actually changes the outcome.
- Dock the Crust: Poke a few holes in the bottom crust with a fork before adding the filling to prevent air bubbles from ruining your pie’s shape. My grandmother swore by this, and she was right.
- Use Cold Butter: Cut the unsalted butter into small cubes and keep it ice-cold until you mix it into the flour—this guarantees a flaky, layered crust. I skip this when I’m lazy, but the dish is noticeably better when I don’t.
Serving Suggestions for Leftovers
Classic Presentation
Serve warm slices on a vintage ceramic plate for that nostalgic feel. The contrast of the golden crust against the white ceramic is stunning. I always dust with powdered sugar for visual appeal.
Ice Cream Pairing
A scoop of vanilla bean ice cream from Ben & Jerry’s melts beautifully over the warm pie. The cold creaminess balances the spiced filling perfectly. I prefer slightly under-scooping to control the ratio. 🍦
Whipped Cream Alternative
For a lighter option, offer freshly whipped cream with a hint of vanilla extract. I add 1 tsp sugar per cup of heavy cream for subtle sweetness. The airy texture complements the flaky crust.
Beverage Companions
Hot Earl Grey tea with its bergamot notes enhances the cinnamon in the filling. For coffee lovers, a light roast with 1 tsp brown sugar per cup brings out the pie’s warmth.
Garnish Ideas
A sprinkle of cinnamon or chopped pecans adds texture and visual interest. I toast ¼ cup pecans in a dry pan for 3-4 minutes before chopping. The nutty aroma is irresistible.
Make It Special
For holidays, drizzle with caramel sauce before serving. I warm ½ cup store-bought caramel with 1 tbsp bourbon for an adult twist. This elevates the pie to dessert centerpiece status. 💛
Nutrition Facts
Frequently Asked Questions
Do I need to drain the canned apples first?
No, use the filling undrained for best results. The syrup adds moisture and sweetness to the pie.
Can I make the crust ahead of time?
Yes, prepare the dough up to 2 days in advance. Wrap tightly in plastic and refrigerate. Let it sit at room temperature for 15 minutes before rolling.
Why did my crust turn out tough?
Overworking the dough develops gluten, making it tough. Handle it gently and stop mixing as soon as it comes together.
Can I add other fruits to the filling?
Try mixing in ½ cup raisins or 1 diced pear for extra texture. Adjust sugar if needed.

Trained in classic French technique but raised on slow-cooked ribs and spicy rubs, she blends culinary skill with smoke and soul.
- Recipe for Boneless Pork Chops in Cast Iron Skillet: Sear and Baste to Juicy Perfection - October 3, 2026
- Recipe for Boneless Cross Rib Roast: Slow-Roasted Beef with Herb Crust - October 3, 2026
- Hamburgers in Sauce Recipe Crock Pot: Slow-Cooked Savory Delight - October 3, 2026