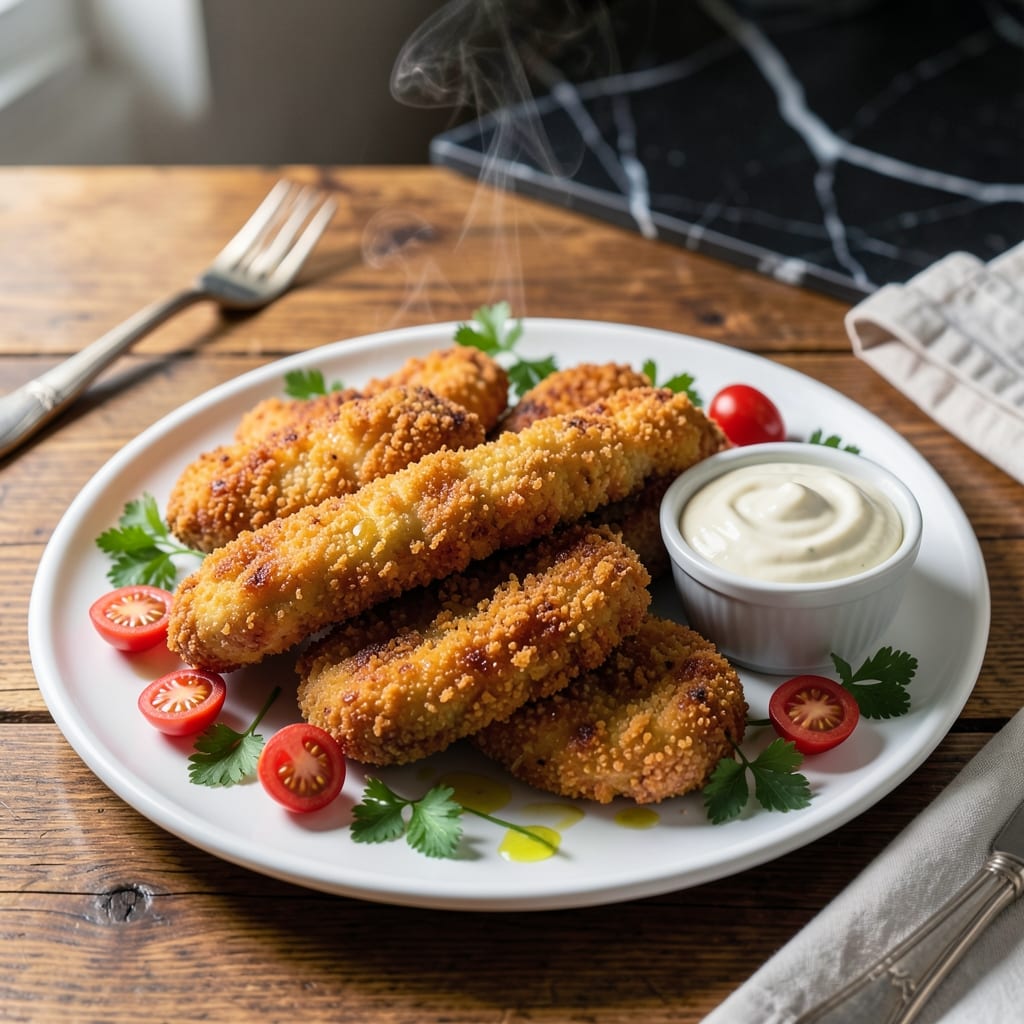
Recreating that signature restaurant crunch at home is simpler than you think. This method delivers crispy, tender chicken every time, with a coating that actually stays on during frying.
I developed this after years of testing batter ratios and frying temperatures in my tiny Boston kitchen. The secret is a two-step breading process that mimics the restaurant version exactly, without any specialty equipment.
The result is golden tenders with a shatteringly crispy exterior and juicy interior. They hold up to dipping sauces without falling apart, just like the original.
Serve with honey mustard or ranch for the full experience. Here’s how to make them.
Ingredients for Applebee’s Chicken Tenders
Pantry staples plus chicken create that restaurant-quality crunch you crave at home.
| Ingredient | Amount | Notes |
|---|---|---|
| Chicken Breast Tenders 🍗 | 1 ½ lb | Boneless, skinless, cut into strips |
| All-Purpose Flour 🌾 | 1 cup | For initial dredging |
| Large Eggs 🥚 | 2 whole | Beaten for egg wash |
| Buttermilk 🥛 | ½ cup | For tenderizing and moisture |
| Panko Breadcrumbs 🍞 | 2 cups | Japanese-style for extra crunch |
| Cornstarch 🌾 | ¼ cup | For crispier coating |
| Salt 🧂 | 1 ½ tsp | Divided for seasoning layers |
| Black Pepper 🌶️ | ½ tsp | Freshly ground preferred |
| Garlic Powder 🧄 | 1 tsp | For savory depth |
| Onion Powder 🧅 | 1 tsp | Adds subtle sweetness |
| Paprika 🌶️ | 1 tsp | Sweet or smoked variety |
| Vegetable Oil 🫒 | 4 cups | For deep frying |
| Honey Mustard 🍯 | ½ cup | For serving (optional) |
| Ranch Dressing 🥛 | ½ cup | For serving (optional) |
[recipe_ingredient_scaler]
The chicken is everything here. Boneless, skinless tenders (or breasts cut into strips) work best—thighs stay juicy but lack that classic texture. Costco sells pre-cut tenders that save time. For the breading, Panko from Kikkoman (found at most supermarkets) gives that shatteringly crisp coating. Buttermilk matters too—full-fat for the best results (or make a quick substitute with milk and vinegar).
No buttermilk? Mix 1 cup milk with 1 tbsp vinegar and let sit 5 minutes. Out of Panko? Crush cornflakes or Ritz crackers for a similar crunch. The cornstarch is key for that extra crispiness—don’t skip it. For a spicier kick, add half a teaspoon of cayenne to the flour. Vegetable oil is ideal for frying, but peanut or canola oil works too.
Fry in batches so the oil temp stays steady—overcrowding makes them soggy. Leftovers? They reheat surprisingly well in a 400°F oven for 10 minutes. Keeps in the fridge for 3-4 days, but honestly, they’re best fresh. Freeze uncooked breaded tenders on a tray first, then bag for up to 3 months.
Why You’ll Love This Recipe
- One Bowl Wonder: I just dump the flour, buttermilk, and panko in separate bowls and it’s ready for dipping—no fuss, no fancy tools.
- Crispy Perfection: That panko crust gives it a crunch you won’t get from regular breadcrumbs, and the buttermilk keeps the chicken juicy inside.
- Weeknight Hero: I toss these together on busy nights and pair them with fries or a salad—dinner’s done in under 30.
- Budget Friendly: Chicken tenders stretch further than whole breasts, and a bag of panko lasts me through multiple meals.
Step-by-Step Instructions for Copycat Chicken Tenders
Here’s the method that delivers that signature crunch and juiciness every time.
Step 1: Season and Dredge the Chicken
Pat the 1.5 lb Chicken Breast Tenders completely dry with paper towels—this is crucial for the coating to adhere properly. Season both sides with 1 tsp Salt, 0.5 tsp Black Pepper, 1 tsp Garlic Powder, 1 tsp Onion Powder, and 1 tsp Paprika. These spices create that familiar savory depth.
Place the 1 cup All-Purpose Flour in a shallow dish. Dredge each seasoned tender in the flour, pressing gently to ensure full coverage. Shake off any excess—this initial layer helps the egg wash stick better and creates extra crispiness.
Step 2: Create the Wet and Dry Coating Stations
In a second shallow dish, whisk together the 2 whole Large Eggs and 0.5 cup Buttermilk until smooth. The buttermilk not only adds moisture but also tenderizes the chicken, while the eggs act as the glue for the final coating.
In a third dish, combine the 2 cups Panko Breadcrumbs and 0.25 cup Cornstarch with the remaining 0.5 tsp Salt. The cornstarch is the secret to achieving that ultra-crispy texture that stays crunchy even after frying.
Step 3: Bread the Chicken for Maximum Crunch
Dip each floured tender into the egg mixture, allowing any excess to drip off. Then press it into the panko-cornstarch mixture, turning to coat completely. Apply gentle pressure to ensure the breading adheres well—this creates those craggy bits that get extra crispy.
Place the breaded tenders on a wire rack set over a baking sheet. This setup prevents the breading from getting soggy on one side while you finish coating the rest. Let them rest for 10 minutes to help the coating set before frying.
Step 4: Fry to Golden Perfection
Heat the 4 cups Vegetable Oil in a large, heavy pot or Dutch oven over medium-high heat to 350°F. Use a deep-fry thermometer to monitor the temperature—maintaining the right heat is key to even cooking without burning the exterior.
Fry the tenders in batches for 4-5 minutes until they’re golden brown and the internal temperature reaches 165°F. Don’t overcrowd the pot, or the oil temperature will drop, resulting in greasy tenders. Transfer the cooked tenders to a paper towel-lined plate to drain excess oil.
Step 5: Serve with Signature Dipping Sauces
While the tenders are still hot, give them a quick sprinkle with a pinch of salt to enhance the flavor. Serve immediately with 0.5 cup Honey Mustard and 0.5 cup Ranch Dressing on the side for dipping.
The contrast of the crispy exterior and tender interior is exactly what you’re after. These tenders are best enjoyed fresh, while the coating is at its peak crunch. For a true copycat experience, serve with extra napkins—these are irresistibly messy in the best way.
Pro Tips For Making Applebee’S Chicken Tenders
- Double Dredge: Dip the tenders in flour, then buttermilk-egg wash, then back in flour before the panko—this builds a thicker, crunchier crust that actually stays put.
- Rest the Chicken: Let the breaded tenders sit for 10 minutes on a wire rack before frying. I learned this the hard way—skipping it means the coating slides right off.
- Oil Temp Matters: Keep the oil at 350°F and use a thermometer. After burning three batches, I finally figured out that guesswork just doesn’t cut it with panko.
- Swap the Buttermilk: If you’re out of buttermilk, mix 1 cup milk with 1 tablespoon vinegar and let it sit for 5 minutes—sounds weird, but it works just as well for tenderizing.
Flavor Customization for These Flavors
Spicy Kick
Add ½ tsp cayenne pepper to the flour mixture for heat that builds with each bite. I tested this in my Boston kitchen and found it perfect for those who like a little fire. The warmth pairs beautifully with the creamy ranch dressing. 🌶️
Herb-Infused
Mix 1 tbsp dried Italian seasoning into your panko breadcrumbs. This adds an herby note that reminds me of Nonna’s cooking. The combination of oregano, basil, and thyme elevates the flavor profile significantly.
Cheesy Crunch
Stir ½ cup grated Parmesan cheese into your panko mixture. The cheese melts slightly during frying, creating an extra layer of flavor and a golden, crispy crust. I use Parmigiano-Reggiano from the Italian deli for the best results.
Citrus Zest
Add 1 tbsp lemon zest to your flour for a bright, zingy twist. This works surprisingly well with the honey mustard dipping sauce. The citrus cuts through the richness of the fried chicken beautifully.
Double-Crunch
For maximum texture, press crushed cornflakes into the breaded tenders before frying. This adds an extra layer of crunch that’s reminiscent of those childhood chicken tenders we all loved. I use about 1 cup crushed flakes for this recipe.
Sweet and Spicy
Toss the cooked tenders in 2 tbsp hot honey right after frying. This creates a sticky, sweet-spicy glaze that’s addictive. Serve with extra hot honey on the side for dipping. 💛
Nutrition Facts
Frequently Asked Questions
Can I bake these instead of frying?
Yes! Bake at 400°F for 15-20 minutes, flipping halfway. Spray with oil first for extra crispiness. They won’t be as crunchy as fried but still delicious.
Why does the coating fall off sometimes?
Usually from not letting the breading rest before frying or overcrowding the oil. Pat the chicken very dry first and maintain 350°F oil temp.
How do I keep them warm for a party?
Place cooked tenders on a wire rack in a 200°F oven for up to 30 minutes. This prevents them from getting soggy while staying crispy.
What’s the best oil for frying?
Vegetable, peanut, or canola oil all work well. Avoid olive oil—it has a lower smoke point and can burn at frying temps.

Trained in classic French technique but raised on slow-cooked ribs and spicy rubs, she blends culinary skill with smoke and soul.
- Recipe for Boneless Pork Chops in Cast Iron Skillet: Sear and Baste to Juicy Perfection - October 3, 2026
- Recipe for Boneless Cross Rib Roast: Slow-Roasted Beef with Herb Crust - October 3, 2026
- Hamburgers in Sauce Recipe Crock Pot: Slow-Cooked Savory Delight - October 3, 2026