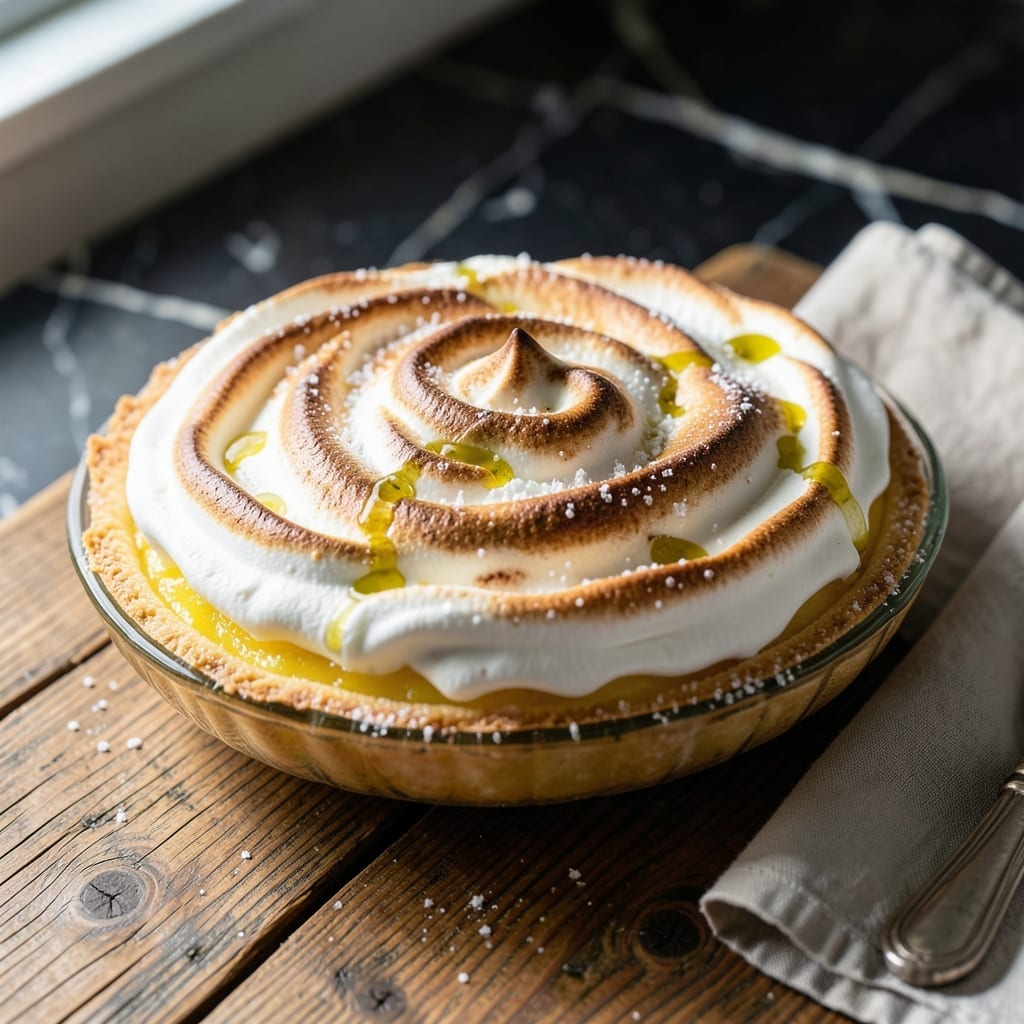
This classic pie delivers the perfect balance of tart lemon custard and fluffy meringue topping. The crust stays crisp while supporting the rich filling and airy topping.
Each layer builds on the last, with the lemon filling offering bright citrus flavor before the meringue adds its cloud-like finish. The result is a dessert that looks impressive yet comes together with straightforward techniques.
Ingredients for Argo Lemon Meringue Pie
Classic ingredients create this layered dessert with bright citrus and airy topping.
| Ingredient | Amount | Notes |
|---|---|---|
| All-Purpose Flour 🌾 | 1 ½ cups | Plus extra for dusting |
| Granulated Sugar 🍚 | 1 ½ cups | Divided for crust and filling |
| Unsalted Butter 🧈 | ½ cup | Cold, cubed for crust |
| Salt 🧂 | ½ tsp | Divided for crust and filling |
| Ice Water 💧 | 6 tbsp | For pie crust dough |
| Cornstarch 🌽 | ⅓ cup | For thickening filling |
| Fresh Lemon Juice 🍋 | 1 cup | About 4-6 large lemons |
| Lemon Zest 🍋 | 2 tbsp | Finely grated, packed |
| Large Eggs 🥚 | 4 whole | Separated, yolks for filling |
| Large Egg Whites 🥚 | 4 whole | For meringue topping |
| Cream of Tartar 🧂 | ½ tsp | Stabilizes meringue |
| Vanilla Extract 🌿 | 1 tsp | Pure extract preferred |
[recipe_ingredient_scaler]
The crust demands precision. Cold butter and ice water prevent tough pastry—use a pastry cutter or fork to avoid overworking. King Arthur flour is my go-to for consistent results. For the lemons, Meyer lemons (when in season) add a floral note, but standard grocery store varieties work perfectly fine. Always zest before juicing—those oils pack serious flavor.
No fresh lemons? Bottled juice in a pinch, though fresh is brighter. Out of cream of tartar? White vinegar or lemon juice at half the amount keeps the meringue stable. Cornstarch can be swapped for arrowroot powder at a 1:1 ratio. The egg whites must be room temperature for maximum volume—don’t skip this step.
The pie keeps 2-3 days in the fridge, though the meringue weeps slightly. Store uncovered first to prevent condensation, then cover loosely. Freezes beautifully for 1 month—thaw in the fridge overnight. Best served the day it’s made, honestly.
Why You’ll Love This Recipe
- I’ll be real: this pie looks impressive but is secretly simple, making it my go-to for potlucks and holidays.
- One-Bowl Crust: I love that the buttery, flaky crust comes together in one bowl—just flour, sugar, butter, salt, and ice water. No fancy equipment needed.
- Bright Zing: Honestly, that tangy lemon curd against the sweet meringue? It’s the flavor combo I crave every time.
- Dinner Party Star: I’ll be real: this pie looks impressive but is secretly simple, making it my go-to for potlucks and holidays.
Step-by-Step Instructions for Lemon Meringue Pie
Here is the method. Tested, refined, and guaranteed to deliver that perfect balance of tangy filling and fluffy topping.
Step 1: Prepare the Pie Crust
In a food processor, pulse the 1.5 cups All-Purpose Flour and ¼ tsp Salt to combine. Add the 0.5 cup Unsalted Butter, cubed and cold, and pulse until the mixture resembles coarse crumbs with pea-sized butter pieces visible.
With the processor running, drizzle in the 6 tbsp Ice Water one tablespoon at a time until the dough just comes together. You’ll know it’s ready when it holds its shape when pressed. Turn the dough out onto a lightly floured surface, shape into a disk, and refrigerate for 30 minutes to relax the gluten.
Roll the chilled dough to a 12-inch circle and transfer it to a 9-inch pie dish. Crimp the edges, prick the bottom with a fork, and chill for another 15 minutes before blind baking at 375°F for 15 minutes with pie weights, then 10-12 minutes without, until light golden brown.
Step 2: Make the Lemon Filling
In a medium saucepan, whisk together the 1.5 cups Granulated Sugar, 0.33 cup Cornstarch, and remaining ¼ tsp Salt. Gradually whisk in the 1 cup Fresh Lemon Juice and 2 tbsp Lemon Zest until smooth.
Place the saucepan over medium heat and cook, stirring constantly, until the mixture thickens and begins to bubble. This usually takes 5-7 minutes. Once bubbling, cook for an additional 1 minute to fully activate the cornstarch.
In a separate bowl, lightly beat the 4 whole Large Eggs (yolks only). Temper the eggs by slowly whisking in about ½ cup of the hot lemon mixture. Pour the tempered eggs back into the saucepan and cook for another 2 minutes, stirring constantly, until the filling is thick enough to coat the back of a spoon. Remove from heat and stir in the 1 tsp Vanilla Extract. Pour the filling into the pre-baked crust.
Step 3: Prepare and Bake the Meringue
In a clean, grease-free bowl, beat the 4 whole Large Egg Whites with the 0.5 tsp Cream of Tartar on medium speed until soft peaks form. Gradually add the remaining ⅓ cup Granulated Sugar (from the divided 1.5 cups), one tablespoon at a time, beating well after each addition until the meringue is glossy and holds stiff peaks.
Spread the meringue over the warm lemon filling, sealing it to the edges of the crust to prevent shrinkage. Use the back of a spoon to create decorative peaks. Bake at 350°F for 12-15 minutes until the meringue is golden brown.
Let the pie cool completely at room temperature for 2-3 hours before slicing. This resting time allows the filling to set fully. Chill in the refrigerator for 4 hours or overnight for the cleanest slices.
Pro Tips For Making Argo Lemon Meringue Pie
- Chill the Dough: After mixing the flour, butter, and ice water, wrap the dough and refrigerate for at least 30 minutes—I learned this the hard way after my crust shrank in the pan.
- Use Ice-Cold Water: Keep your water truly ice-cold, about 3-4 ice cubes in a cup of water, to prevent the butter from melting before the crust bakes.
- Don’t Overwork It: Mix just until the dough comes together; overworking it makes the crust tough, and nobody wants a chewy pie base.
- Pre-Bake the Crust: Blind-bake the crust for 10-12 minutes at 375°F to avoid a soggy bottom under the lemon filling—sounds weird, but it works.
Storing and Reheating This Recipe
Refrigerator Storage
Let your pie cool completely at room temperature first—about 2-3 hours. Then, cover loosely with plastic wrap or a pie dome. I use a glass cake stand with a lid. It keeps well in the fridge for 2-3 days. 🍋
Freezer Storage
For longer storage, freeze the pie uncovered first until solid—about 1-2 hours. Then wrap tightly in plastic wrap and aluminum foil. It stays fresh for up to 1 month. Thaw overnight in the fridge before serving.
Avoiding Meringue Weeping
Store the pie uncovered for the first 24 hours to prevent condensation from softening the meringue. After that, cover loosely. I learned this the hard way at my first local BBQ competition!
Reheating Slices
For warm servings, reheat individual slices in a 300°F oven for 10-15 minutes. Avoid the microwave—it can make the crust soggy. The meringue may soften slightly, but the flavors will shine. 🔥
Best Serving Temperature
This pie is delicious served chilled or at room temperature. If you prefer it warm, reheat gently. The lemon filling stays bright and tangy either way—I love it straight from the fridge on a hot day.
Nutrition Facts
Frequently Asked Questions
Can I use bottled lemon juice instead of fresh?
Yes, but fresh is better. Bottled juice works in a pinch, though it may taste slightly less bright. Use the same 1 cup measurement.
Why does my meringue weep?
Weeping often happens from undercooked filling or not sealing the meringue to the crust edges. Ensure the filling reaches 160°F and bake meringue at 350°F for 12-15 minutes.
Can I make this pie ahead of time?
Bake and cool completely, then refrigerate for up to 2-3 days. For best results, store uncovered for the first 24 hours to prevent sogginess.
What if I don’t have cream of tartar?
Substitute with 1/2 tsp white vinegar or lemon juice. It stabilizes the egg whites similarly. The meringue may be slightly less stable but will still work.

Trained in classic French technique but raised on slow-cooked ribs and spicy rubs, she blends culinary skill with smoke and soul.
- Recipe for Boneless Pork Chops in Cast Iron Skillet: Sear and Baste to Juicy Perfection - October 3, 2026
- Recipe for Boneless Cross Rib Roast: Slow-Roasted Beef with Herb Crust - October 3, 2026
- Hamburgers in Sauce Recipe Crock Pot: Slow-Cooked Savory Delight - October 3, 2026