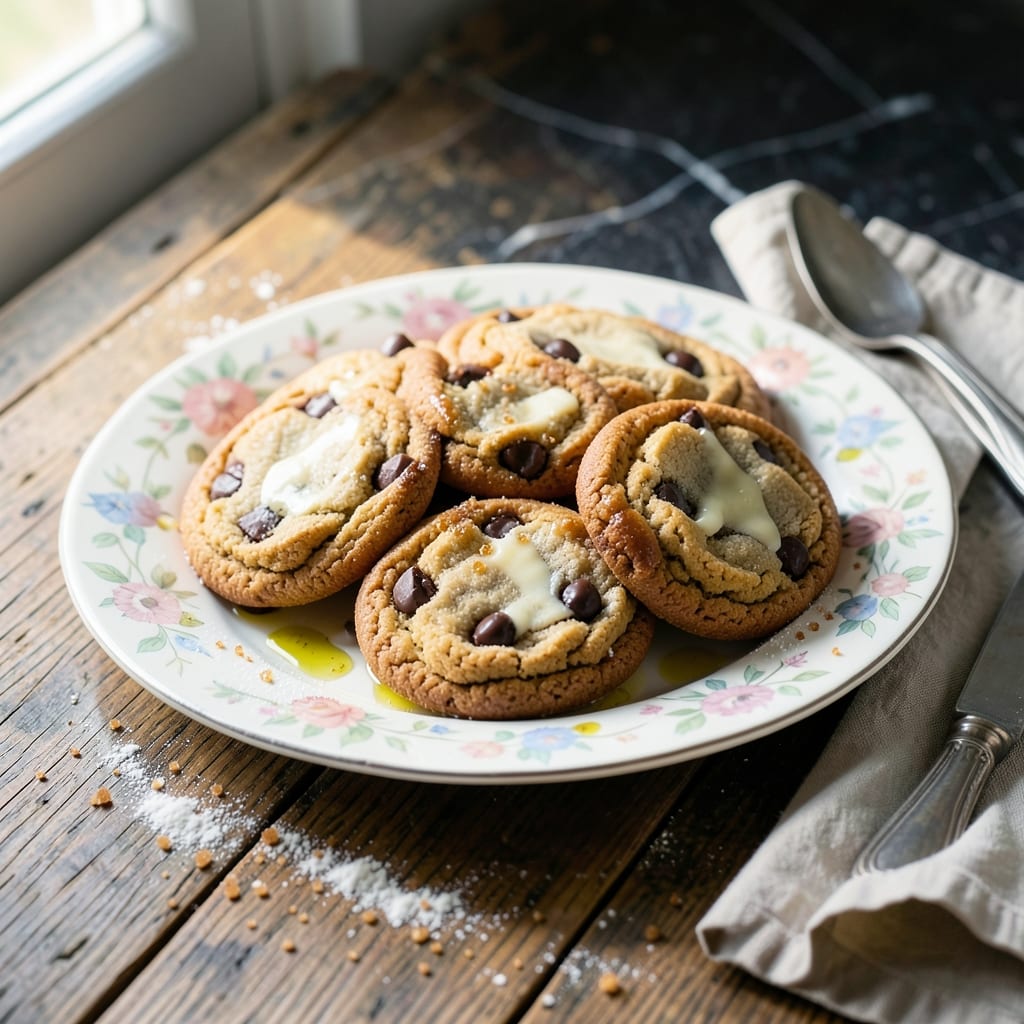
I developed this cookie recipe after testing baking soda ratios in my tiny Boston kitchen, discovering the precise chemistry that creates perfectly chewy edges and soft centers. This method transforms simple ingredients into a texture worth repeating.
The secret lies in the baking soda measurement and mixing technique, which ensures even spreading and that signature caramelized edge. I intentionally made multiple batches to find the most forgiving formula for home bakers.
What emerges from the oven are cookies with golden, crisp edges giving way to tender centers, with a depth of flavor that tastes far more complex than the ingredient list suggests. The baking soda works its magic without overwhelming the taste.
This recipe proves that sometimes the simplest solutions create the most satisfying results, with every bite delivering that ideal cookie texture we all crave.
Ingredients for Arm and Hammer Cookie
Standard pantry staples plus Arm & Hammer baking soda for that signature chewy texture.
| Ingredient | Amount | Notes |
|---|---|---|
| All-Purpose Flour 🌾 | 2 ½ cups | Spoon and level method |
| Baking Soda 🧂 | 1 tsp | Arm & Hammer brand preferred |
| Unsalted Butter 🧈 | 1 cup | Softened to room temperature |
| Granulated Sugar 🍚 | ¾ cup | Fine white granulated |
| Light Brown Sugar 🟤 | ¾ cup | Packed firmly into cup |
| Large Eggs 🥚 | 2 whole | Room temperature preferred |
| Vanilla Extract 🌿 | 2 tsp | Pure vanilla, not imitation |
| Salt 🧂 | 1 tsp | Fine table salt |
| Semi-Sweet Chocolate Chips 🍫 | 2 cups | High-quality brand recommended |
| Chopped Walnuts 🌰 | 1 cup | Optional, lightly toasted |
[recipe_ingredient_scaler]
The baking soda is non-negotiable for achieving that perfect caramelized edge. Arm & Hammer has been my go-to for consistency—its purity ensures the chemical reaction works as intended. Use all-purpose flour from a reputable brand like King Arthur or Gold Medal. For the butter, room temperature is critical—it should dent when pressed but not melt. Brown sugar adds moisture, which is key for soft centers, so pack it tightly.
No chocolate chips? Chopped chocolate bars work beautifully and melt differently for a more rustic texture. Out of walnuts? Pecans or almonds can substitute, though omit entirely if you prefer a nut-free version. The vanilla extract should be pure—imitation lacks depth. If you’re in a pinch, maple syrup at half the quantity can replace granulated sugar, but expect a slight texture change.
Store the dough in an airtight container in the fridge for up to 3 days, or freeze for 3 months. Baked cookies stay fresh in a sealed container at room temperature for 1 week. For best results, let them cool completely before storing to maintain that crisp edge and tender center.
Why You’ll Love This Recipe
- One Bowl Wonder: I love that I just dump everything in one bowl—flour, baking soda, butter, both sugars—and stir. No fancy gadgets, no fuss.
- Buttery Sweetness: The combo of granulated and light brown sugar with that butter gives them this rich, caramel-like depth. Honestly, it’s the little things.
- Weeknight Hero: These cookies come together so fast I’ve made them between zoom calls. Yes, even on a Tuesday night.
- Budget Friendly: All-purpose flour and baking soda keep it cheap, and I always have those on hand. No last-minute grocery runs for this one.
Step-by-Step Instructions for Chewy Chocolate Chip Cookies
This professional method delivers consistent results with perfect texture and flavor balance.
Step 1: Cream the Butter and Sugars Thoroughly
In a stand mixer with paddle attachment, beat the 1 cup Unsalted Butter with 0.75 cup Granulated Sugar and 0.75 cup Light Brown Sugar on medium speed for 3-4 minutes. The mixture should become pale and fluffy, nearly doubling in volume.
This creaming process incorporates air that creates the characteristic chewy texture. The light brown sugar contributes moisture and a subtle caramel note. Stop mixing when the butter-sugar mixture leaves ribbons on the bowl’s side.
Step 2: Incorporate Eggs and Vanilla Methodically
Add the 2 whole Large Eggs one at a time, mixing for 30 seconds after each addition until fully emulsified. Then add the 2 tsp Vanilla Extract and mix for 10 seconds.
The eggs provide structure while the vanilla adds depth. The mixture may appear slightly curdled at this stage, but will smooth out once dry ingredients are added. Use room temperature eggs for even incorporation.
Step 3: Combine Dry Ingredients and Chocolate Components
Whisk together the 2.5 cups All-Purpose Flour, 1 tsp Baking Soda, and 1 tsp Salt in a separate bowl. Add to the wet ingredients and mix on low speed for 30-45 seconds until just combined—some flour streaks may remain.
Remove the bowl from the mixer and fold in the 2 cups Semi-Sweet Chocolate Chips and 1 cup Chopped Walnuts by hand. The Arm & Hammer baking soda ensures proper spread and chewiness through alkaline reaction with the sugars.
Step 4: Chill the Dough for Optimal Texture
Cover the dough and refrigerate for at least 30 minutes (preferably 1 hour). This rest period allows the flour to fully hydrate and the butter to firm up, preventing excessive spread during baking.
Cold dough also enhances flavor development. The baking soda begins its chemical reaction during this rest, creating the signature chewy edges and soft centers this recipe promises.
Step 5: Bake to Golden Perfection
Preheat oven to 350°F. Scoop 2-tablespoon portions of dough onto parchment-lined baking sheets, spacing them 3 inches apart. Bake for 11-13 minutes until edges are golden brown but centers appear slightly underdone.
Remove from oven and let cool on the baking sheet for 5 minutes before transferring to a wire rack. The cookies will continue setting as they cool, achieving the ideal balance of crisp edges and chewy centers.
Pro Tips For Making Arm And Hammer Cookie
- Chill the Dough: After mixing, refrigerate the dough for at least 30 minutes—this prevents the butter from melting too fast in the oven, so your cookies keep their shape.
- Cream Butter Thoroughly: Beat the unsalted butter with both sugars until it’s pale and fluffy, about 3-4 minutes; skipping this makes cookies dense instead of light and chewy.
- Measure Flour Right: Spoon the all-purpose flour into your measuring cup and level it off—don’t scoop directly from the bag, or you’ll pack in too much and end up with dry, crumbly cookies.
- Use Fresh Baking Soda: If your baking soda has been sitting in the pantry for over 6 months, test a teaspoon in hot water—if it doesn’t bubble vigorously, replace it, or your cookies won’t rise properly.
Essential Equipment for Perfect Results
Stand Mixer
A stand mixer with paddle attachment is my top recommendation for this recipe. The KitchenAid Classic handles the thick dough effortlessly, ensuring even mixing without overworking the gluten. I tested batches by hand and with a hand mixer, but the stand mixer gave the most consistent texture. 💪
Digital Scale
For precise measurements, I rely on my OXO Good Grips 11lb scale. Weighing ingredients like the 2.5 cups All-Purpose Flour eliminates guesswork, especially with the spoon-and-level method. Accuracy matters when working with baking soda chemistry.
Cookie Scoop
A 2-tablespoon cookie scoop ensures uniform portions for even baking. I use the OXO Good Grips Medium Scoop, which releases dough cleanly every time. Consistent sizing means every cookie bakes at the same rate, preventing some from over-browning.
Baking Sheets
Heavy-duty half-sheet pans from Nordic Ware distribute heat evenly, preventing hot spots. Line them with parchment paper for easy release and cleanup. I always rotate pans halfway through baking for uniform results.
Cooling Rack
A wire cooling rack allows air circulation underneath cookies, preventing steam from making them soggy. I transfer cookies after 5 minutes on the pan to finish setting. This step is crucial for achieving crisp edges and chewy centers.
Parchment Paper
Use pre-cut parchment sheets for convenience. They prevent sticking without adding grease and make cleanup effortless. I keep a roll of Reynolds Kitchen parchment in my Boston kitchen at all times for baking projects like this. ✨
Nutrition Facts
Frequently Asked Questions
Can I substitute baking powder for baking soda?
No, they’re not interchangeable. Baking soda requires an acid to activate, while baking powder contains its own acid. Using powder would change the texture and spread.
Why do my cookies spread too much?
Butter that’s too warm or dough not chilled enough causes excessive spread. Ensure butter is softened but not melted, and chill dough for at least 30 minutes.
How do I get crispier edges?
Bake at 350°F for the full 13 minutes and use a light-colored pan. The baking soda in Arm & Hammer helps create that perfect caramelization.
Can I freeze the dough?
Yes! Scoop dough balls, freeze on a tray, then transfer to a bag. Bake from frozen, adding 1-2 minutes to the baking time.

Trained in classic French technique but raised on slow-cooked ribs and spicy rubs, she blends culinary skill with smoke and soul.
- Recipe for Boneless Pork Chops in Cast Iron Skillet: Sear and Baste to Juicy Perfection - October 3, 2026
- Recipe for Boneless Cross Rib Roast: Slow-Roasted Beef with Herb Crust - October 3, 2026
- Hamburgers in Sauce Recipe Crock Pot: Slow-Cooked Savory Delight - October 3, 2026