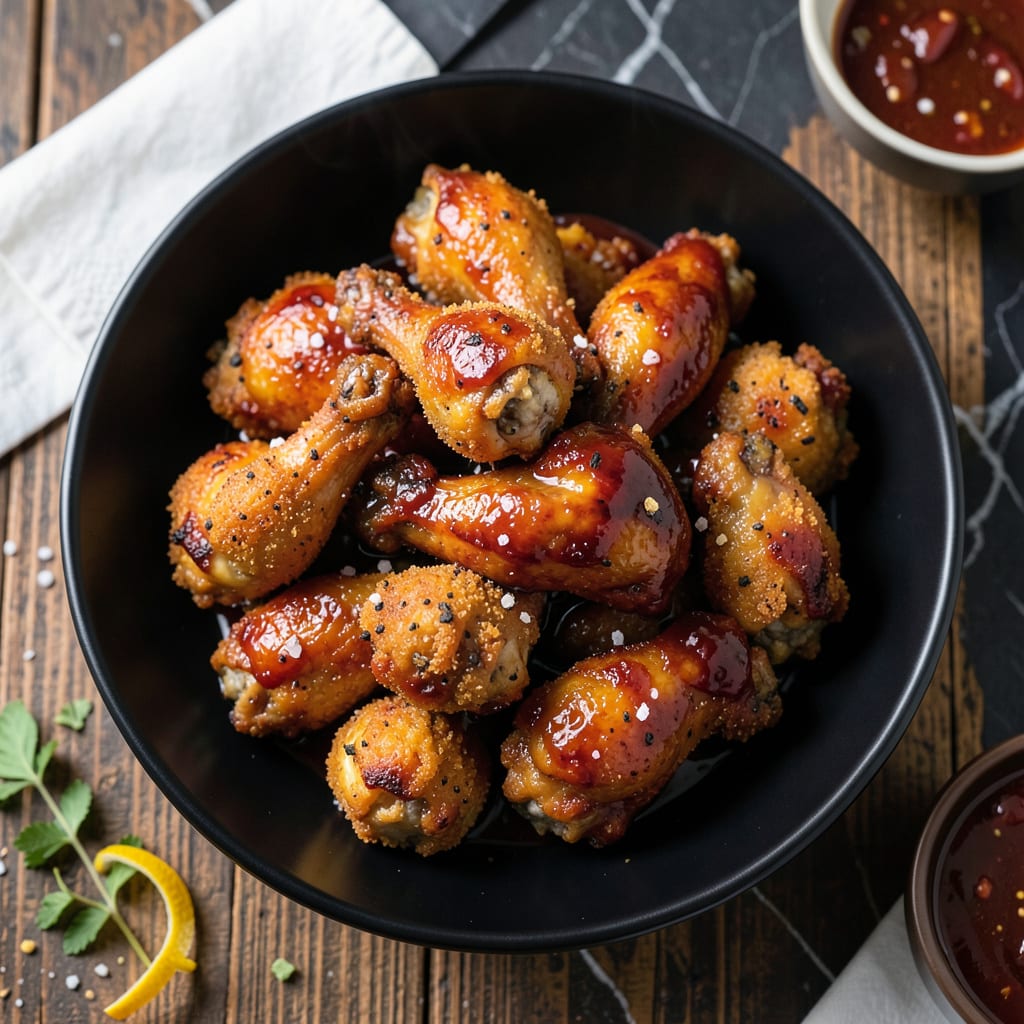
Achieving crispy wings without a deep fryer is easier than you think. This oven method delivers perfect texture every time, with a smoky sweet glaze that clings to each bite.
I developed this technique to replicate pit-smoked flavor at home. The high heat ensures wings develop a golden crust while staying juicy inside, ready for your favorite BBQ sauce.
Ingredients for Bake Bbq Wings
Pantry staples plus chicken wings. Simple enough for a weeknight, impressive enough for guests.
| Ingredient | Amount | Notes |
|---|---|---|
| Chicken Wings 🍗 | 2 ½ lb | Split into drumettes and flats |
| Baking Powder 🧂 | 1 tbsp | For extra crispiness |
| Kosher Salt 🧂 | 1 tsp | Divided for seasoning |
| Black Pepper 🌶️ | 1 tsp | Freshly ground preferred |
| Garlic Powder 🧄 | 1 tsp | Enhances flavor depth |
| Onion Powder 🧅 | 1 tsp | Balances seasoning blend |
| Smoked Paprika 🌶️ | 1 tsp | Adds smoky depth |
| Olive Oil 🫒 | 1 tbsp | For coating wings |
| BBQ Sauce 🍯 | 1 cup | Sweet and smoky variety |
| Honey 🍯 | 2 tbsp | Balances tanginess |
| Apple Cider Vinegar 🍏 | 1 tbsp | Adds tangy brightness |
| Worcestershire Sauce 🍶 | 1 tsp | Deepens umami flavor |
| Brown Sugar 🧈 | 2 tbsp | For caramelized glaze |
[recipe_ingredient_scaler]
The wings are the star here. Look for fresh, not frozen—they crisp up better and have more flavor. I grab mine from Costco for big batches, but any grocery store works. The baking powder is the secret to that golden crust (trust me on this). Aluminum-free is best if you can find it. Don’t skip the high heat—it’s what gets them crispy without frying.
No smoked paprika? Regular paprika plus a pinch of cayenne works in a pinch. Out of BBQ sauce? Mix ketchup with 1 tbsp brown sugar, 1 tsp vinegar, and a dash of liquid smoke. The honey can be swapped for maple syrup if needed. Fresh garlic and onion powder? Skip the fresh—powdered blends better into the coating for these.
Wings are best hot out of the oven, but they reheat well too. Store leftovers in an airtight container for up to 4 days in the fridge. Freeze before saucing for up to 3 months—just bake straight from frozen, adding a few extra minutes.
Why You’ll Love This Recipe
- One Pan Magic: I toss the wings with baking powder and spices, pop them in the oven, and that’s it—no frying, no mess.
- Crispy Perfection: The baking powder trick gives them that golden, crunchy skin every time, and the garlic powder? Pure flavor.
- Weeknight Hero: I make a double batch on Sunday, and they reheat beautifully for quick dinners or snacks all week.
- Budget Friendly: Chicken wings are affordable, and with just a few pantry staples, I get a restaurant-worthy dish at home.
Step-by-Step Instructions for Oven-Baked BBQ Wings
Here’s how I get perfectly crispy wings with a finger-licking glaze every time.
Step 1: Season and Prep the Wings for Maximum Crisp
Pat the 2.5 lb Chicken Wings completely dry with paper towels—this is critical for crispiness. In a large bowl, toss the wings with 1 tbsp Olive Oil, then sprinkle evenly with 1 tbsp Baking Powder, 1 tsp Kosher Salt, 1 tsp Black Pepper, 1 tsp Garlic Powder, 1 tsp Onion Powder, and 1 tsp Smoked Paprika.
I use my hands to ensure every wing is thoroughly coated—the baking powder is the secret to that extra-crispy texture. Arrange the wings on a wire rack set over a baking sheet, leaving space between each piece so hot air can circulate. Don’t skip the rack; it prevents the wings from steaming in their own juices.
Step 2: Bake Until Golden and Crispy
Place the wings in a preheated 425°F oven on the middle rack. Bake for 45 minutes, then flip each wing and bake for another 15-20 minutes until they’re deep golden brown and crispy all over.
You’ll know they’re ready when the skin looks blistered and the wings feel firm to the touch. I always check a few pieces—if the smallest ones are crispy, the whole batch is done. The baking powder works its magic here, creating that coveted crunch without frying.
Step 3: Prepare the Smoky Sweet Glaze
While the wings bake, combine 1 cup BBQ Sauce, 2 tbsp Honey, 1 tbsp Apple Cider Vinegar, 1 tsp Worcestershire Sauce, and 2 tbsp Brown Sugar in a saucepan over medium heat. Stir frequently as it comes to a gentle simmer.
Let it cook for 3-4 minutes until the sauce thickens slightly and the brown sugar dissolves completely. You want it to coat the back of a spoon but still be pourable. Taste and adjust—if it needs more tang, add a splash of vinegar; if it’s too sharp, a little more honey balances it perfectly.
Step 4: Toss and Serve Immediately
As soon as the wings come out of the oven, transfer them to a large bowl and pour the warm glaze over the top. Toss gently with a spatula until every wing is evenly coated. The glaze will thicken slightly as it hits the hot wings, creating that perfect sticky coating.
Serve immediately while they’re still crispy and hot. I like to line the serving platter with parchment paper for easy cleanup. These wings are best eaten fresh from the oven, but if you must wait, keep them in a single layer to preserve that crispy texture.
Pro Tips For Making Bake Bbq Wings
- Pat Wings Dry: Use paper towels to thoroughly dry the wings before seasoning—this helps the baking powder create that crispy, blistered skin everyone loves.
- Use Baking Powder: Sounds weird, but it works: the alkaline in baking powder (not baking soda) breaks down proteins, giving you extra-crispy wings without frying.
- Skip the Crowding: Spread wings in a single layer on the rack with space between each piece, or they’ll steam instead of crisp up.
- Flip Halfway: After 30 minutes at 425°F, flip the wings to guarantee even browning and crispiness on both sides.
Pro Cooking Tips for Great bake bbq wings
Oven Heat Control
Preheat your oven to 425°F and use the middle rack for even heat distribution. I always let my oven fully heat for 15 minutes before baking to ensure consistent temperature. A convection setting can cut cook time by 10-15% if your oven has it.
Wire Rack Trick
Place wings on a wire rack over a baking sheet—this allows hot air to circulate all around for maximum crispiness. I use a Nordic Ware rack because it’s sturdy and fits perfectly in my half-sheet pan. Without the rack, wings steam instead of crisp.
Flip for Even Browning
After 45 minutes, flip each wing to ensure even browning. The underside needs direct heat exposure to develop that golden crust. I use tongs to avoid piercing the skin, which can release precious juices. 🔥
Glaze Timing
Prepare your glaze during the last 15 minutes of baking so it’s fresh and hot when the wings come out. The warm glaze adheres better to crispy wings than cold sauce. Stir frequently to prevent burning—brown sugar can caramelize quickly.
Serve Immediately
Toss wings with glaze right after baking while they’re piping hot. The sauce thickens on contact, creating that perfect sticky coating. If you wait, the wings lose crispiness. I serve mine on a platter lined with parchment for easy cleanup.
Resting Not Needed
Unlike roasted meats, wings are best eaten straight from the oven. Resting causes them to lose that coveted crunch. If you must hold them, keep in a single layer on the rack at room temperature for no more than 10 minutes. ✨
Nutrition Facts

Trained in classic French technique but raised on slow-cooked ribs and spicy rubs, she blends culinary skill with smoke and soul.
- Recipe for Boneless Pork Chops in Cast Iron Skillet: Sear and Baste to Juicy Perfection - October 3, 2026
- Recipe for Boneless Cross Rib Roast: Slow-Roasted Beef with Herb Crust - October 3, 2026
- Hamburgers in Sauce Recipe Crock Pot: Slow-Cooked Savory Delight - October 3, 2026