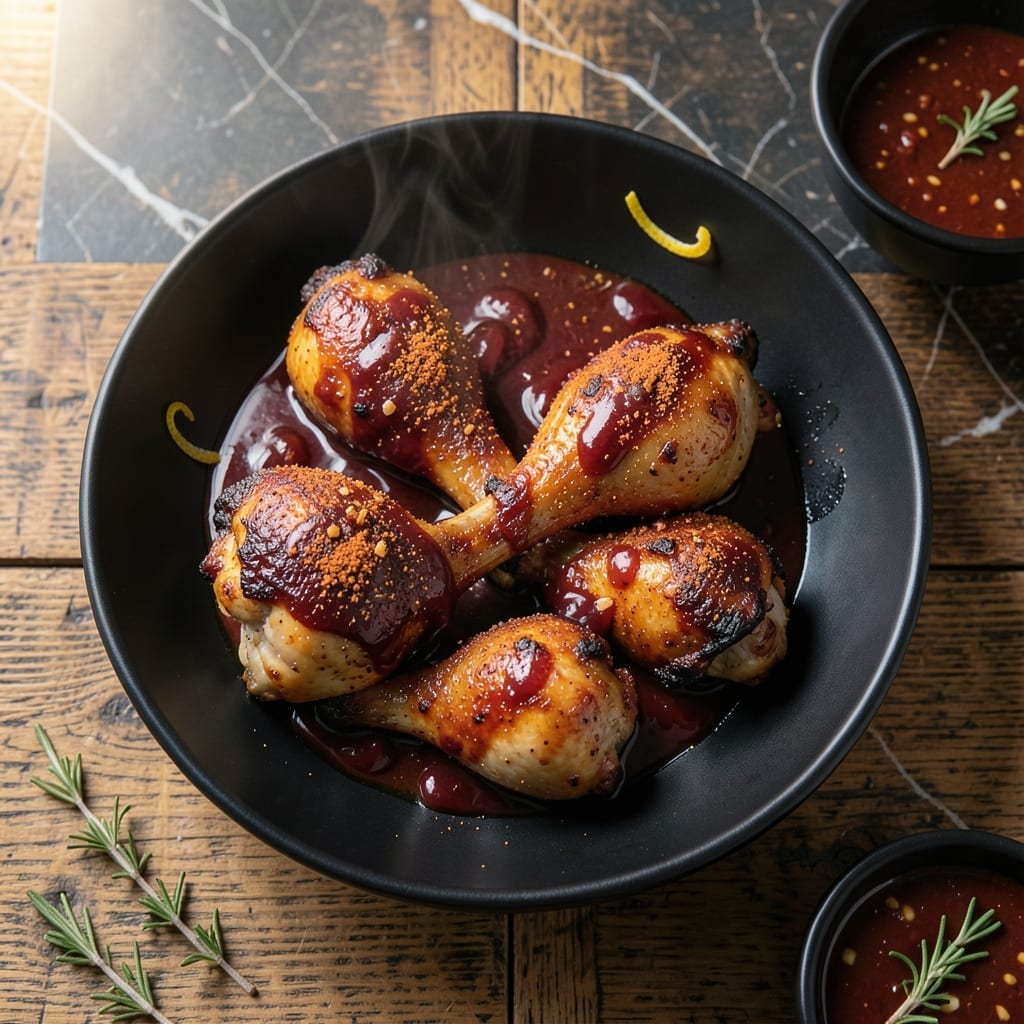
This recipe delivers fall-off-the-bone thighs with a sticky glaze that caramelizes beautifully in the oven.
I developed this method to capture smoky BBQ flavor without the grill, using simple ingredients and precise timing.
Ingredients for Baked Barbecue Chicken Thighs
Simple ingredients transform into tender, caramelized perfection with professional results every time.
| Ingredient | Amount | Notes |
|---|---|---|
| Bone-In Chicken Thighs 🍗 | 2 ½ lb | Skin-on for crispiness |
| Barbecue Sauce 🍯 | 1 ½ cups | High-quality, thick consistency |
| Olive Oil 🫒 | 1 tbsp | Extra-virgin preferred |
| Garlic Powder 🧄 | 1 tsp | For dry rub base |
| Onion Powder 🧅 | 1 tsp | Balances sweet and smoky |
| Smoked Paprika 🌶️ | 1 tsp | Adds depth and color |
| Brown Sugar 🍚 | 2 tbsp | Light or dark, packed |
| Salt 🧂 | 1 tsp | Kosher or sea salt |
| Black Pepper 🌶️ | ½ tsp | Freshly ground preferred |
| Apple Cider Vinegar 🍏 | 1 tbsp | Brightens the glaze |
| Worcestershire Sauce 🍶 | 1 tbsp | Adds umami complexity |
| Dijon Mustard 🟡 | 1 tsp | Enhances tangy depth |
[recipe_ingredient_scaler]
The chicken thighs are non-negotiable for that fall-off-the-bone texture—bone-in, skin-on gives the best results. Costco or Whole Foods have consistent quality, but any supermarket with fresh poultry will work. Look for thighs that are uniform in size (about 6-8 pieces per 2.5 lbs) so they cook evenly. The barbecue sauce should be thick enough to cling—Stubb’s or Sweet Baby Ray’s are reliable choices.
No smoked paprika? Regular paprika plus a pinch of liquid smoke gets you close. Out of apple cider vinegar? White vinegar or lemon juice works in a pinch (though the cider adds a subtle fruitiness). The Worcestershire can be swapped for soy sauce if needed, though the flavor profile shifts slightly. Brown sugar alternatives like coconut sugar work, but may alter caramelization.
Store raw chicken in the coldest part of your fridge—use within 2 days or freeze for up to 9 months. The glaze ingredients keep indefinitely in your pantry, but fresh spices (like the smoked paprika) lose potency after about 6-12 months. Always bring chicken to room temperature before baking for even cooking.
Why You’ll Love This Recipe
- One Pan Wonder: I toss the thighs with olive oil and spices, slather on the sauce, and let the oven do the rest—no babysitting required.
- Sticky Sweet Crisp: That combo of caramelized barbecue sauce with the garlic and onion powder? Ridiculously good, especially with the crispy skin.
- Feeds the Crowd: I make a double batch for Sunday dinner, and it’s just as good cold in sandwiches the next day.
- Budget Hero: Bone-in thighs are cheap, and this recipe stretches them into something that tastes like a restaurant meal.
Step-by-Step Instructions for Baked Barbecue Chicken Thighs
This method delivers perfectly caramelized sauce and tender meat with minimal effort.
Step 1: Season the Chicken Thighs
Pat the 2.5 lb bone-in chicken thighs dry with paper towels to ensure crispy skin. In a small bowl, combine the 1 tsp salt, 0.5 tsp black pepper, 1 tsp garlic powder, 1 tsp onion powder, 1 tsp smoked paprika, and 2 tbsp brown sugar.
Rub this mixture evenly over all sides of the chicken thighs, pressing gently to adhere. The brown sugar will help create a sticky, caramelized crust while the spices build layers of smoky, savory flavor.
Step 2: Sear for Crispy Skin
Heat the 1 tbsp olive oil in a large oven-safe skillet over medium-high heat. When the oil shimmers, add the chicken thighs skin-side down. Sear undisturbed for 5-6 minutes until the skin turns deep golden brown and releases easily from the pan.
Flip and sear the other side for 3-4 minutes. This initial sear locks in juices and creates the foundation for a rich, flavorful base. The skin should already look crispy at this stage.
Step 3: Create the Barbecue Glaze
In a bowl, whisk together the 1.5 cups barbecue sauce, 1 tbsp apple cider vinegar, 1 tbsp Worcestershire sauce, and 1 tsp Dijon mustard. The vinegar brightens the sweetness, while the Worcestershire and mustard add depth and umami complexity.
Pour this mixture over the chicken thighs in the skillet, turning each piece to coat evenly. The liquid should pool slightly at the bottom but not submerge the meat—this ensures a thick, sticky glaze rather than a thin, watery sauce.
Step 4: Bake to Perfection
Transfer the skillet to a preheated 375°F oven. Bake uncovered for 25-30 minutes, basting the chicken with the pan sauce every 10 minutes. You’ll notice the sauce beginning to thicken and cling to the meat.
Remove when the internal temperature reaches 175°F and the sauce has reduced to a glossy, sticky consistency. The chicken should pull away from the bone effortlessly when pierced with a fork.
Step 5: Rest and Serve
Let the chicken rest in the skillet for 5 minutes before serving. This allows the juices to redistribute and the glaze to set slightly, ensuring every bite is coated in that rich, tangy sauce.
Serve the thighs with the reduced pan sauce spooned over the top. The skin will be crispy, the meat fall-off-the-bone tender, and the sauce perfectly balanced between sweet, smoky, and tangy.
Pro Tips For Making Baked Barbecue Chicken Thighs
- Start Hot, Finish Low: Bake at 425°F for the first 20 minutes to get the skin crispy, then drop to 375°F to let the barbecue sauce caramelize without burning.
- Pat Thighs Dry: I learned this the hard way—skip the paper towel and your sauce will slide right off; dry skin grabs the glaze and crisps up properly.
- Sauce Late, Not Early: Brush on the barbecue sauce only in the last 15 minutes, or it’ll turn bitter and sticky from the long bake time.
- Rest Before Serving: Give it a solid 5-10 minutes under foil after baking; the juices redistribute and the meat stays moist when you cut in.
Pro Cooking Tips for This Recipe
Skillet Selection
Use a heavy oven-safe skillet—I swear by my Lodge cast iron for even heat distribution. A 12-inch pan gives enough room for 2.5 lb chicken thighs without crowding, which prevents steaming instead of searing.
Searing Technique
Don’t rush the sear! Let the skin render fat and crisp to deep golden brown before flipping. The 5-6 minutes per side builds the flavor foundation. I learned this patience from my French training—it’s worth the wait.
Basting Method
Baste every 10 minutes during baking to build layers of sticky glaze. Use a silicon brush to avoid scraping the crispy skin. The 375°F oven temperature ensures the sauce caramelizes without burning.
Temperature Control
An instant-read thermometer is your best friend here. Pull the chicken at 175°F internal temperature for juicy, tender meat. The temp will rise 5-10°F during resting. 🌡️
Resting Period
That 5-minute rest lets juices redistribute and the glaze set. Skipping this step means losing all that beautiful sauce to the plate. I use this time to toss a quick salad or warm rolls.
Glaze Consistency
If your sauce is too thin, reduce it on the stovetop for 3-4 minutes before baking. The apple cider vinegar and Worcestershire balance the sweetness perfectly. Trust me, it’ll cling like a dream. 🔥
Nutrition Facts
Frequently Asked Questions
Can I use boneless thighs instead?
Yes, but reduce baking time to 20-25 minutes. Boneless cooks faster and won’t be as juicy as bone-in. The skin may also shrink more during cooking.
How do I prevent the sauce from burning?
Baste every 10 minutes and keep the oven at 375°F. If the sauce darkens too quickly, tent the pan loosely with foil.
What if my glaze is too thin?
Simmer it on the stovetop for 3-4 minutes before baking. The vinegar and Worcestershire will help it thicken as it reduces.
Can I make this ahead?
Bake and cool completely, then refrigerate for up to 3 days. Reheat covered at 350°F for 15 minutes.

Trained in classic French technique but raised on slow-cooked ribs and spicy rubs, she blends culinary skill with smoke and soul.
- Recipe for Boneless Pork Chops in Cast Iron Skillet: Sear and Baste to Juicy Perfection - October 3, 2026
- Recipe for Boneless Cross Rib Roast: Slow-Roasted Beef with Herb Crust - October 3, 2026
- Hamburgers in Sauce Recipe Crock Pot: Slow-Cooked Savory Delight - October 3, 2026