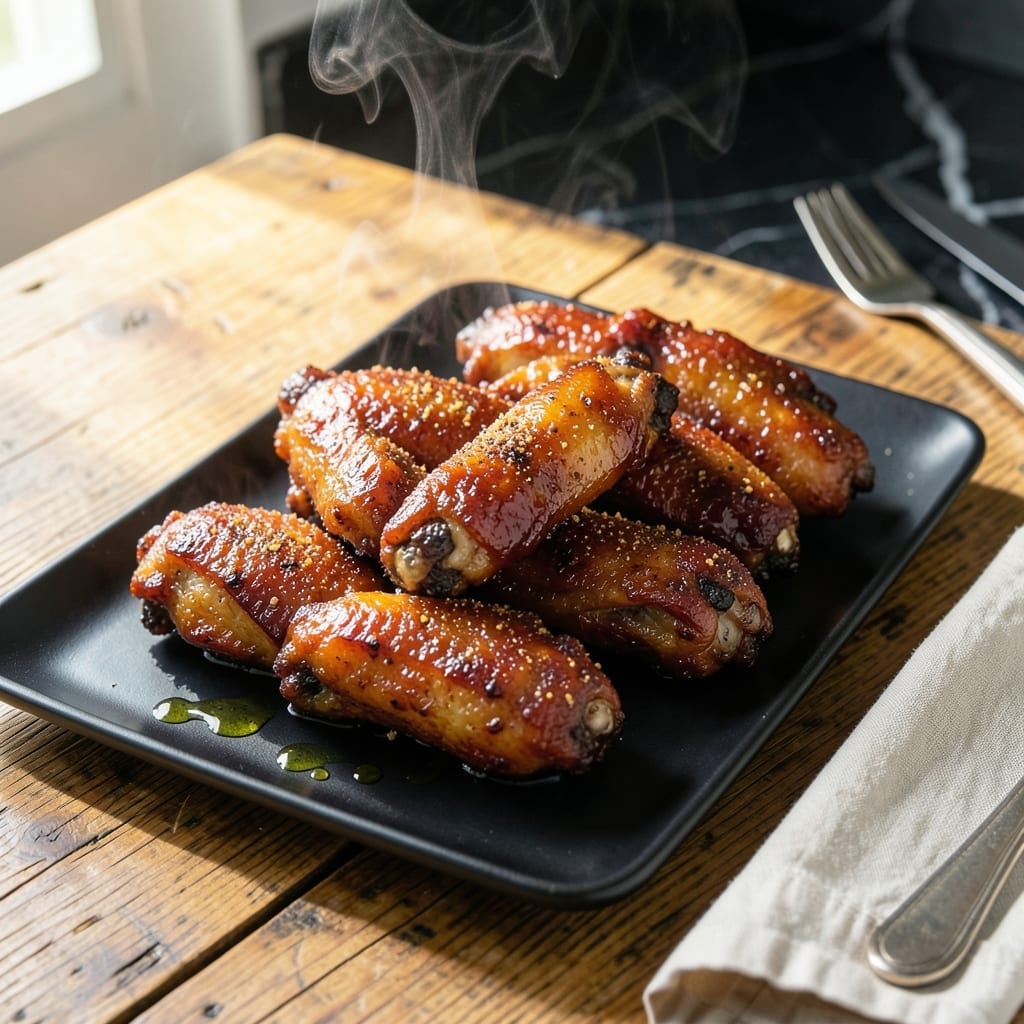
This baked method delivers the smoky sweet crust of grilled wings without firing up the pit. I developed this technique to bring competition-level flavor to home kitchens.
High-heat baking creates sticky, caramelized barbecue sauce clinging to crispy wings. The result rivals any smoker-cooked version, with less mess and more control.
Ingredients for Baked Barbecue Chicken Wings
High-heat baking transforms simple wings into a smoky, competition-level dish at home.
| Ingredient | Amount | Notes |
|---|---|---|
| Chicken Wings 🍗 | 3 lb | Split into drumettes and flats, patted dry |
| Baking Powder 🧂 | 1 tbsp | Aluminum-free for crispiness |
| Kosher Salt 🧂 | 1 tsp | Diamond Crystal preferred |
| Smoked Paprika 🌶️ | 1 tsp | For smoky depth of flavor |
| Garlic Powder 🧄 | 1 tsp | Freshly ground if possible |
| Onion Powder 🧅 | 1 tsp | Balances the seasoning blend |
| Black Pepper 🌶️ | ½ tsp | Freshly ground for best results |
| Barbecue Sauce 🍯 | 1 ½ cups | High-quality smoky variety |
| Unsalted Butter 🧈 | 2 tbsp | Melted for sauce blend |
| Apple Cider Vinegar 🍏 | 1 tbsp | For tangy balance |
| Brown Sugar 🍚 | 1 tbsp | Light or dark variety |
| Worcestershire Sauce 🫒 | 1 tsp | Adds umami complexity |
| Hot Sauce 🔥 | 1 tsp | Optional for heat lovers |
[recipe_ingredient_scaler]
The wings are the foundation here. Split them yourself for more even cooking—most grocery stores sell whole wings cheaper than pre-cut. Look for plump, moist wings with no greyish tint (a sign of freezer burn). Costco or Sam’s Club offer the best bulk pricing. Pat them completely dry before seasoning—this is non-negotiable for achieving that crispy crust.
No smoked paprika? Regular paprika plus a pinch of liquid smoke works in a pinch. Annie’s or Stubb’s barbecue sauces have that competition-style balance of sweet and smoky. For a sugar-free version, swap in a low-carb barbecue sauce. The baking powder is key—aluminum-free ensures no metallic aftertaste. Skip it and you’ll lose that coveted crispiness.
Wings are best served immediately, but they reheat surprisingly well. Store cooked wings in an airtight container for up to 4 days in the fridge. Reheat in a 400°F oven for 10-12 minutes to restore crispiness. Leftovers? Toss them in fresh sauce—revives the flavor beautifully.
Why You’ll Love This Recipe
- One Pan Magic: I toss the wings with baking powder and spices, pop them on a sheet pan, and the oven does the rest.
- Smoky Perfection: The smoked paprika and garlic powder create that deep, savory flavor I crave in every bite.
- Crowd Pleaser: Honestly, these disappear faster than any appetizer I’ve made for game night.
- Budget Friendly: A big batch of wings costs less than takeout, and leftovers (if there are any) reheat beautifully.
Step-by-Step Instructions for Baked Barbecue Chicken Wings
Here is the proven method I use to achieve maximum crispiness and smoky-sweet flavor every time.
Step 1: Prepare and Season the Chicken Wings
Begin by thoroughly patting the 3 lb Chicken Wings dry with paper towels—this is essential for achieving crispy skin. Split the wings into drumettes and flats if not already separated.
In a large bowl, toss the wings with the 1 tbsp Baking Powder, 1 tsp Kosher Salt, 1 tsp Smoked Paprika, 1 tsp Garlic Powder, 1 tsp Onion Powder, and 0.5 tsp Black Pepper. The baking powder creates micro-bubbles on the skin’s surface, ensuring extra crispiness without any metallic aftertaste.
Step 2: Bake Until Crispy
Arrange the seasoned wings on a wire rack set over a baking sheet, ensuring they are not touching. This setup allows heat to circulate evenly, promoting uniform crisping. Preheat the oven to 425°F and bake the wings for 45 minutes, flipping halfway through.
After 45 minutes, increase the oven temperature to 450°F and bake for an additional 15-20 minutes, until the wings are deep golden brown and the skin is crispy to the touch. The elevated temperature at the end ensures a perfect finish.
Step 3: Prepare the Barbecue Sauce
While the wings bake, prepare the sauce. In a small saucepan, melt the 2 tbsp Unsalted Butter over medium heat. Add the 1.5 cups Barbecue Sauce, 1 tbsp Apple Cider Vinegar, 1 tbsp Brown Sugar, 1 tsp Worcestershire Sauce, and 1 tsp Hot Sauce.
Stir well to combine and simmer for 5 minutes, allowing the flavors to meld and the sauce to thicken slightly. The vinegar and brown sugar balance the smokiness of the barbecue sauce, while the Worcestershire adds depth. Taste and adjust seasoning if needed.
Step 4: Toss and Serve
Once the wings are crispy, transfer them to a large bowl. Pour the prepared barbecue sauce over the wings and toss gently until each piece is evenly coated. The sauce should cling to the crispy skin without making it soggy.
Serve immediately while hot, with extra sauce on the side if desired. The contrast between the crispy exterior and the sticky, smoky-sweet glaze is what makes this dish irresistible. For best results, enjoy right away as the wings lose crispness as they cool.
Pro Tips For Making Baked Barbecue Chicken Wings
- Pat Wings Dry: Use paper towels to thoroughly dry the wings before seasoning—this helps the baking powder create that extra-crispy skin we all want.
- High Oven Heat: Crank the oven to 425°F and use the top rack. I learned this the hard way—lower temps give you soggy wings instead of that perfect char.
- Don’t Skip Baking Powder: Sounds weird, but it works: a teaspoon of baking powder (not baking soda) mixed with your spices makes the skin crackle like fried wings.
- Toss in Sauce Late: Coat the wings in barbecue sauce only after baking—doing it before turns them steamed instead of crispy. I was skeptical until I tried it.
Pro Cooking Tips for Great baked barbecue chicken wings
Oven Heat Control
I start with 425°F for even cooking, then finish at 450°F to lock in crispiness. This two-stage method prevents burning while ensuring that perfect crunch. A good oven thermometer is invaluable—I use ThermoWorks for accuracy. 🌡️
Wire Rack Trick
Always bake wings on a wire rack over a baking sheet. This allows air circulation on all sides for uniform crisping. I learned this trick at my first BBQ competition—it changed everything. Without it, the bottoms steam instead of crisp.
Sauce Timing
Wait until the final 5 minutes to toss wings in sauce. Coating them too early can prevent proper crisping. The sauce should be warm but not boiling when you combine it with the wings. This ensures the glaze adheres perfectly.
Baking Powder Magic
The 1 tbsp baking powder in the dry rub is the secret to extra-crispy skin. It creates micro-bubbles that dry out the surface. Just be sure to use aluminum-free to avoid any metallic aftertaste. 💡
Rest Before Saucing
Let wings rest 2-3 minutes after baking before saucing. This allows the juices to settle, preventing a soggy bottom. I toss them gently in the bowl to avoid breaking the crispy skin.
Double-Batch Strategy
For parties, bake wings in two batches on separate racks. Overcrowding the oven drops the temperature and leads to uneven cooking. I rotate the pans halfway through for consistent results.
Nutrition Facts
Frequently Asked Questions
Why use baking powder on wings?
1 tbsp baking powder creates tiny bubbles that make the skin extra crispy. Use aluminum-free to prevent a metallic taste. It’s the secret to that perfect crunch.
What’s the best oven setup?
Place wings on a wire rack over a baking sheet. This lets air circulate for even crisping on all sides. Without it, the bottoms may steam instead of crisp.
When should I add the sauce?
Toss wings in sauce only after baking. Coating them too early can soften the skin. For best results, wait until the final 5 minutes before serving.
Can I make these ahead of time?
Reheat in a 400°F oven for 10-12 minutes to restore crispiness. Store in an airtight container for up to 4 days. Avoid microwaving, as it makes them soggy.

Trained in classic French technique but raised on slow-cooked ribs and spicy rubs, she blends culinary skill with smoke and soul.
- Recipe for Boneless Pork Chops in Cast Iron Skillet: Sear and Baste to Juicy Perfection - October 3, 2026
- Recipe for Boneless Cross Rib Roast: Slow-Roasted Beef with Herb Crust - October 3, 2026
- Hamburgers in Sauce Recipe Crock Pot: Slow-Cooked Savory Delight - October 3, 2026