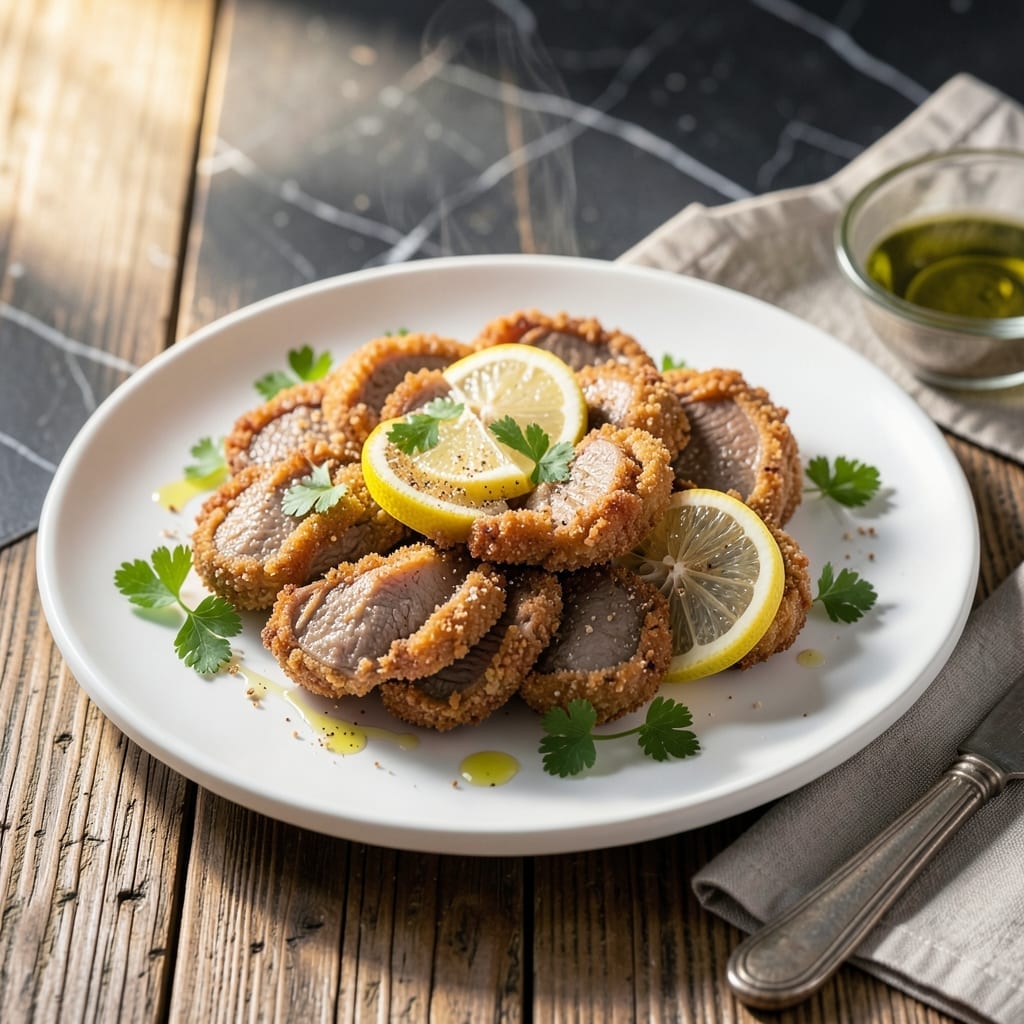
This method transforms humble chicken livers into crispy, golden bites with rich, savory depth. A simple yet precise technique ensures perfect texture every time.
High heat and careful timing create that coveted exterior while keeping the interior tender. The result is a dish that elevates an often-overlooked ingredient to star status.
Ingredients for Baked Chicken Livers
A handful of pantry staples plus fresh chicken livers create these crispy, golden bites with rich depth.
| Ingredient | Amount | Notes |
|---|---|---|
| Chicken Livers 🍗 | 1 ½ lb | Trimmed of connective tissue |
| Buttermilk 🥛 | 1 cup | Full-fat for best texture |
| All-Purpose Flour 🌾 | 1 cup | For dredging livers |
| Cornstarch 🌾 | ¼ cup | For extra crispiness |
| Garlic Powder 🧄 | 1 tsp | Not garlic salt |
| Onion Powder 🧅 | 1 tsp | Balances the richness |
| Smoked Paprika 🌶️ | 1 tsp | Adds depth and color |
| Kosher Salt 🧂 | 1 tsp | Diamond Crystal preferred |
| Freshly Ground Black Pepper 🌶️ | ½ tsp | Coarse grind ideal |
| Cayenne Pepper 🔥 | ¼ tsp | Adjust for spice preference |
| Olive Oil 🫒 | ½ cup | For baking, high smoke point |
| Unsalted Butter 🧈 | 2 tbsp | Melted for richness |
[recipe_ingredient_scaler]
The livers are the star here. Source from a trusted butcher or high-turnover grocery store—look for vibrant, deep red color with no gray spots. Trim any connective tissue yourself (it’s quick with kitchen shears). Whole Foods often has pre-trimmed packs, saving time. Buttermilk is non-negotiable for tenderness; full-fat yields the best crisp.
No buttermilk? Whole milk plus 1 tbsp lemon juice or vinegar per cup, rested 5 minutes. Swap cornstarch for arrowroot at one-to-one ratio if needed. For gluten-free, use rice flour and cornstarch blend (50/50). The paprika can be sweet if you prefer milder flavor. Penzeys carries excellent smoked paprika for authentic depth.
Livers keep 1-2 days in the fridge—use them fresh for best texture. Once baked, these are best eaten immediately but reheat well at 375°F for 5-8 minutes. Leftovers (if any) store 3 days refrigerated. Freezing isn’t recommended as it softens the crust.
Why You’ll Love This Recipe
- One Bowl Mix: I just toss the livers in buttermilk, then the flour-cornstarch blend—no extra bowls, no fuss.
- Crispy Garlic Bite: That cornstarch trick gives an insane crunch, and the garlic powder? Pure umami in every bite.
- Feeds the Crew: I stretch one pound to serve four with sides, and honestly, it’s cheaper than takeout.
- Leftovers? Gone: Cold or reheated, these disappear—my kids even sneak them straight from the fridge.
Step-by-Step Instructions for Baked Chicken Livers
This method ensures maximum crispiness while preserving the livers’ rich, iron-filled depth of flavor.
Step 1: Prepare and Marinate the Chicken Livers
Begin by trimming the 1.5 lb chicken livers of any connective tissue or membranes. I use kitchen shears for precision, but a sharp knife works too. Pat them thoroughly dry with paper towels—moisture is the enemy of crispiness.
Place the trimmed livers in a bowl and pour over the 1 cup buttermilk. Stir gently to ensure all pieces are coated. Let them marinate at room temperature for 30 minutes, or refrigerate for up to 2 hours for deeper flavor penetration. The buttermilk tenderizes the meat and helps the coating adhere.
Step 2: Create the Crispy Coating
In a large shallow dish, whisk together the 1 cup all-purpose flour, 0.25 cup cornstarch, 1 tsp garlic powder, 1 tsp onion powder, 1 tsp smoked paprika, 1 tsp kosher salt, 0.5 tsp freshly ground black pepper, and 0.25 tsp cayenne pepper. The cornstarch is the secret to extra crispiness.
Remove the livers from the buttermilk, letting excess drip off, and dredge each piece in the flour mixture. Press gently to ensure full coverage. Place the coated livers on a wire rack set over a baking sheet to allow air circulation, which prevents sogginess. Let them rest for 10 minutes to set the coating.
Step 3: Bake to Golden Perfection
Preheat your oven to 425°F. Line a large baking sheet with parchment paper. This high temperature ensures the coating crispens quickly while the livers cook through without drying out.
Drizzle 0.5 cup olive oil onto the prepared baking sheet, spreading it evenly to coat the surface. Arrange the coated livers on the sheet, leaving space between each piece to prevent steaming. Bake for 12-15 minutes, flipping halfway through, until golden brown and crispy on both sides.
Step 4: Finish with Butter for Richness
As soon as you remove the livers from the oven, brush them with the 2 tbsp unsalted butter (melted). This adds a final layer of richness and sheen. The butter will sizzle slightly on contact—this is exactly what you want.
Let the livers rest for 5 minutes before serving. This brief rest allows the coating to set completely and the flavors to meld. The exterior should remain crisp while the interior stays tender and juicy. Serve immediately while hot and crispy.
Pro Tips For Making Baked Chicken Livers
- Soak in Buttermilk: Let the livers sit in buttermilk for at least 30 minutes—I learned this the hard way after my first batch came out tough and bitter.
- Dry Before Coating: Pat the livers completely dry after the buttermilk soak, or the flour mixture will clump and slide right off.
- Hot Oven Start: Bake at 425°F for the first 10 minutes to get that crust, then drop to 375°F to finish cooking without burning the coating.
- Mix Flour and Cornstarch: Use equal parts all-purpose flour and cornstarch in the dredge—it makes the coating extra crispy, even without frying.
Perfect Pairings for These Flavors
Classic Side Dishes
I love serving these with creamy mashed potatoes—the cool, smooth texture balances the crispy livers perfectly. Use Yukon Gold potatoes for natural buttery flavor. A simple green salad with lemon-dijon vinaigrette adds freshness to cut through the richness.
Comforting Carbs
Buttermilk biscuits are my go-to for soaking up every last bit of flavor. I make mine with White Lily flour for that authentic Southern texture. For a quicker option, cornbread with a touch of honey delivers sweet and savory contrast.
Vegetable Pairings
Sautéed greens like collards or kale with garlic complement the iron-rich livers beautifully. I finish mine with a splash of apple cider vinegar for brightness. Roasted Brussels sprouts with bacon add a smoky depth that pairs wonderfully.
Sauce Options
A simple gravy made from the pan drippings takes this to another level—I whisk in 2 tbsp flour and 1 cup whole milk for a quick version. For heat lovers, hot sauce or pepper jelly adds a spicy-sweet contrast. 🌶️
Beverage Pairings
An ice-cold pilsner or IPA cuts through the richness with its crisp bitterness. For non-alcoholic options, sweet tea or sparkling lemonade provides refreshing contrast. I always keep Sweet Leaf Tea on hand for just this purpose.
Plating Tips
Serve on a warm platter lined with paper towels to maintain crispiness. Garnish with chopped parsley or green onions for color. I like to add a wedge of lemon for a bright finish that enhances all the flavors.
Nutrition Facts
Frequently Asked Questions
Can I use milk instead of buttermilk?
Yes, mix 1 cup whole milk with 1 tbsp lemon juice or vinegar. Let it sit for 5 minutes to thicken before using. This creates a buttermilk substitute with similar tang and tenderizing properties.
How do I know when they’re fully cooked?
Look for golden-brown crust and internal temperature of 165°F. The livers should be firm but still slightly pink inside. Overcooking makes them tough, so start checking at 12 minutes.
Why did my coating fall off during baking?
This usually means the livers weren’t dry before dredging or didn’t rest after coating. Always pat dry with paper towels first, then let the coated pieces rest for 10 minutes before baking.

Trained in classic French technique but raised on slow-cooked ribs and spicy rubs, she blends culinary skill with smoke and soul.
- Recipe for Boneless Pork Chops in Cast Iron Skillet: Sear and Baste to Juicy Perfection - October 3, 2026
- Recipe for Boneless Cross Rib Roast: Slow-Roasted Beef with Herb Crust - October 3, 2026
- Hamburgers in Sauce Recipe Crock Pot: Slow-Cooked Savory Delight - October 3, 2026