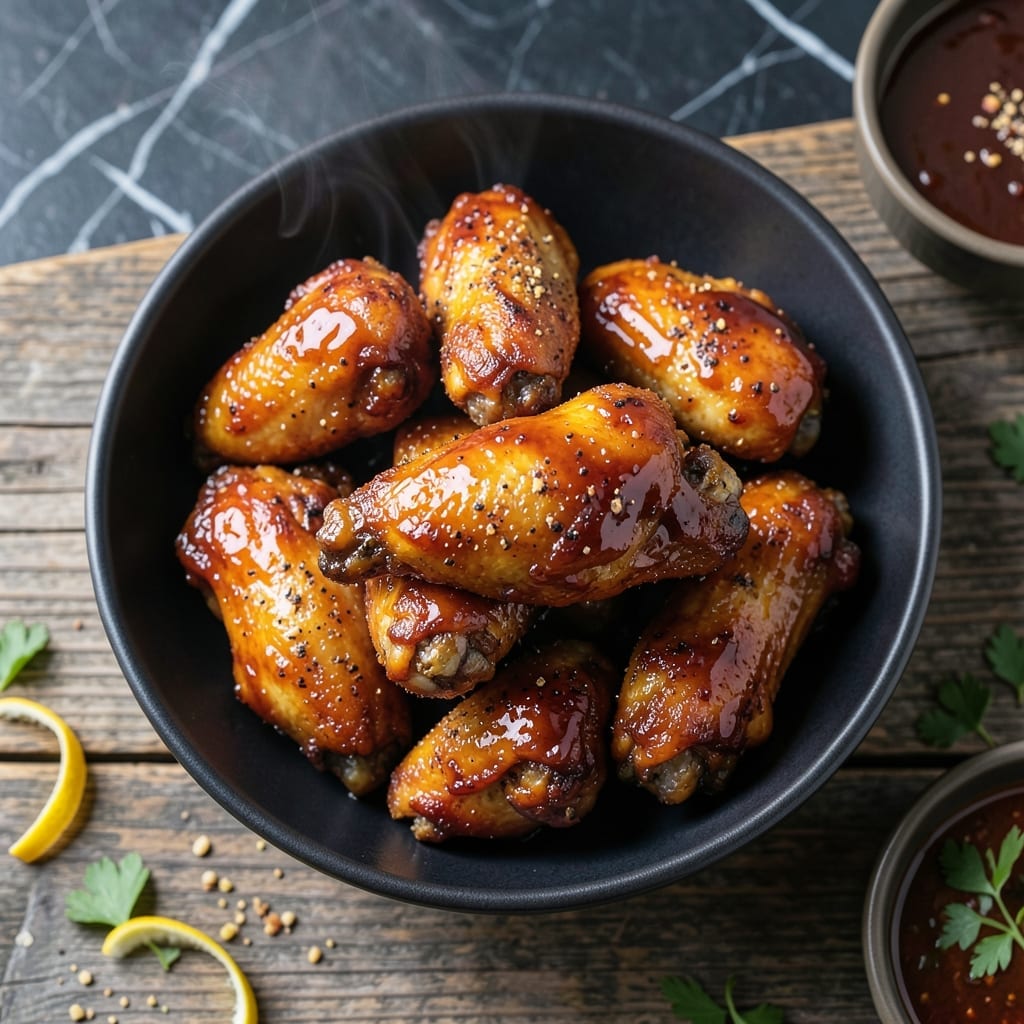
These wings deliver sticky, sweet perfection straight from your oven. The honey barbecue glaze caramelizes beautifully, creating an irresistible coating that clings to every bite.
No fryer needed—just crispy skin and tender meat with a sauce that balances smoky depth and honey’s natural sweetness. Simple, foolproof oven-baked method for restaurant-quality results at home.
Ingredients for Baked Honey Barbecue Wings
Crispy oven-baked wings meet a sweet, smoky honey barbecue glaze for irresistible results.
| Ingredient | Amount | Notes |
|---|---|---|
| Chicken Wings 🍗 | 3 lb | Split into drumettes and flats |
| Baking Powder 🧂 | 1 tbsp | For extra crispy skin |
| Kosher Salt 🧂 | 1 tsp | Divided, Diamond Crystal preferred |
| Black Pepper 🌶️ | ½ tsp | Freshly ground preferred |
| Smoked Paprika 🌶️ | 1 tsp | For smoky depth |
| Garlic Powder 🧄 | 1 tsp | Not garlic salt |
| Onion Powder 🧅 | 1 tsp | Balances flavor profile |
| Honey 🍯 | ½ cup | Pure, natural variety |
| Barbecue Sauce 🍯 | 1 ½ cups | High-quality, thick variety |
| Unsalted Butter 🧈 | 4 tbsp | For rich glaze consistency |
| Apple Cider Vinegar 🍏 | 1 tbsp | For tangy balance |
| Worcestershire Sauce 🫒 | 1 tbsp | Adds umami complexity |
[recipe_ingredient_scaler]
The chicken wings are the foundation—opt for fresh, high-quality wings with skin intact for maximum crispiness. Split them yourself into drumettes and flats for even cooking, or buy pre-cut to save time. Baking powder is the secret to extra-crispy skin without frying. Diamond Crystal kosher salt is ideal for its texture and clean flavor. Look for it at most supermarkets or specialty stores.
No honey on hand? Maple syrup at a 1:1 ratio works in a pinch (though the flavor will differ slightly). If you prefer a less sweet glaze, reduce the honey to 1/3 cup. The barbecue sauce can be store-bought—Stubb’s or Sweet Baby Ray’s are reliable choices. For a homemade touch, use your favorite recipe. The vinegar and Worcestershire add depth, but skip the Worcestershire for a vegetarian version.
Store raw wings in the fridge for up to 2 days before cooking. Leftovers keep well in an airtight container for 3-4 days, though the skin may soften. Reheat in the oven at 375°F for 10-15 minutes to restore crispiness. The glaze can be made ahead and stored separately for up to 1 week.
Why You’ll Love This Recipe
- One Pan Magic: I toss the wings with baking powder, salt, and smoked paprika, then let the oven do the rest.
- Sticky Sweet Heat: The honey barbecue glaze caramelizes into a finger-licking finish with just the right smoky kick from the paprika.
- Crowd Pleaser: I serve these at parties, and honestly, they disappear faster than I can refill the platter.
- Budget Friendly: A big batch costs less than takeout, and leftovers taste even better the next day.
Step-by-Step Instructions for Baked Honey Barbecue Wings
This method ensures maximum crispiness and a glossy, finger-licking glaze with minimal effort.
Step 1: Season and Prepare the Wings for Crispiness
Pat the 3 lb chicken wings completely dry with paper towels—this is non-negotiable for achieving crispy skin. In a large bowl, toss the wings with 1 tbsp baking powder, 1 tsp kosher salt, 0.5 tsp black pepper, 1 tsp smoked paprika, 1 tsp garlic powder, and 1 tsp onion powder until evenly coated.
The baking powder raises the pH of the skin, breaking down proteins faster and creating micro-bubbles that crisp up beautifully. Arrange the wings on a wire rack set over a baking sheet, leaving space between each piece for even air circulation.
Step 2: Bake Until Golden and Crisp
Preheat your oven to 425°F. Bake the wings on the middle rack for 45 minutes, flipping halfway through, until the skin is deep golden brown and crisp to the touch.
At this temperature, the high heat renders the fat while the baking powder works its magic. You’ll see the skin transform from pale to a rich amber, and the wings will release easily from the rack when fully crisped. Don’t rush this step—patience here ensures the glaze later adheres perfectly.
Step 3: Prepare the Honey Barbecue Glaze
In a saucepan over medium heat, melt 4 tbsp unsalted butter. Add 0.5 cup honey, 1.5 cups barbecue sauce, 1 tbsp apple cider vinegar, and 1 tbsp Worcestershire sauce. Stir to combine and let simmer for 3-4 minutes until slightly thickened.
The vinegar and Worcestershire add depth, balancing the sweetness of the honey and barbecue sauce. The glaze should coat the back of a spoon with a glossy sheen but still be pourable. Taste and adjust seasoning if needed, though the sauce itself is likely well-balanced.
Step 4: Coat and Finish the Wings
Transfer the baked wings to a large bowl and pour about ¾ of the glaze over them. Toss gently with tongs until every wing is evenly coated. Return the wings to the wire rack and bake for an additional 8-10 minutes at 425°F to set the glaze.
This second bake caramelizes the glaze, turning it from liquid to a sticky, lacquered finish. Watch closely—you want the glaze to bubble and deepen in color but not burn. The wings are done when the glaze has thickened and clings to the skin without pooling at the bottom of the rack.
Serve immediately with the remaining glaze on the side for dipping. The contrast of crispy skin and glossy, tangy-sweet sauce is what makes these irresistible.
Pro Tips For Making Baked Honey Barbecue Wings
- Pat Wings Dry: Use paper towels to thoroughly dry the wings before seasoning—this helps the baking powder create that extra-crispy skin we all love.
- Don’t Skip Baking Powder: It’s not a typo: 1 teaspoon of baking powder per pound of wings makes the skin crackle like it’s been fried, without the mess.
- Flip Halfway Through: After 25 minutes at 425°F, flip the wings to guarantee even browning and prevent the bottoms from sticking to the rack.
- Sauce Last: Toss the wings in the honey barbecue sauce only after baking—adding it earlier burns the sugars and leaves a bitter, sticky coating.
Troubleshooting Perfect Results
Soggy Skin Fix
If your wings aren’t crispy, you likely skipped patting them dry or crowded the pan. Use paper towels to thoroughly dry each wing, then space them 1 inch apart on the rack. The baking powder needs a dry surface to work its magic. 🔥
Glaze Too Thin
Simmer your glaze longer over medium heat—it needs 5-7 minutes to thicken properly. If it’s still runny, mix 1 tsp cornstarch with 1 tbsp water and stir into the glaze. Boil for 1 minute to activate the thickening.
Burnt Glaze
Your oven may run hot. Next time, reduce temperature to 400°F for the final glaze bake. Watch closely after 5 minutes—the honey caramelizes quickly. I pull mine out as soon as the glaze bubbles and darkens slightly.
Uneven Cooking
Rotate your baking sheet halfway through each baking phase. If using two racks, swap their positions. My vintage motorcycle rides taught me patience—don’t rush the flip. The wings tell you when they’re ready by releasing easily from the rack.
Glaze Slides Off
This happens when the wings aren’t crispy enough before glazing. Extend the initial bake by 10-15 minutes until the skin is deep golden and firm to the touch. The glaze needs that textured surface to cling to. 💡
Too Sweet
Balance the sweetness by adding 1 extra tbsp apple cider vinegar or ½ tsp cayenne to your glaze. I often forage wild thyme to infuse into the glaze for an earthy contrast that cuts through the honey’s richness.
Nutrition Facts
Frequently Asked Questions
Do I need to use a wire rack for baking?
Yes, a wire rack is essential for crispy results. It allows air to circulate around the wings, preventing steaming. Place it over a baking sheet to catch drips.
Can I make the glaze ahead of time?
Prepare the glaze up to 1 week in advance and store it in an airtight container in the fridge. Reheat gently before tossing with wings.
Why did my glaze turn out runny?
Simmer it longer—5-7 minutes over medium heat thickens it properly. For a quick fix, mix 1 tsp cornstarch with 1 tbsp water and stir in.
How do I keep the wings crispy after glazing?
Bake them for 8-10 minutes after glazing to set the coating. Serve immediately—the glaze softens the skin over time.

Trained in classic French technique but raised on slow-cooked ribs and spicy rubs, she blends culinary skill with smoke and soul.
- Recipe for Boneless Pork Chops in Cast Iron Skillet: Sear and Baste to Juicy Perfection - October 3, 2026
- Recipe for Boneless Cross Rib Roast: Slow-Roasted Beef with Herb Crust - October 3, 2026
- Hamburgers in Sauce Recipe Crock Pot: Slow-Cooked Savory Delight - October 3, 2026