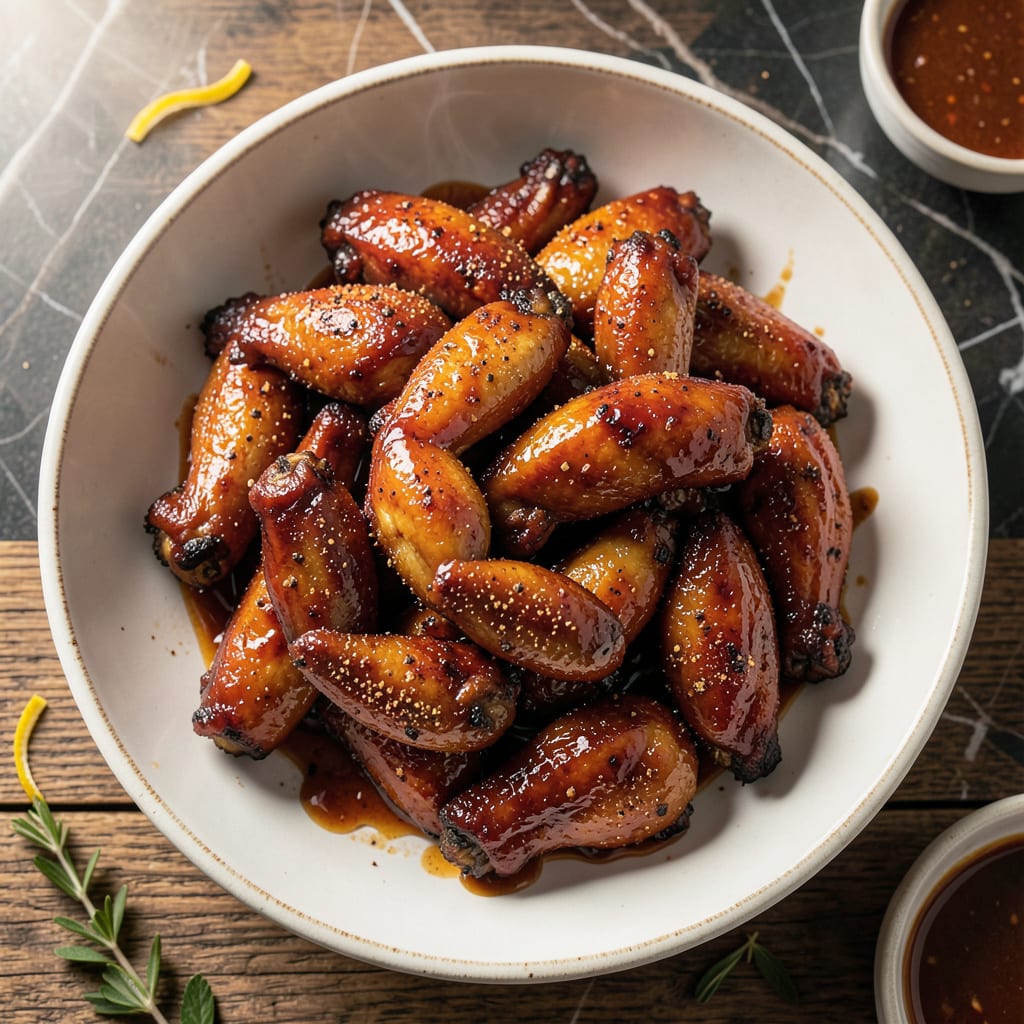
I perfected this oven method after years of smoking wings over open flames. The key is high heat to render fat while keeping meat juicy.
You’ll get crispy skin and sticky glaze with minimal effort. No fryer needed, just your oven and 30 minutes.
Ingredients for Baked Honey Bbq Wings
Pantry staples plus a quick trip to the butcher. Nothing exotic, just bold flavor.
| Ingredient | Amount | Notes |
|---|---|---|
| Chicken Wings 🍗 | 2 ½ lb | Split into drumettes and flats, patted dry |
| Baking Powder 🧂 | 1 tbsp | Aluminum-free for crispiness |
| Kosher Salt 🧂 | 1 tsp | Diamond Crystal preferred |
| Black Pepper 🌶️ | ½ tsp | Freshly ground for best flavor |
| Garlic Powder 🧄 | 1 tsp | Not garlic salt |
| Smoked Paprika 🌶️ | 1 tsp | Adds depth to rub |
| Honey 🍯 | ½ cup | Local or raw preferred |
| Barbecue Sauce 🍯 | 1 cup | Your favorite brand or homemade |
| Unsalted Butter 🧈 | 3 tbsp | For glaze richness |
| Apple Cider Vinegar 🍏 | 1 tbsp | Balances sweetness |
| Worcestershire Sauce 🫒 | 1 tsp | Adds umami depth |
| Vegetable Oil 🫒 | 1 tbsp | For tossing wings |
[recipe_ingredient_scaler]
The wings are everything here. Look for split wings (drumettes and flats separated) to save time—most grocery stores sell them this way. I grab mine from Costco for big batches, but Whole Foods has great quality if you’re doing a smaller portion. The baking powder is the secret to crispy skin without frying (trust me on the aluminum-free kind). Pat those wings very dry—this is non-negotiable for maximum crispiness.
No honey? Maple syrup or agave works in a pinch, but the flavor changes slightly. Swap barbecue sauce for Sriracha plus a little brown sugar if you want heat and sweetness. The butter can be vegan butter if needed—still gets that glossy finish. Out of Worcestershire? Soy sauce plus a dash of vinegar mimics the tang. The apple cider vinegar is subtle, but lemon juice can sub in.
These wings taste best fresh but reheat well in the oven. Leftovers keep 3-4 days in the fridge, though they lose some crisp. Freeze uncooked wings for up to 3 months—thaw before baking. Pro tip: Toss in sauce right before serving (don’t let them sit or they’ll get soggy).
Why You’ll Love This Recipe
- One Pan Magic: I just toss the wings with baking powder, salt, and spices, then bake—no frying, no mess.
- Sweet & Smoky: The honey in the BBQ glaze caramelizes into this sticky, finger-licking coating that’s balanced by the garlic powder’s bite.
- Crowd Pleaser: I serve these at parties and my picky nephew even asks for seconds.
- Budget Winner: Chicken wings are cheap, and this recipe stretches to feed six without breaking the bank.
Step-by-Step Instructions for Baked Honey BBQ Wings
This method delivers crispy, sticky wings with minimal effort and maximum flavor.
Step 1: Season and Prep the Wings for Crispy Texture
Pat the 2.5 lb chicken wings completely dry with paper towels—this is non-negotiable for achieving that coveted crispiness. In a large bowl, toss the wings with the 1 tbsp vegetable oil until evenly coated.
In a separate small bowl, combine the 1 tbsp baking powder, 1 tsp kosher salt, 0.5 tsp black pepper, 1 tsp garlic powder, and 1 tsp smoked paprika. Sprinkle this mixture over the wings and toss until every piece is well coated. The baking powder works its magic by breaking down proteins, resulting in extra-crispy skin.
Step 2: Bake the Wings to Golden Perfection
Preheat your oven to 425°F and line a large baking sheet with parchment paper or set a wire rack on top. Arrange the wings in a single layer, ensuring they’re not touching. This spacing allows hot air to circulate, crisping all sides evenly.
Bake for 45 minutes, flipping halfway through, until the wings are deep golden brown and the skin is crisp to the touch. You’ll notice the baking powder creates a slightly bubbly, crackly surface—that’s exactly what you want for maximum sauce adhesion.
Step 3: Prepare the Honey BBQ Glaze
While the wings bake, melt the 3 tbsp unsalted butter in a saucepan over medium heat. Add the 0.5 cup honey, 1 cup barbecue sauce, 1 tbsp apple cider vinegar, and 1 tsp Worcestershire sauce. Stir until smooth and simmer for 3-4 minutes until slightly thickened.
The vinegar and Worcestershire add depth that balances the sweetness of the honey and barbecue sauce. Keep the heat at a gentle simmer—you want the glaze to thicken, not burn. The mixture should coat the back of a spoon when it’s ready.
Step 4: Toss and Serve the Sticky Wings
Transfer the baked wings to a large bowl and pour about three-quarters of the warm glaze over them. Toss gently until every wing is evenly coated. For extra stickiness, return the glazed wings to the oven for 3-5 minutes to set the sauce.
Serve immediately with the remaining glaze on the side for dipping. The wings should have a glossy, finger-licking finish with a perfect balance of sweet, smoky, and tangy flavors. Real talk: these disappear fast, so make extra if you’re feeding a crowd.
Pro Tips For Making Baked Honey Bbq Wings
- Dry the Wings: Pat those wings completely dry with paper towels before seasoning—I learned this the hard way after ending up with steamed instead of crispy skin.
- Use Baking Powder: Don’t confuse it with baking soda; a teaspoon of baking powder per pound actually changes the outcome by helping the skin crisp up in the oven.
- Skip the Crowding: Spread the wings out on the rack with at least an inch between each one, or they’ll steam instead of getting that sticky, caramelized glaze.
- Toss Twice: Coat the wings with half the honey BBQ sauce halfway through baking, then toss again with the rest right before serving for maximum flavor without burning.
Essential Equipment for baked honey bbq wings
Baking Sheet Setup
Use a heavy-duty half-sheet pan (18×13 inches) with a wire rack for best air circulation. I prefer Nordic Ware pans—they conduct heat evenly. Line with parchment paper for easy cleanup, but avoid foil as it can trap steam and make wings soggy. 💡
Essential Thermometer
A good instant-read thermometer ensures perfect doneness. I use ThermoWorks ThermoPop for its accuracy and quick response. Check the thickest wing piece—it should reach 165°F internally. This is non-negotiable for safety and texture.
Mixing Bowls
You’ll need a large mixing bowl for tossing wings in oil and seasoning. A stainless steel bowl (like Cuisinox) is ideal—it’s durable and won’t absorb odors. A second medium bowl helps for combining your glaze ingredients.
Saucepan for Glaze
Use a 2-quart saucepan with a heavy base to prevent scorching. I recommend All-Clad for even heat distribution. The wider surface area helps reduce the glaze faster while maintaining control over the simmer.
Tongs for Tossing
Invest in 12-inch locking tongs—OXO Good Grips are my go-to. They give you the reach and control needed to flip wings and toss them in glaze. Avoid flimsy tongs that can’t handle the weight of multiple wings at once.
Cooling Rack
Place baked wings on a wire cooling rack before glazing to maintain crispiness. This prevents steam from softening the skin. I keep a stainless steel rack from Wilton in my pantry for this exact purpose.
Nutrition Facts

Trained in classic French technique but raised on slow-cooked ribs and spicy rubs, she blends culinary skill with smoke and soul.
- Recipe for Boneless Pork Chops in Cast Iron Skillet: Sear and Baste to Juicy Perfection - October 3, 2026
- Recipe for Boneless Cross Rib Roast: Slow-Roasted Beef with Herb Crust - October 3, 2026
- Hamburgers in Sauce Recipe Crock Pot: Slow-Cooked Savory Delight - October 3, 2026