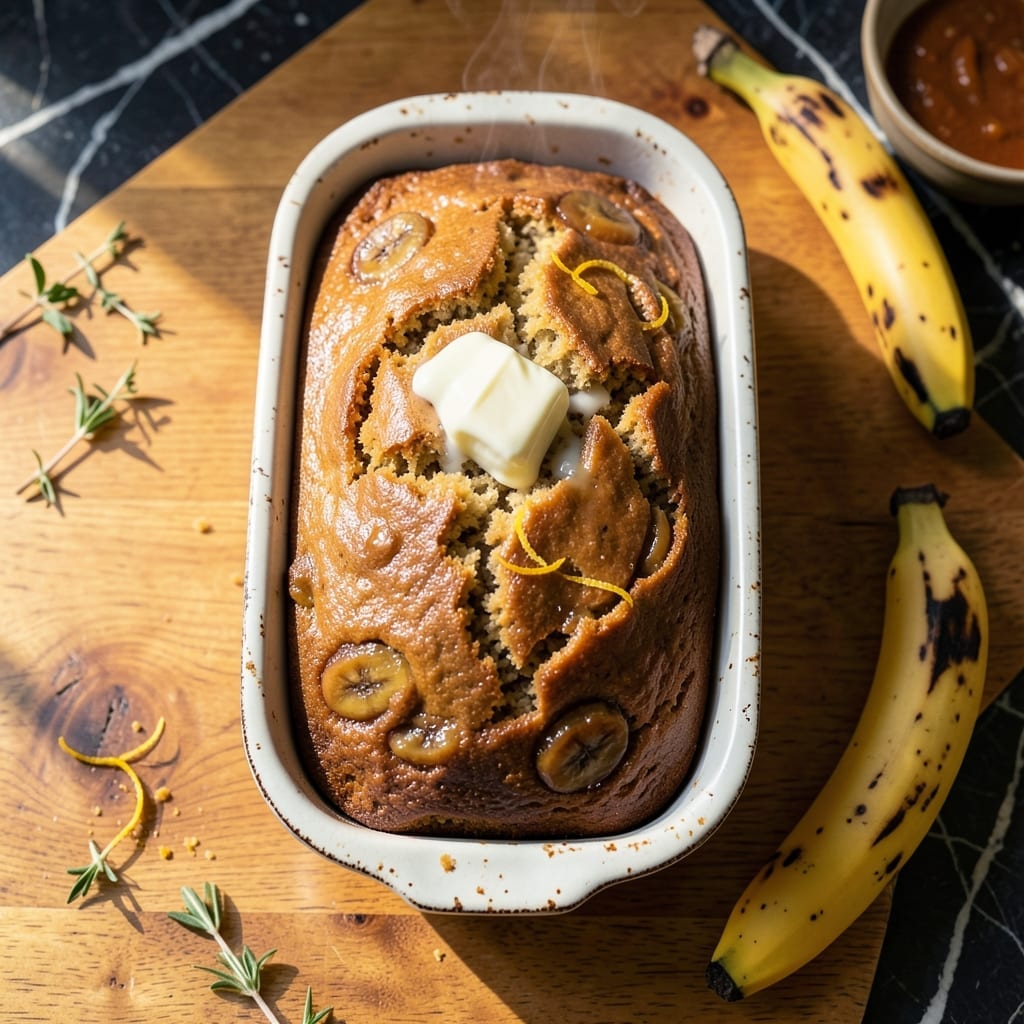
This banana bread delivers a moist, tender crumb using self-rising flour as its secret weapon. The leavening is already built in, eliminating the need for yeast or additional baking powder.
With just a few simple ingredients and one bowl, you’ll have a golden loaf ready in under an hour. The result is perfectly balanced—sweet, soft, and impossible to resist.
Ingredients for Banana Bread Recipe with Self Rising Flour
Pantry staples plus a few fresh items deliver that signature moist, tender crumb with zero yeast.
| Ingredient | Amount | Notes |
|---|---|---|
| Ripe Bananas 🍌 | 3 whole | Very ripe, heavily speckled |
| Self-Rising Flour 🌾 | 2 cups | Sifted for even texture |
| Granulated Sugar 💧 | ¾ cup | Fine granulated preferred |
| Unsalted Butter 🧈 | ½ cup | Melted and cooled slightly |
| Large Eggs 🥚 | 2 whole | Room temperature for best incorporation |
| Vanilla Extract 🌿 | 1 tsp | Pure extract, not imitation |
| Ground Cinnamon 🌶️ | 1 tsp | Optional but recommended |
| Salt 🧂 | ½ tsp | Fine sea salt preferred |
| Chopped Walnuts 🌰 | ½ cup | Toasted for extra flavor |
| Milk 🥛 | ¼ cup | Whole milk for richness |
[recipe_ingredient_scaler]
The bananas are non-negotiable here—only the spottiest, black-speckled ones will give you that deep sweetness and moisture. Self-rising flour is the star; White Lily or Softasilk brands work beautifully. For butter, Plugra or Kerrygold are top-tier, but any unsalted will do. The walnuts? Toast them first (350°F for 8-10 minutes) to wake up their flavor before chopping.
No self-rising flour? All-purpose flour plus 1.5 tsp baking powder and 0.5 tsp salt per cup gets you close. Out of walnuts? Pecans or almonds work just as well. Need it dairy-free? Swap butter for coconut oil and milk for oat or almond milk. The cinnamon is flexible—skip it or double it based on your spice tolerance.
Store the loaf wrapped tightly at room temperature for 2-3 days, or freeze slices for up to 3 months. Bananas freeze perfectly for future batches—peel first, then bag. Always bring eggs and butter to room temp before starting for even mixing.
Why You’ll Love This Recipe
- No Fuss Mixing: I just dump the ripe bananas, self-rising flour, sugar, butter, and eggs in a bowl—no measuring baking powder or salt separately.
- Sweet Nostalgia: That warm, buttery banana flavor with a tender crumb takes me right back to my grandma’s kitchen.
- Breakfast to Dessert: I slice it for breakfast, pack it in lunches, or serve it warm with ice cream for dessert.
- Budget Stretcher: Honestly, it’s my way to use up overripe bananas and pantry staples without a special grocery trip.
Step-by-Step Instructions for Banana Bread With Self Rising Flour
This method ensures a perfectly moist loaf with a tender crumb every time.
Step 1: Prepare the Wet Ingredients
In a large mixing bowl, mash the 3 whole Ripe Bananas until nearly smooth with just a few small lumps remaining. I use a potato masher for this—it gives you better control than a fork. The bananas should be heavily speckled or even blackened for maximum sweetness and moisture.
Add the 0.5 cup Unsalted Butter (melted and cooled slightly), 0.75 cup Granulated Sugar, 2 whole Large Eggs, 1 tsp Vanilla Extract, and 0.25 cup Milk. Whisk vigorously until fully combined and the mixture looks uniform. The butter should be warm but not hot to prevent cooking the eggs.
Step 2: Combine Dry Ingredients
In a separate medium bowl, whisk together the 2 cups Self-Rising Flour, 1 tsp Ground Cinnamon, and 0.5 tsp Salt. Sifting the flour first, as noted in the ingredients, ensures an even texture without dense pockets in your finished loaf.
The self-rising flour already contains baking powder and salt, but I add a pinch more salt to enhance the banana flavor. The cinnamon adds warmth that complements the natural sweetness of the fruit. Make sure these dry ingredients are thoroughly mixed before combining with the wet.
Step 3: Fold in Dry Ingredients and Nuts
Gradually add the dry mixture to the wet ingredients, folding gently with a silicone spatula just until the flour is mostly incorporated. Overmixing at this stage develops gluten, which would make your bread dense rather than tender.
Fold in the 0.5 cup Chopped Walnuts (toasted if you prefer extra depth of flavor) until just combined. You’ll notice the batter is thick but pourable. If it seems too stiff, the moisture from the bananas will hydrate the flour as it rests.
Step 4: Bake to Golden Perfection
Pour the batter into a greased 9×5-inch loaf pan and smooth the top with your spatula. Preheat your oven to 350°F and bake for 50-60 minutes, or until a toothpick inserted into the center comes out clean or with a few moist crumbs.
Check at the 50-minute mark—if the top is browning too quickly, tent loosely with aluminum foil. The loaf is done when it pulls slightly away from the sides of the pan and springs back when lightly pressed in the center.
Step 5: Cool and Serve
Remove the pan from the oven and let the bread cool in the pan for 10 minutes. This brief rest allows the structure to set, making it easier to remove without breaking. Then transfer to a wire rack to cool completely.
For the best texture and flavor, wait at least 1 hour before slicing. This patience ensures the loaf holds its shape and the moisture distributes evenly. Serve warm or at room temperature, with or without a spread of butter. The bread will stay moist for 2-3 days when stored in an airtight container at room temperature.
Pro Tips For Making Banana Bread Recipe With Self Rising Flour
- Mash Bananas Thoroughly: I learned this the hard way—lumpy banana bread has a weird texture. Use a fork or potato masher to break them down completely before mixing.
- Skip Overmixing: After burning three batches, I finally figured out that stirring just until the flour disappears keeps the bread tender instead of tough.
- Room Temp Ingredients: My grandmother swore by this, and she was right: eggs and butter at room temp blend smoother into the batter, preventing dense spots.
- Test with a Toothpick: Sounds weird, but it works: pull it out at 55 minutes—if it comes out clean, it’s done, even if the top looks pale.
Health Benefits of This Recipe
Energy Boost
Bananas pack natural sugars and fiber that provide sustained energy, making this bread a great breakfast or snack. The 3 ripe bananas in the recipe deliver potassium, which helps maintain healthy blood pressure levels. I notice my energy stays steady for hours after eating a slice. 💪
Digestive Health
The fiber from bananas and whole ingredients aids digestion and promotes gut health. One slice contains about 2-3 grams of fiber, contributing to your daily needs. This helps keep things moving smoothly in your digestive tract.
Heart Healthy
Walnuts add omega-3 fatty acids and antioxidants that support heart health. The ½ cup chopped walnuts in the recipe provide healthy fats that may help lower bad cholesterol levels. I always toast mine for extra flavor and crunch.
Mood Enhancer
Bananas contain vitamin B6 and tryptophan, which help regulate mood and sleep patterns. The natural sweetness also triggers serotonin release, giving you that happy, satisfied feeling. A slice with tea is my go-to afternoon pick-me-up. ✨
Nutrient Dense
This bread offers vitamin C, magnesium, and iron from its simple ingredients. The eggs add high-quality protein and choline for brain health. It’s a delicious way to get essential nutrients without complicated ingredients.
Quick Energy
The natural carbohydrates in bananas provide quick energy, perfect before a workout or busy day. I love that this recipe uses pantry staples to create something both nourishing and indulgent-feeling.
Nutrition Facts
Frequently Asked Questions
Can I use overripe bananas?
The spottier and blacker the bananas, the better. They provide natural sweetness and moisture to your loaf.
What if I don’t have self-rising flour?
Substitute with 2 cups all-purpose flour plus 1.5 tsp baking powder and 0.5 tsp salt. Mix these dry ingredients thoroughly before using.
How do I prevent a dense loaf?
Fold dry ingredients into wet just until combined—overmixing develops gluten. Also, ensure your oven is fully preheated to 350°F before baking.
Can I add chocolate chips?
Yes! Fold in 1 cup chocolate chips with the walnuts for extra richness. For best results, use semi-sweet chips to balance the sweetness.

Trained in classic French technique but raised on slow-cooked ribs and spicy rubs, she blends culinary skill with smoke and soul.
- Recipe for Boneless Pork Chops in Cast Iron Skillet: Sear and Baste to Juicy Perfection - October 3, 2026
- Recipe for Boneless Cross Rib Roast: Slow-Roasted Beef with Herb Crust - October 3, 2026
- Hamburgers in Sauce Recipe Crock Pot: Slow-Cooked Savory Delight - October 3, 2026