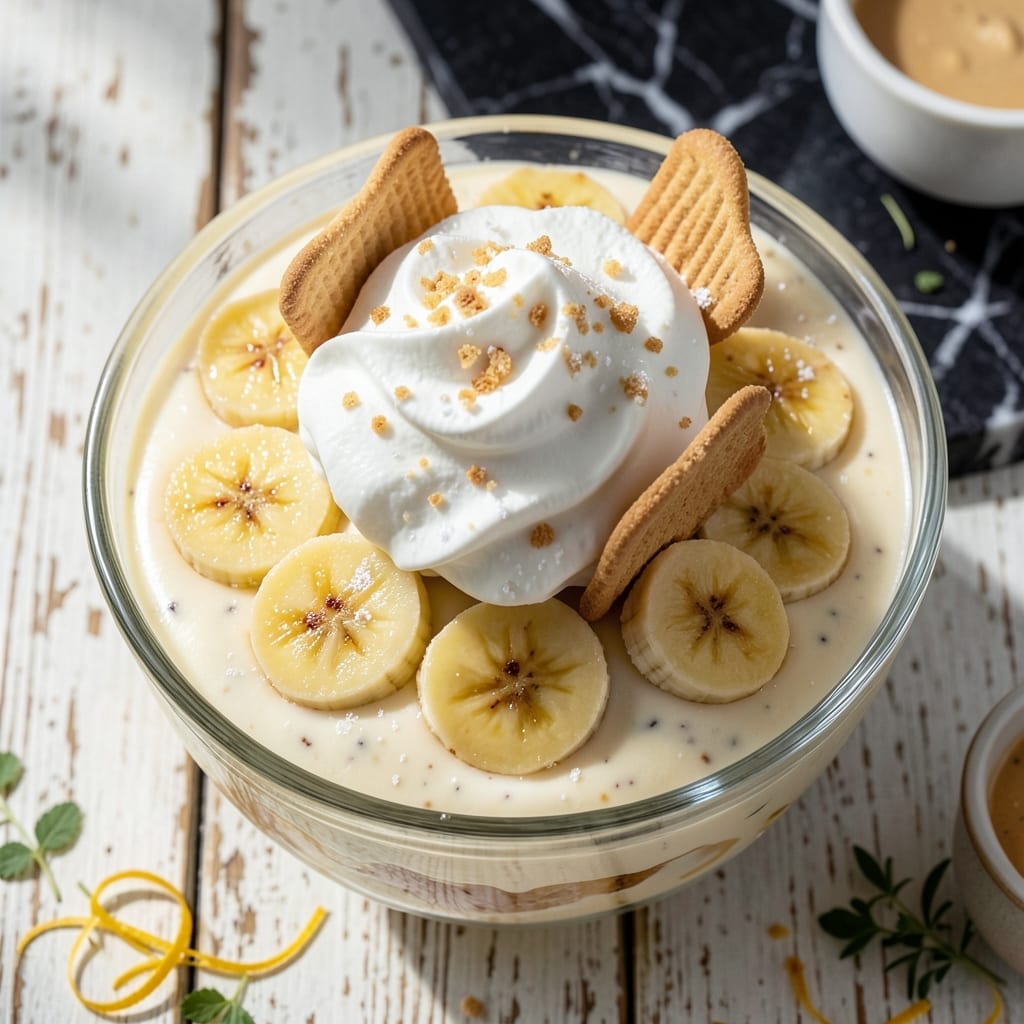
This no-bake dessert delivers restaurant-quality results with minimal effort. Instant pudding creates a creamy base that sets perfectly between vanilla wafers and fresh banana slices.
Each layer builds on the last, creating a balanced texture that’s both smooth and satisfying. Chill for 4 hours to let flavors meld.
Ingredients for Banana Pudding Recipe with Instant Pudding
Restaurant-quality layers start with these pantry staples and fresh fruit. Nothing complicated here.
| Ingredient | Amount | Notes |
|---|---|---|
| Instant Vanilla Pudding Mix 🥣 | 1 package | 3.4 oz size standard |
| Whole Milk 🥛 | 2 cups | Cold for proper setting |
| Vanilla Wafers 🍪 | 12 oz | About 36 wafers total |
| Ripe Bananas 🍌 | 4 whole | Firm but speckled |
| Heavy Whipping Cream 🥛 | 1 cup | For topping layer |
| Granulated Sugar 🧂 | 2 tbsp | For whipped cream |
| Vanilla Extract 💧 | 1 tsp | Pure for best flavor |
| Unsalted Butter 🧈 | 2 tbsp | Melted for wafer layers |
| Sweetened Condensed Milk 🥛 | 1 can | 14 oz standard size |
| Sour Cream 🥛 | ½ cup | Full-fat for creaminess |
[recipe_ingredient_scaler]
The instant pudding is the foundation—Jell-O brand sets reliably and has consistent flavor. For the milk, whole is essential (2% won’t create the right texture). Vanilla wafers should be Nilla brand if possible; their uniform size makes layering foolproof. Bananas need to be ripe but firm enough to slice cleanly (overripe ones turn mushy). Pick up everything at any standard grocery store.
No instant pudding? Make vanilla pudding from scratch and cool completely before layering. Want to skip the whipped cream? Cool Whip works in a pinch (thaw first). For a lighter version, Greek yogurt can replace sour cream at a 1:1 ratio. The condensed milk is non-negotiable though—it’s what gives the pudding its signature richness and sweetness.
Assemble in a glass dish so you can admire the layers. Covers and refrigerates for up to 3 days—though it’s best within 24 hours when the wafers are still crisp. Banana slices may brown slightly, but they’ll still taste fresh. Don’t freeze; the texture suffers.
Why You’ll Love This Recipe
- 5-Minute Magic: No cooking, no baking—just mix the instant pudding with cold milk, layer with bananas and wafers, and it’s done.
- Layered Heaven: That first bite of creamy vanilla, soft bananas, and crunchy vanilla wafers? Pure comfort in a bowl.
- Potluck Hero: I bring this to gatherings and always come home with an empty dish. Even picky eaters go back for seconds.
Step-by-Step Instructions for Banana Pudding With Instant Pudding
This no-bake method delivers perfect layers with minimal effort and maximum flavor.
Step 1: Prepare the Pudding Base
In a large mixing bowl, whisk together the 1 package Instant Vanilla Pudding Mix and 2 cups Whole Milk for 2 minutes until the mixture thickens and becomes smooth. The pudding should hold its shape when tested with a spoon.
Fold in the 1 can Sweetened Condensed Milk and 0.5 cup Sour Cream until fully incorporated. This combination creates a creamy, rich base that balances sweetness with a subtle tang. Let it sit for 5 minutes to set slightly while you prepare the remaining components.
Step 2: Layer the Vanilla Wafers and Bananas
Melt the 2 tbsp Unsalted Butter and lightly brush it over the bottom of a 9×13-inch baking dish. This prevents sticking and adds a subtle richness to the base layer.
Arrange a single layer of 12 oz Vanilla Wafers across the bottom, breaking a few to fit if necessary. Slice the 4 whole Ripe Bananas into ¼-inch thick rounds and layer them evenly over the wafers. Repeat with another layer of wafers, pressing down gently to create a stable foundation.
Step 3: Add the Pudding Mixture
Pour the prepared pudding mixture evenly over the layered wafers and bananas. Use a spatula to spread it into an even layer, ensuring it reaches all corners of the dish. The pudding will begin to set as it rests, bonding the layers together.
Smooth the top with the spatula, creating a flat surface for the next layer. This step ensures every bite has a balanced ratio of pudding, bananas, and wafers.
Step 4: Whip the Cream and Finish the Layers
In a chilled bowl, whip the 1 cup Heavy Whipping Cream with the 2 tbsp Granulated Sugar and 1 tsp Vanilla Extract to stiff peaks. This topping adds a light, airy contrast to the rich pudding and soft bananas.
Spread the whipped cream evenly over the pudding layer. For a polished look, pipe the cream using a star tip. Add a final layer of vanilla wafers, either whole or crushed, for texture and visual appeal. Chill for at least 4 hours or overnight to allow the flavors to meld and the pudding to set completely.
Pro Tips For Making Banana Pudding Recipe With Instant Pudding
- Chill the Pudding: After mixing the instant pudding with milk, refrigerate it for at least 15 minutes—I learned this the hard way when my first batch was runny and refused to set properly.
- Slice Bananas Last: Wait to slice the bananas until right before assembling, or they’ll turn brown and mushy; a quick toss in a little lemon juice can buy you extra time if needed.
- Skip the Cold Milk: Use room temperature milk when whisking the pudding mix—cold straight from the fridge makes it harder to dissolve completely and leaves lumps.
- Whip Cream Separately: Fold the whipped cream in after the pudding has thickened, rather than mixing it all at once; this keeps it light and fluffy instead of dense and flat.
Dietary Considerations for This banana pudding recipe with instant pudding
Gluten-Free Option
Swap Nilla Vanilla Wafers for Mi-Del gluten-free vanilla wafers. They hold up just as well against the pudding layers. I’ve tested this with Schar’s gluten-free cookies too, which work in a pinch.
Dairy-Free Version
Use coconut milk instead of whole milk and So Delicious coconut-based instant pudding mix. Replace whipped cream with coconut cream, whipped with 2 tbsp maple syrup for sweetness.
Lower Sugar Alternative
Cut the sugar by using 1 tbsp monk fruit sweetener in the whipped cream. Opt for sugar-free instant pudding mix and reduce condensed milk by half. The bananas add natural sweetness.
This version still satisfies my sweet tooth without the sugar crash. 💪
Vegan Adaptation
Use almond milk and vegan instant pudding mix. Replace whipped cream with aquafaba (chickpea brine) whipped with 2 tbsp sugar. Use vegan butter for brushing the dish.
Nut Allergy Note
Ensure all ingredients, especially wafers and pudding mix, are processed in nut-free facilities. Enjoy Life Foods makes allergy-safe vanilla wafers. Always double-check labels to avoid cross-contamination.
Nutrition Facts
Frequently Asked Questions
Can I use a different pudding flavor?
Yes, vanilla is classic but cheesecake or butterscotch instant pudding work beautifully. Each adds a unique twist while keeping the no-bake simplicity.
How do I prevent banana browning?
Toss banana slices in 1 tsp lemon juice before layering. The acid slows oxidation without altering the flavor. Keep layers tight to minimize air exposure.
Can I make this ahead?
Assemble up to 1 day in advance. The wafers soften over time but maintain texture. Add whipped cream topping just 2 hours before serving.
Why did my pudding layer separate?
This happens if the pudding isn’t fully set before layering. Whisk for the full 2 minutes and let it rest for 5 minutes before assembling.

Trained in classic French technique but raised on slow-cooked ribs and spicy rubs, she blends culinary skill with smoke and soul.
- Recipe for Boneless Pork Chops in Cast Iron Skillet: Sear and Baste to Juicy Perfection - October 3, 2026
- Recipe for Boneless Cross Rib Roast: Slow-Roasted Beef with Herb Crust - October 3, 2026
- Hamburgers in Sauce Recipe Crock Pot: Slow-Cooked Savory Delight - October 3, 2026